Installing Ant Media Server on Google Kubernetes Engine (GKE)
In this post, we will guide you through the straightforward process of installing Ant Media Server on Google Kubernetes Engine (GKE). We'll explore the deployment method using Helm for seamless setup.
Before diving in, you need to have the Google Cloud CLI , Kubernetes command line tool and Helm installed on your computer.
Step 1: Creating Your GKE Cluster
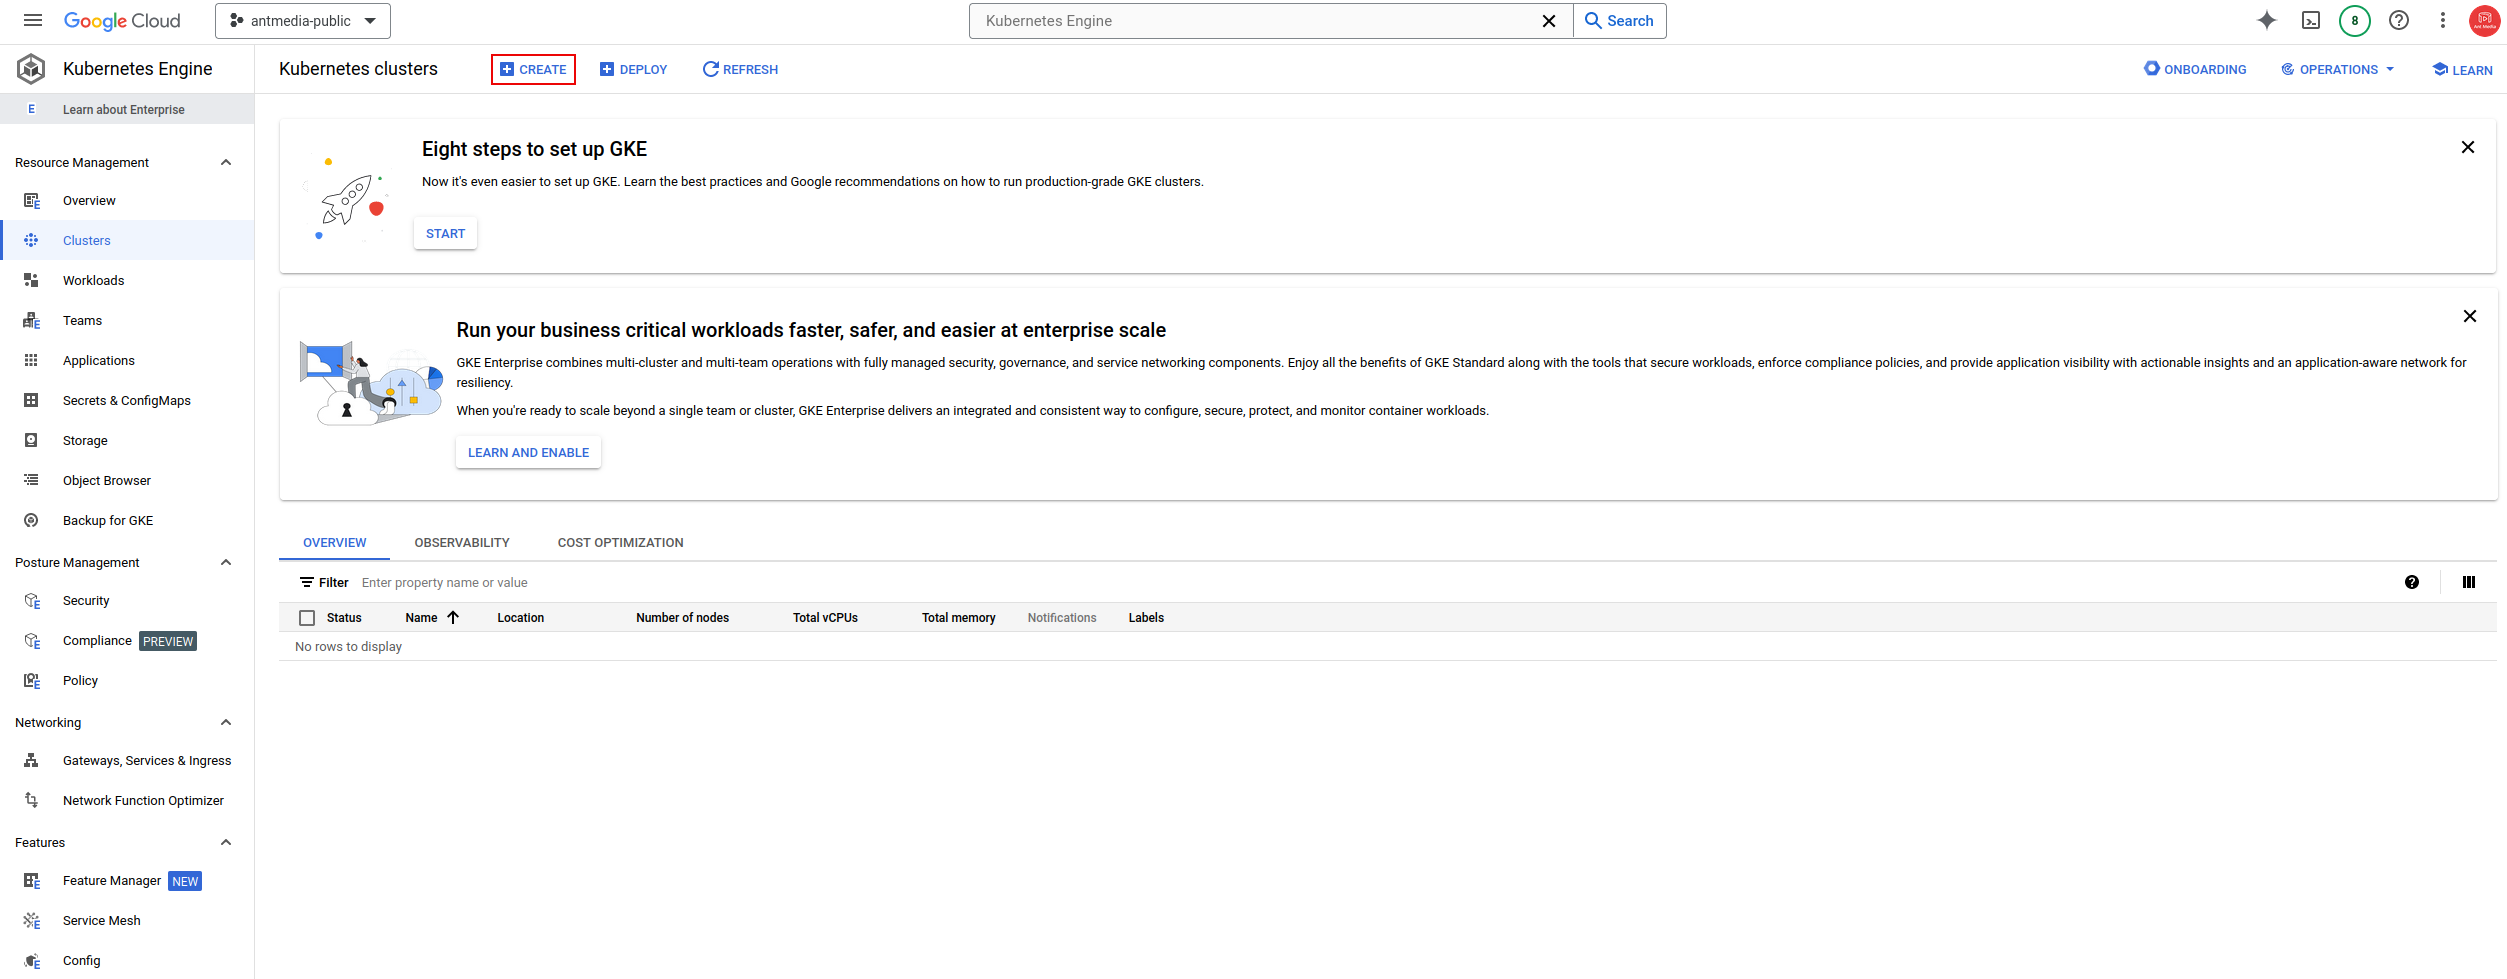
Let's first set up a cluster on GKE. If the Kubernetes Engine service is not active, let's activate it, then open it and click Create button.
Step 2: Cluster Configuration on Kubernetes Engine
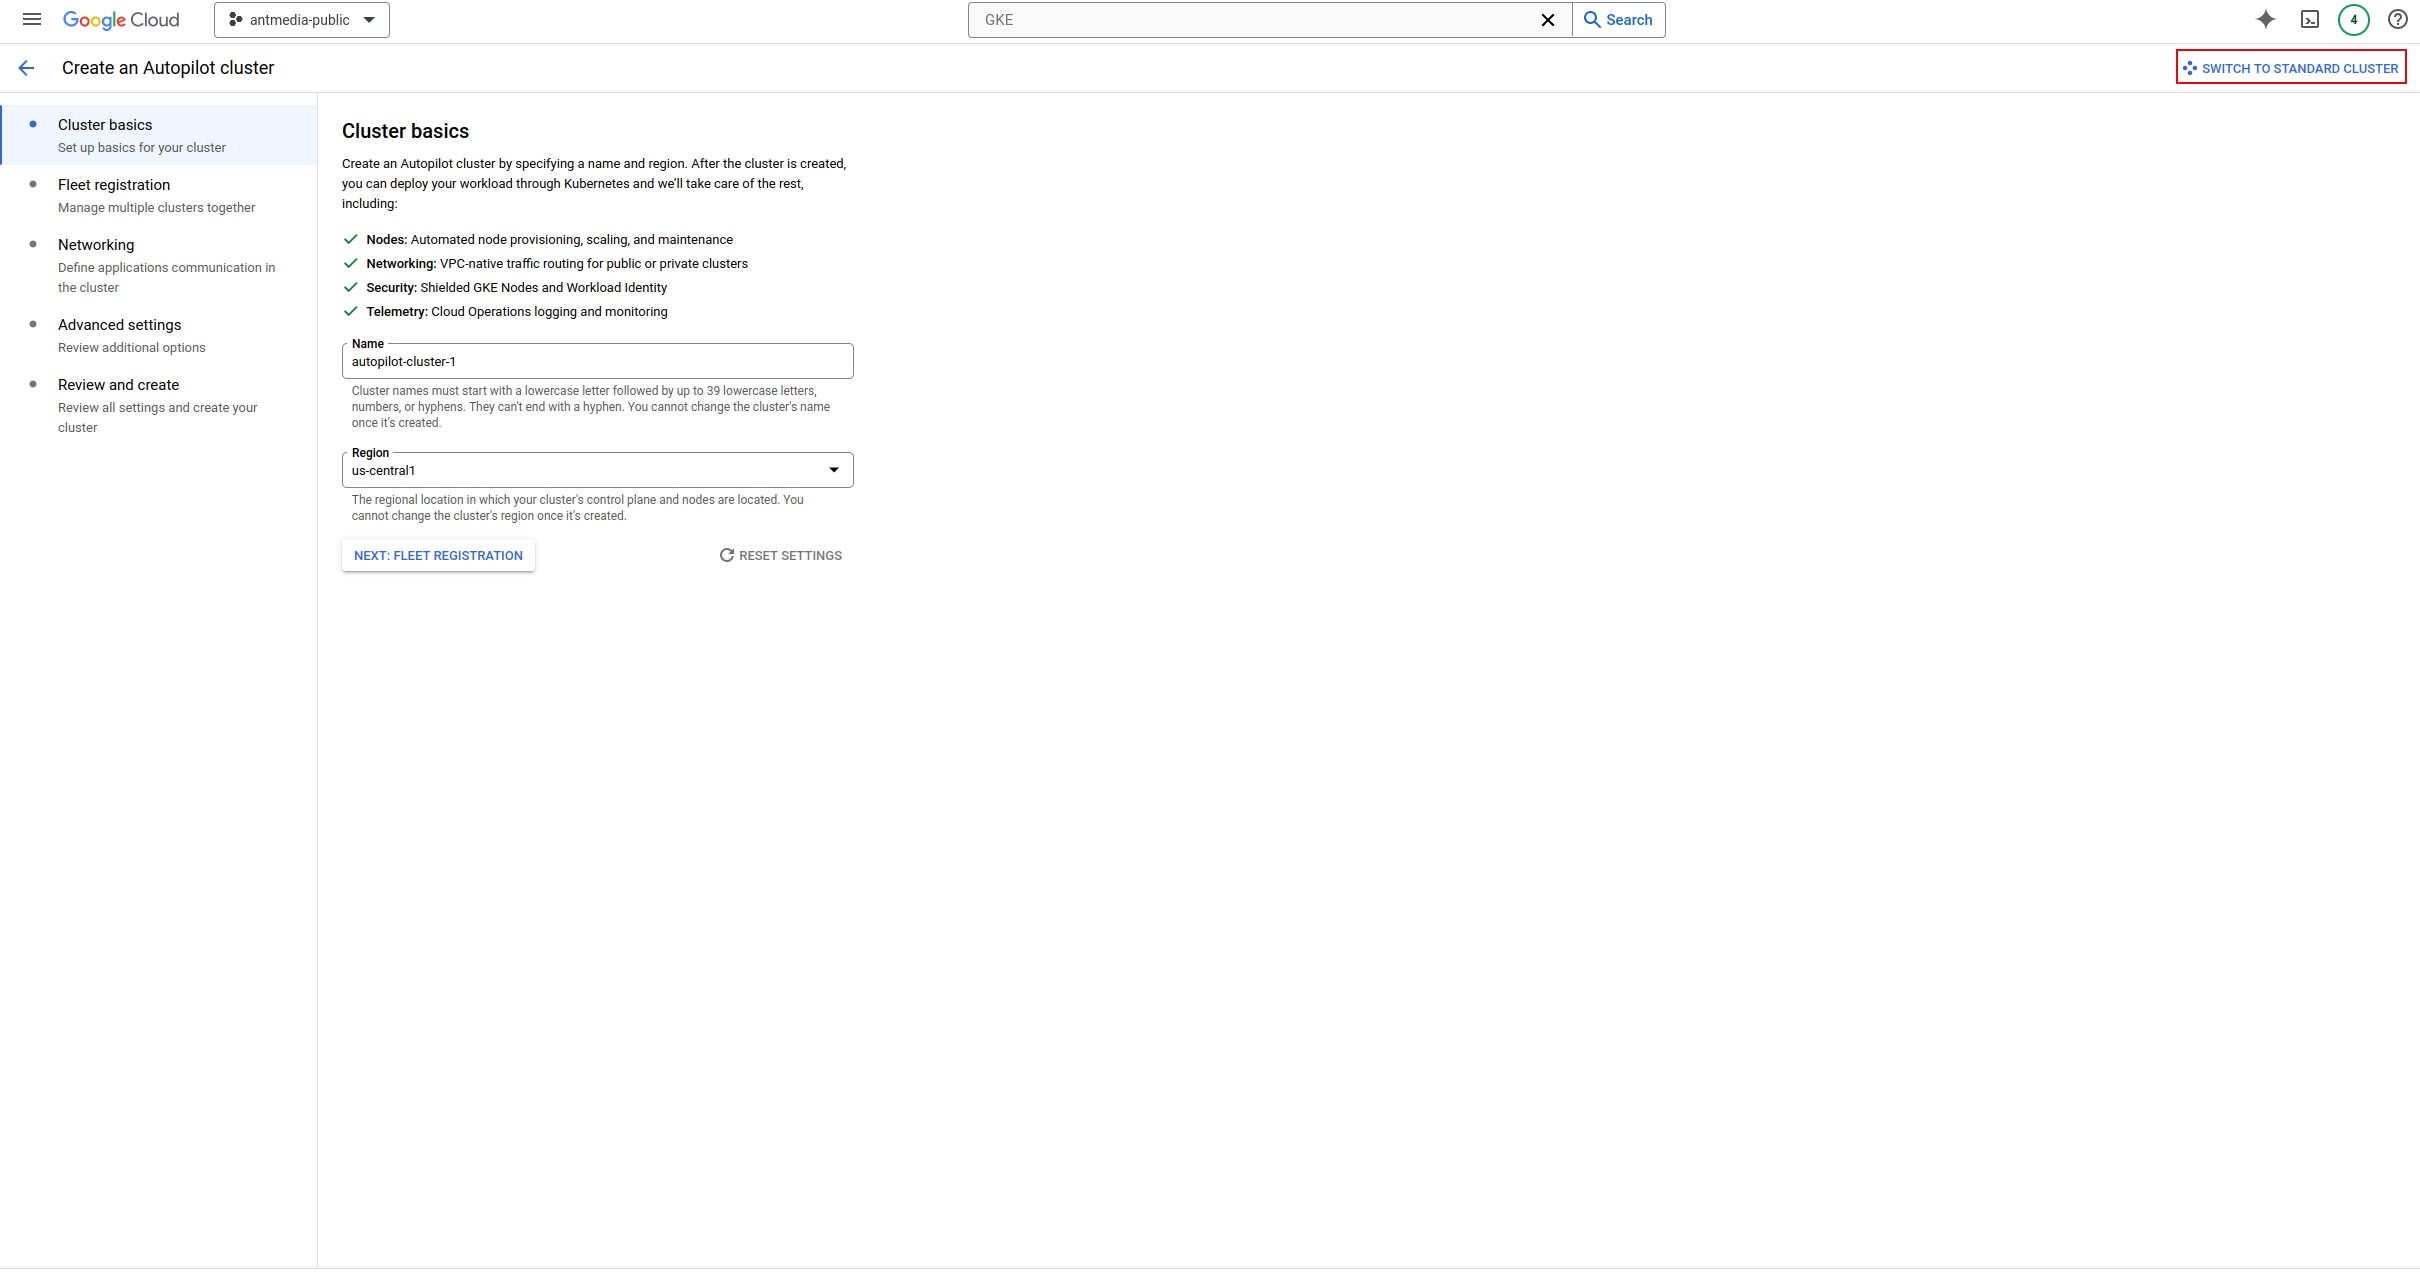
Navigate to the Kubernetes Engine service and select SWITCH TO STANDARD CLUSTER on the top right corner while creating the cluster.
Step 3: Customizing Cluster Settings
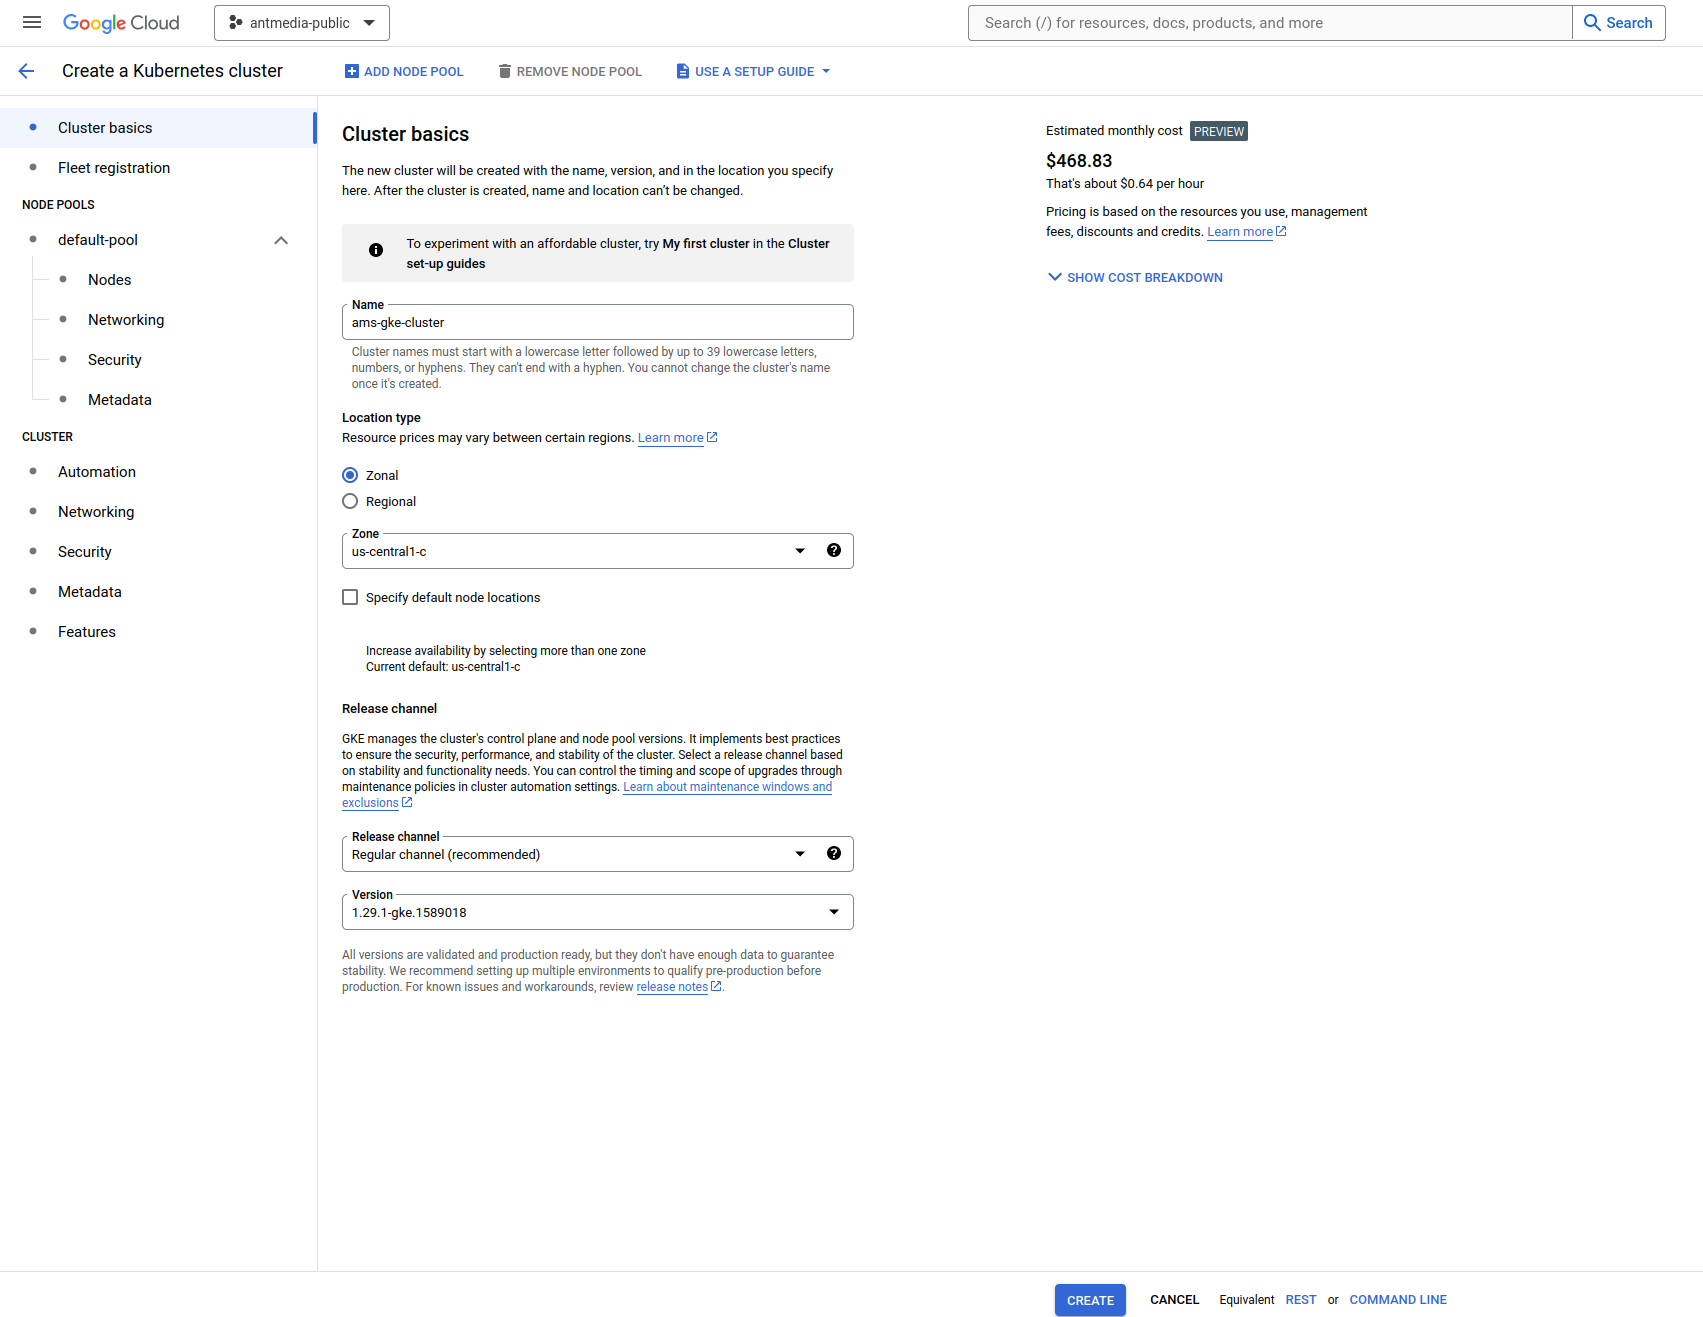
In this menu, select fields such as Zone, Name, and Kubernetes version, and then go to the Nodes tab.
Step 4: Instance Selection and Configuration
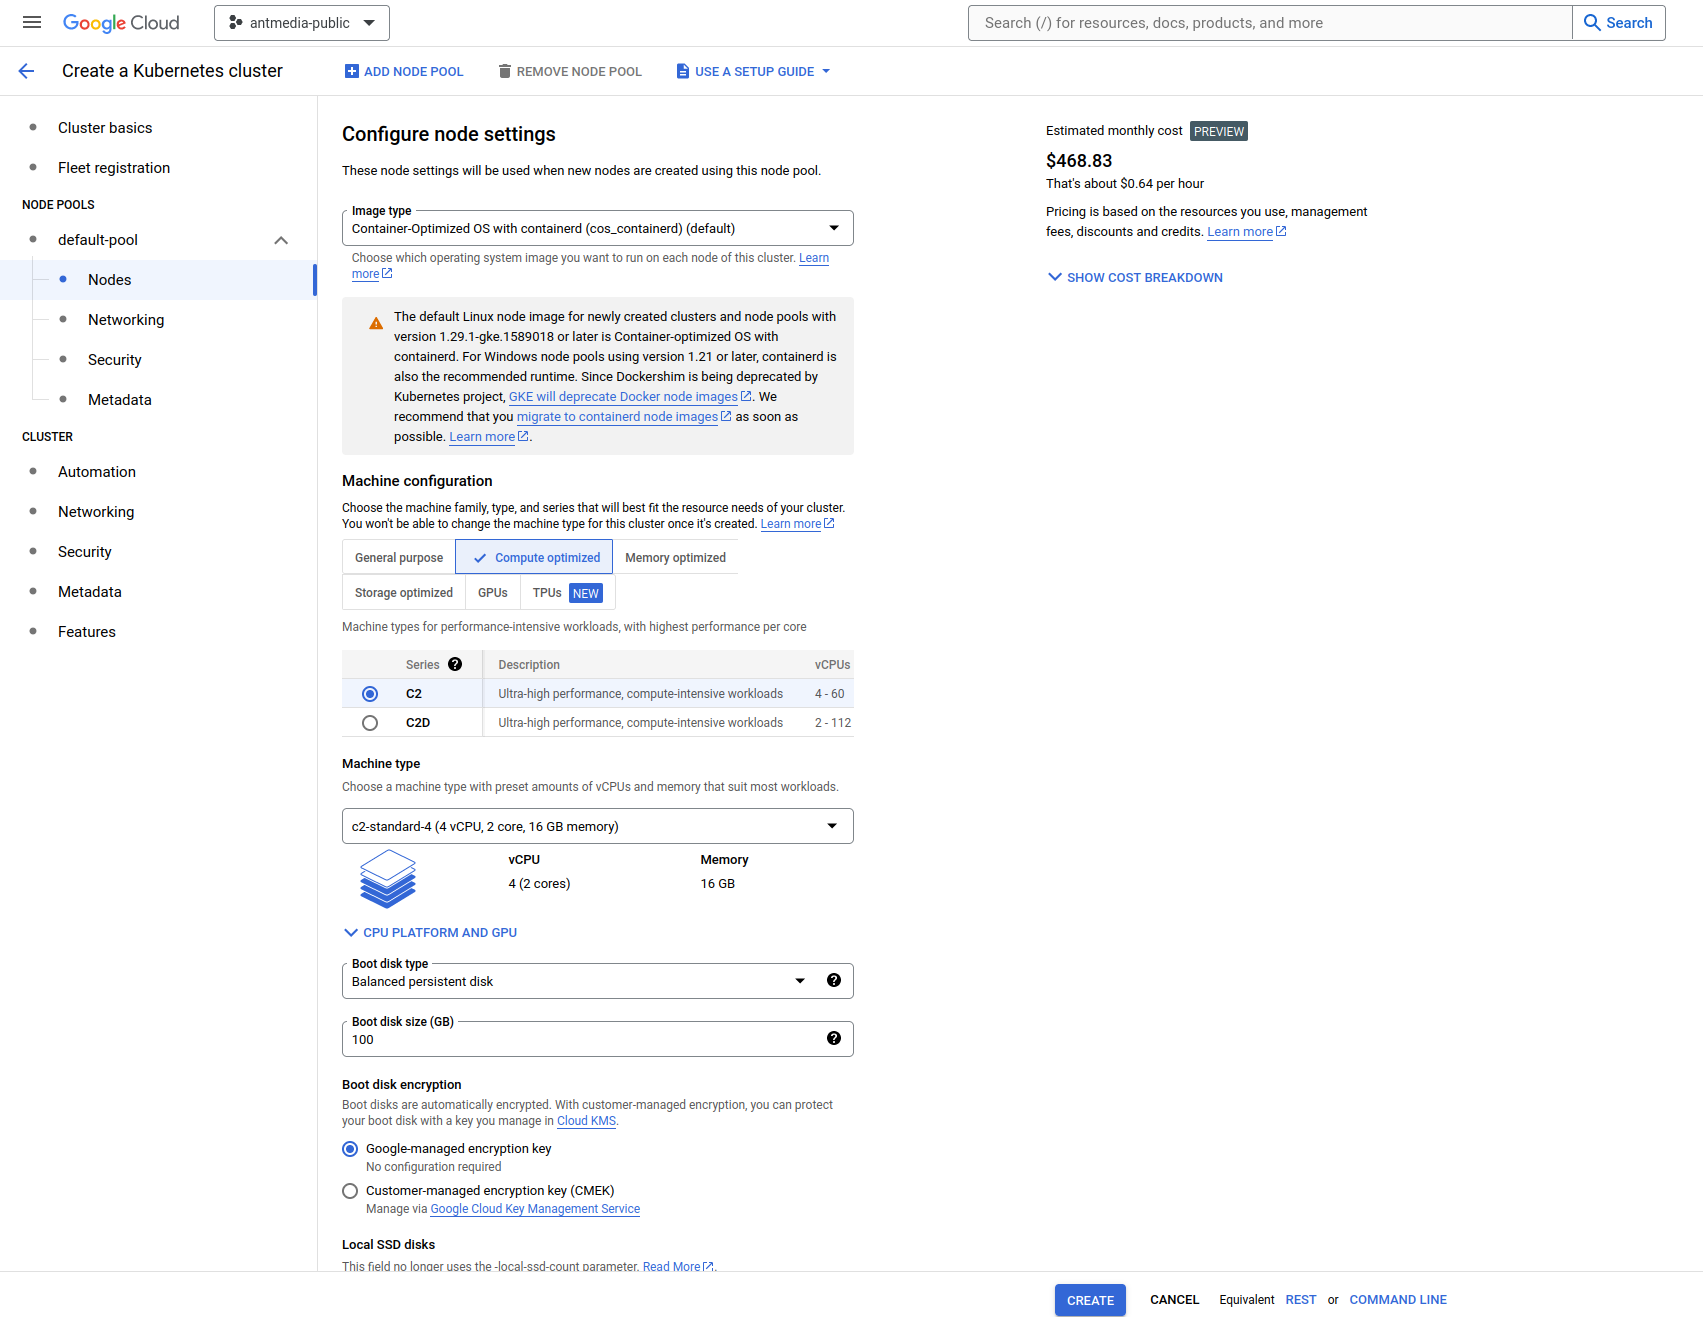
We recommend using a compute-optimized instance. Here we select the c2-standard-4 node type.
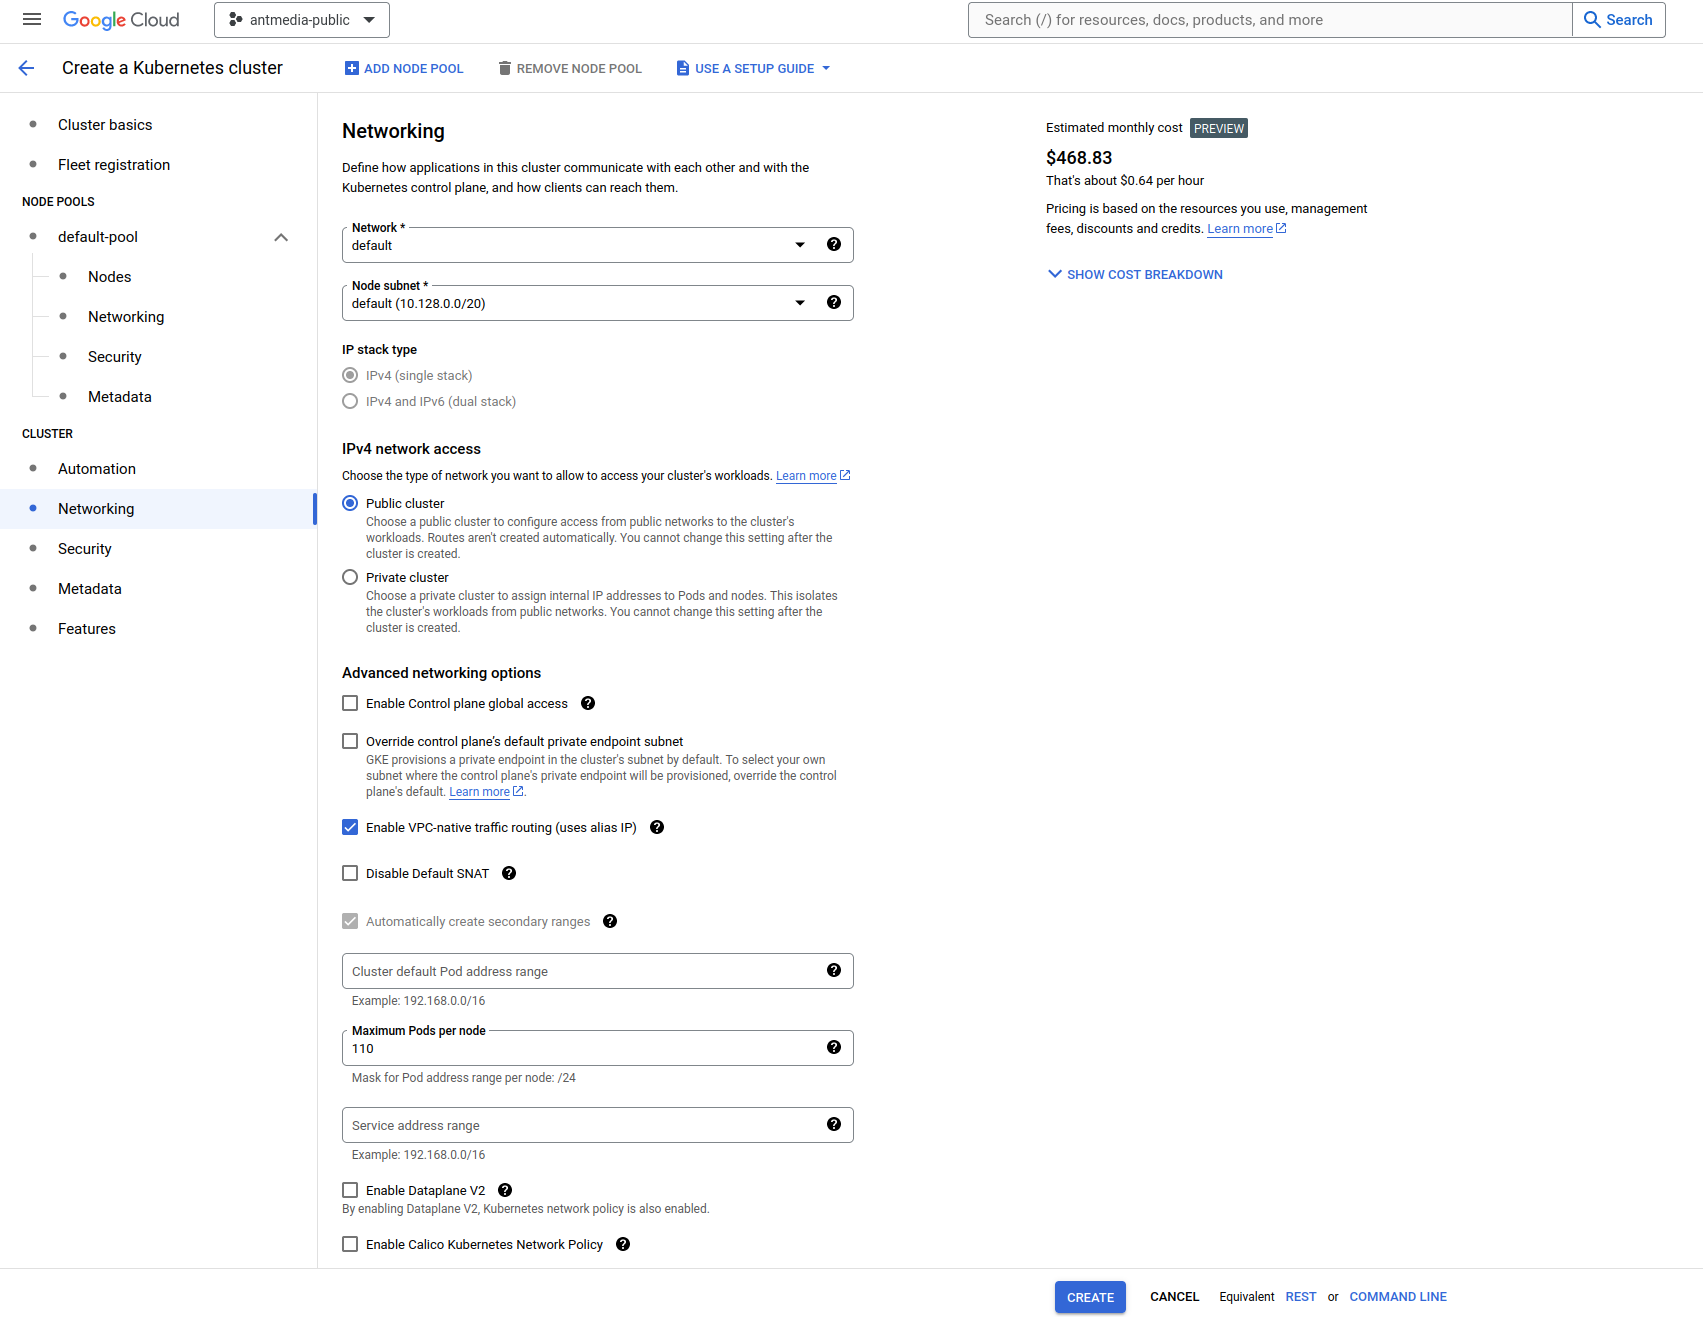
Step 5: Finalizing Cluster Setup
After making sure that Public Cluster is selected in the Networking tab, change the other settings to your requirements and click the Create button to complete the cluster setup.
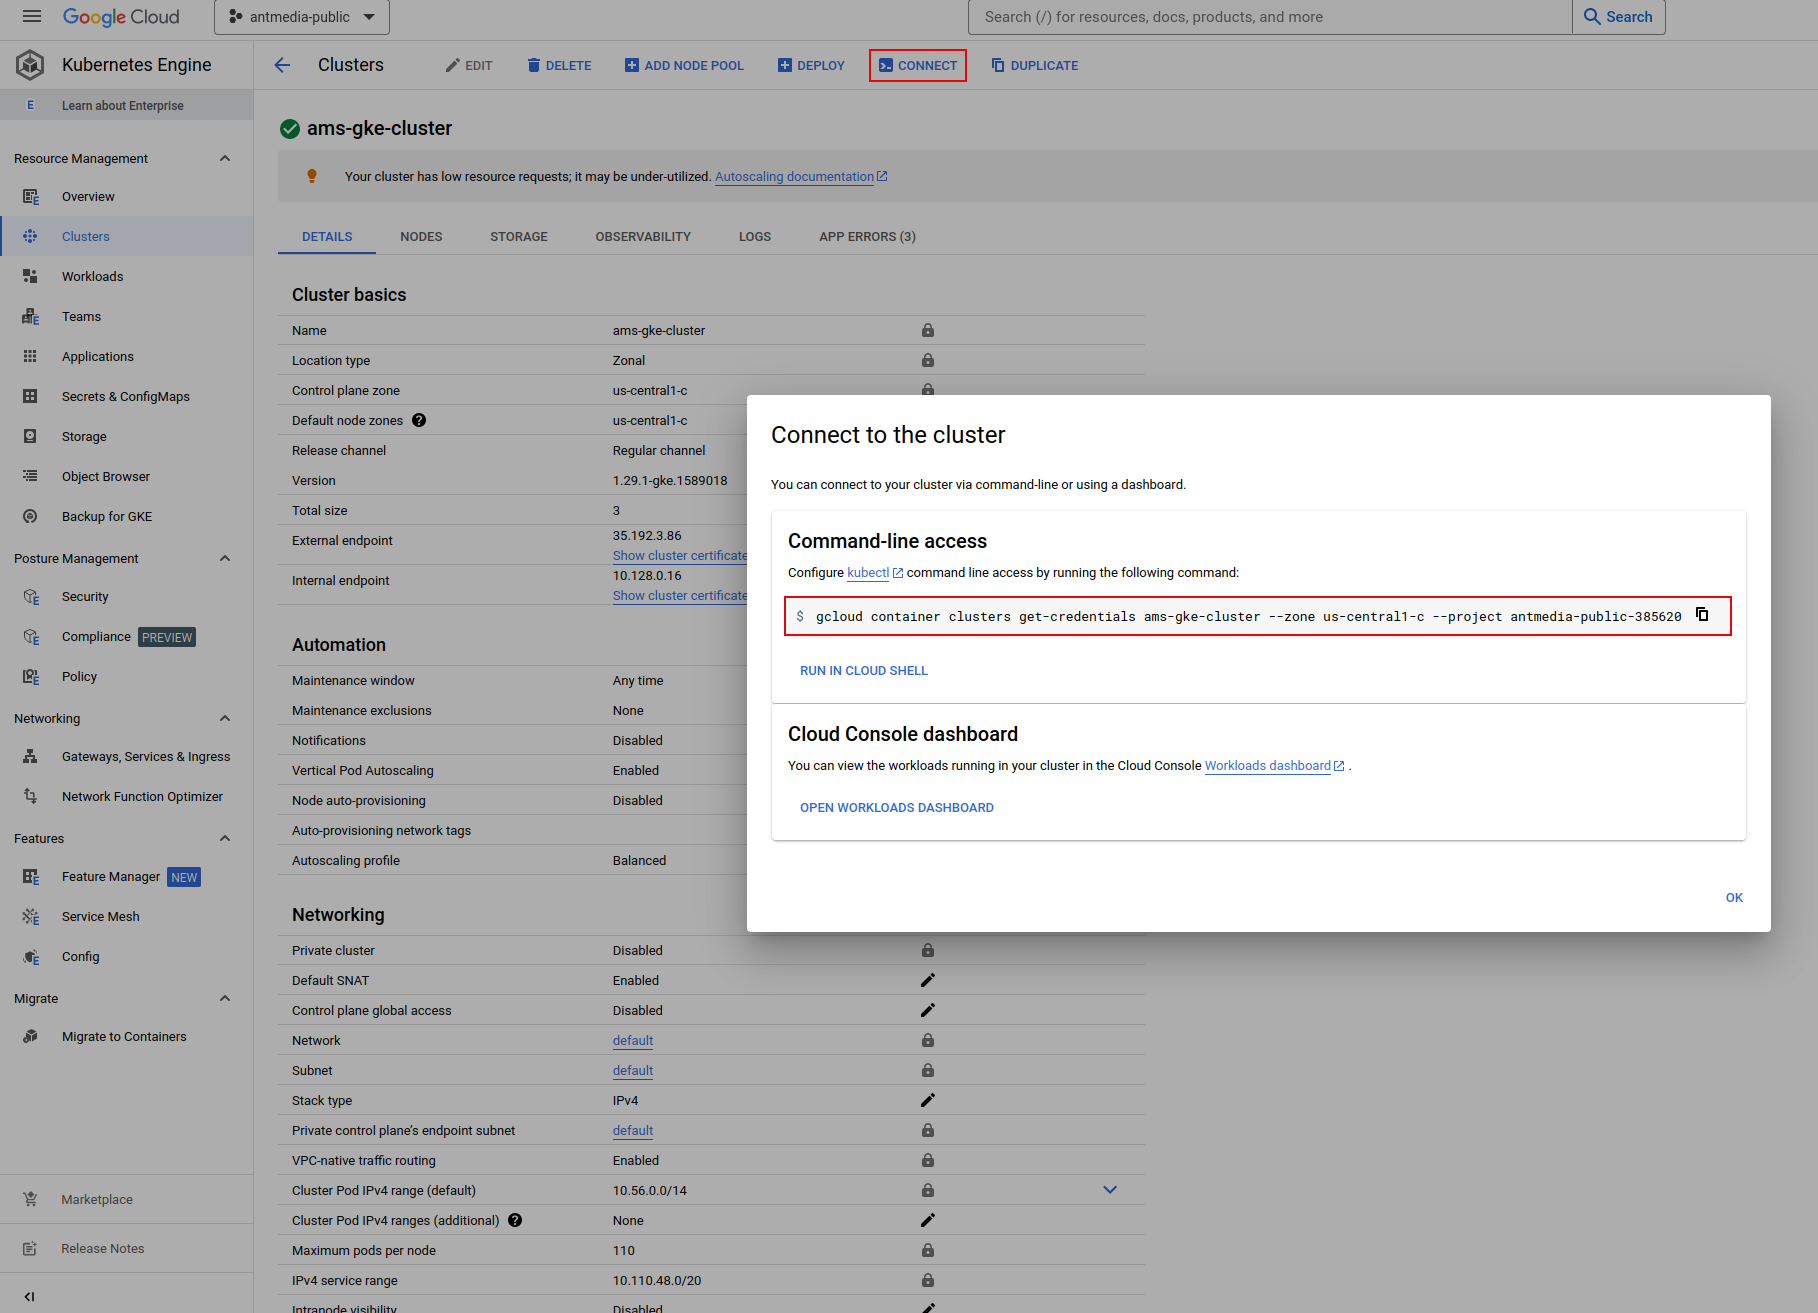
Step 6: Connect to Your Cluster
Now that our cluster is up and running, let's establish a connection using the Google SDK or Google Cloud CLI. Check out this link for detailed instructions.
gcloud container clusters get-credentials ams-gke-cluster --zone us-central1-c --project antmedia-public-385620
Step 7: Install Ant Media Server Cluster using Helm
It's time to deploy Ant Media Server onto our GKE cluster, and we'll do it effortlessly using Helm. If you would like to deploy using yaml files, please visit here for manual deployment.
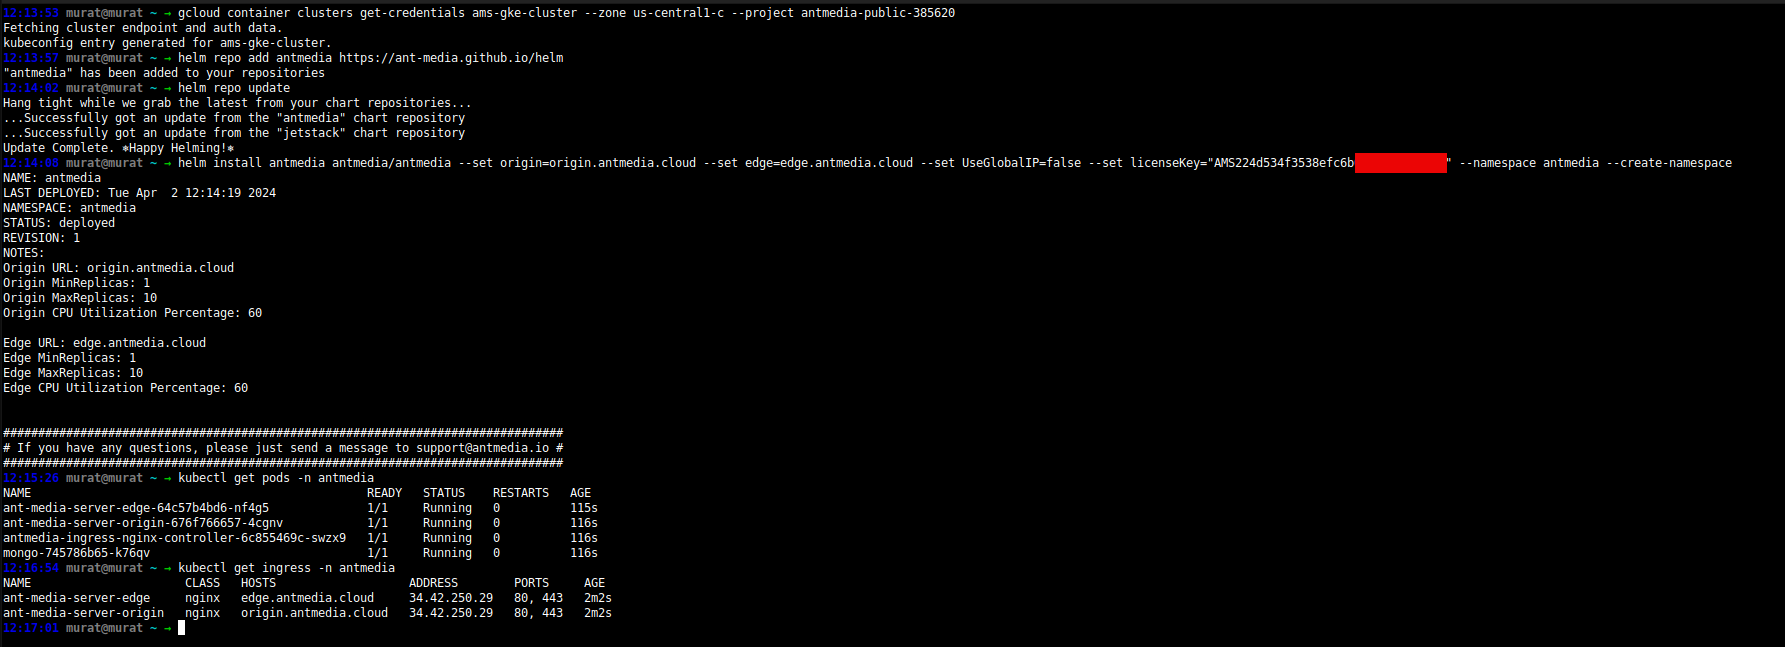
- Add the Ant Media repository to Helm as follows:.
helm repo add antmedia https://ant-media.github.io/helm
helm repo update
-
Run the below command to start the deployment using the helm chart. For other parameters, please visit here.
 helm install antmedia antmedia/antmedia \
 --set origin={origin}.{example.com} \
 --set edge={edge}.{example.com} \
 --set UseGlobalIP=false \
 --set licenseKey="YOUR_LICENSE_KEY" \
 --namespace antmedia \
 --create-namespace
If everything works well, you will see the public IP address/domain name in the kubectl get ingress command’s output.
After that, you need to do the DNS registration to map the Ingress IP address to the Origin and Edge domains. Once the DNS is mapped, you can confirm it via the below commands. You need to replace your domain.
dig origin.antmedia.cloud +noall +answer
dig edge.antmedia.cloud +noall +answer
Step 8: Enable SSL
After the DNS configuration is done, set up SSL according to the steps here.
There are multiple ways to setup the SSL certificate. If you do not have your own certificate to import, you can generate the SSL certificate by Let's Encrypt using the bash script.
Step 9: Access AMS Cluster
Once all steps are done, you will be able to access your AMS cluster on the registered domains.
Congratulations! You've successfully deployed Ant Media Server on GKE. Let's get ready to publish and play!