Quick Start
1. Download the Installation Script
wget https://raw.githubusercontent.com/ant-media/Scripts/master/install_ant-media-server.sh -O install_ant-media-server.sh && sudo chmod 755 install_ant-media-server.sh
2. Install Ant Media Server
Install the Enterprise Edition
sudo ./install_ant-media-server.sh -l 'your-license-key'
Install the Community Edition
sudo ./install_ant-media-server.sh
Install a Specific Version
sudo ./install_ant-media-server.sh -i <ANT_MEDIA_SERVER_ZIP_FILE>
For more installation options check the help: ./install_ant-media-server.sh -h
Checkout: Fast & Easy Installations on Cloud Marketplaces
Video tutorial of AWS marketplace installation
Video tutorial of Azure marketplace installation
3. Configure SSL
-
After installaling the Ant Media Server, login to the web panel and navigate to
SETTINGS > SSL.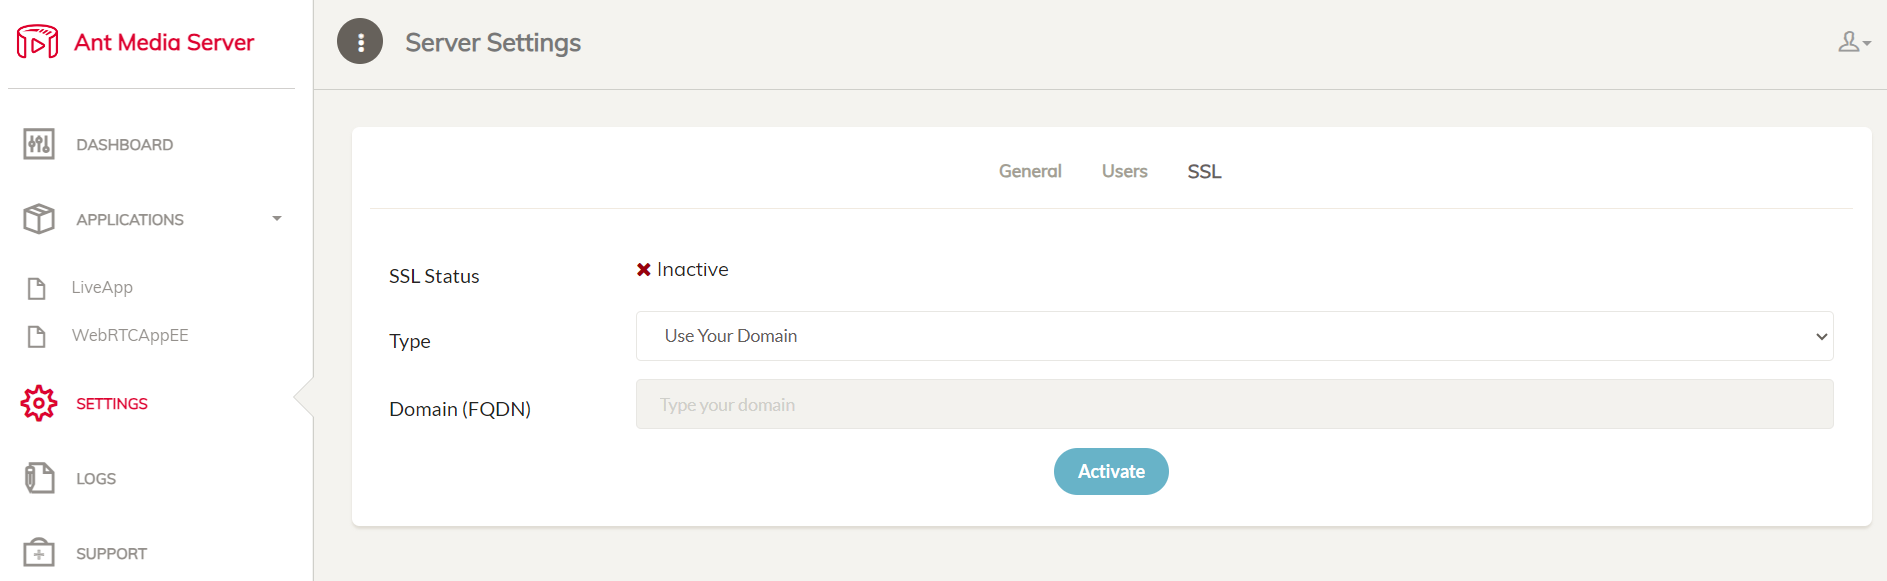
-
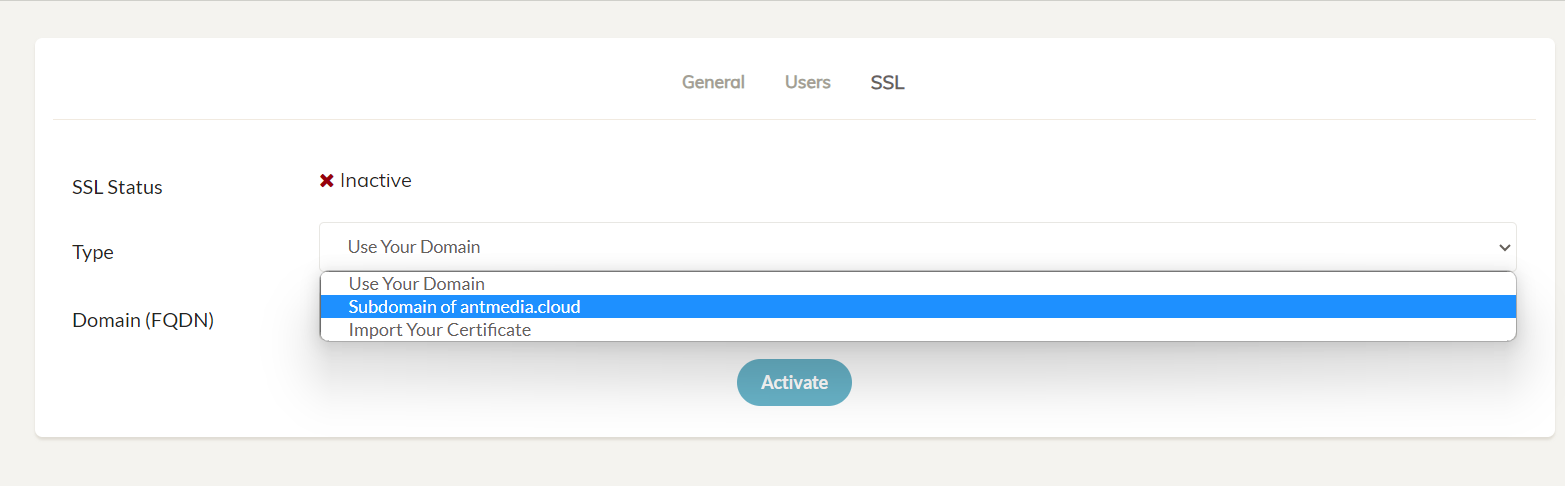
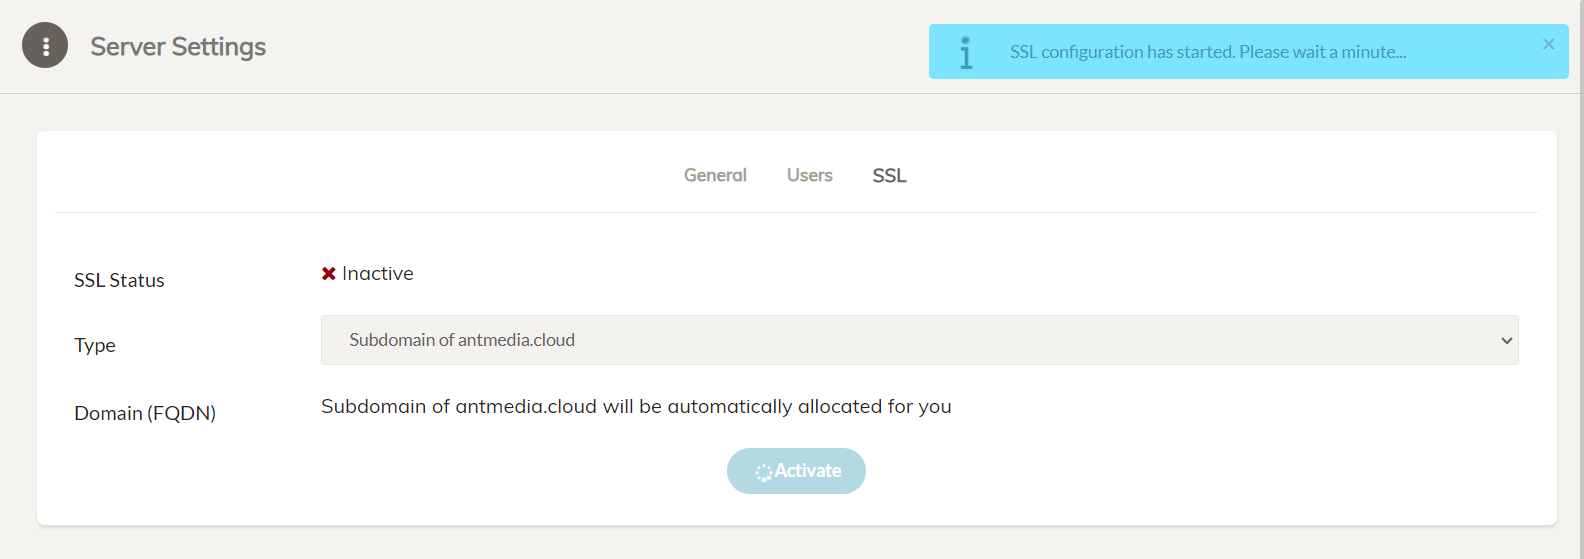
In the drop-down select box named Type, choose among the various options to enable SSL, like using your own domain, free subdomain of antmedia.cloud, or import your own certificate and then click Activate to enable the SSL and restart your server.
-
This will start to enable SSL for your Ant Media Server.
-
The Ant Media Server instance will restart and the server can now be accessed securely with SSL enabled.

-
Check this to learn how to enable SSL via the terminal.
4. Log in to the Web Panel
Navigate to https://ant-media-server:5443 and create the first user account.
5. Publish and Play WebRTC Live Streams
Publish a Live Stream
Publish a WebRTC live stream from the sample webrtc publish page, which is available at https://domain-name:5443/live
Play a Live Stream
Play the live stream with WebRTC using the sample WebRTC player page, which is available at https://domain-name:5443/live/player.html
Sample Tools and Applications
-
Access the sample tools and applications via
https://domain-name:5443/live/samples.html. -
Experience the sample pages here now.
Getting Help
If you need any help, feel free to head over to Github discussions or follow our more detailed AMS Installation Guide.