JWT REST API Filter Guide
This guide will walk you through the steps to use the JWT REST API Filter in Ant Media Server.
Step 1: Introduction
Understand that by default, the JWT REST API Filter is disabled and the REST API IP Filter is enabled in Ant Media Server. The JWT Filter can be used when you consume the REST API from different endpoints. For more information about JWT, visit jwt.io.
Step 2: Enable JWT Filter
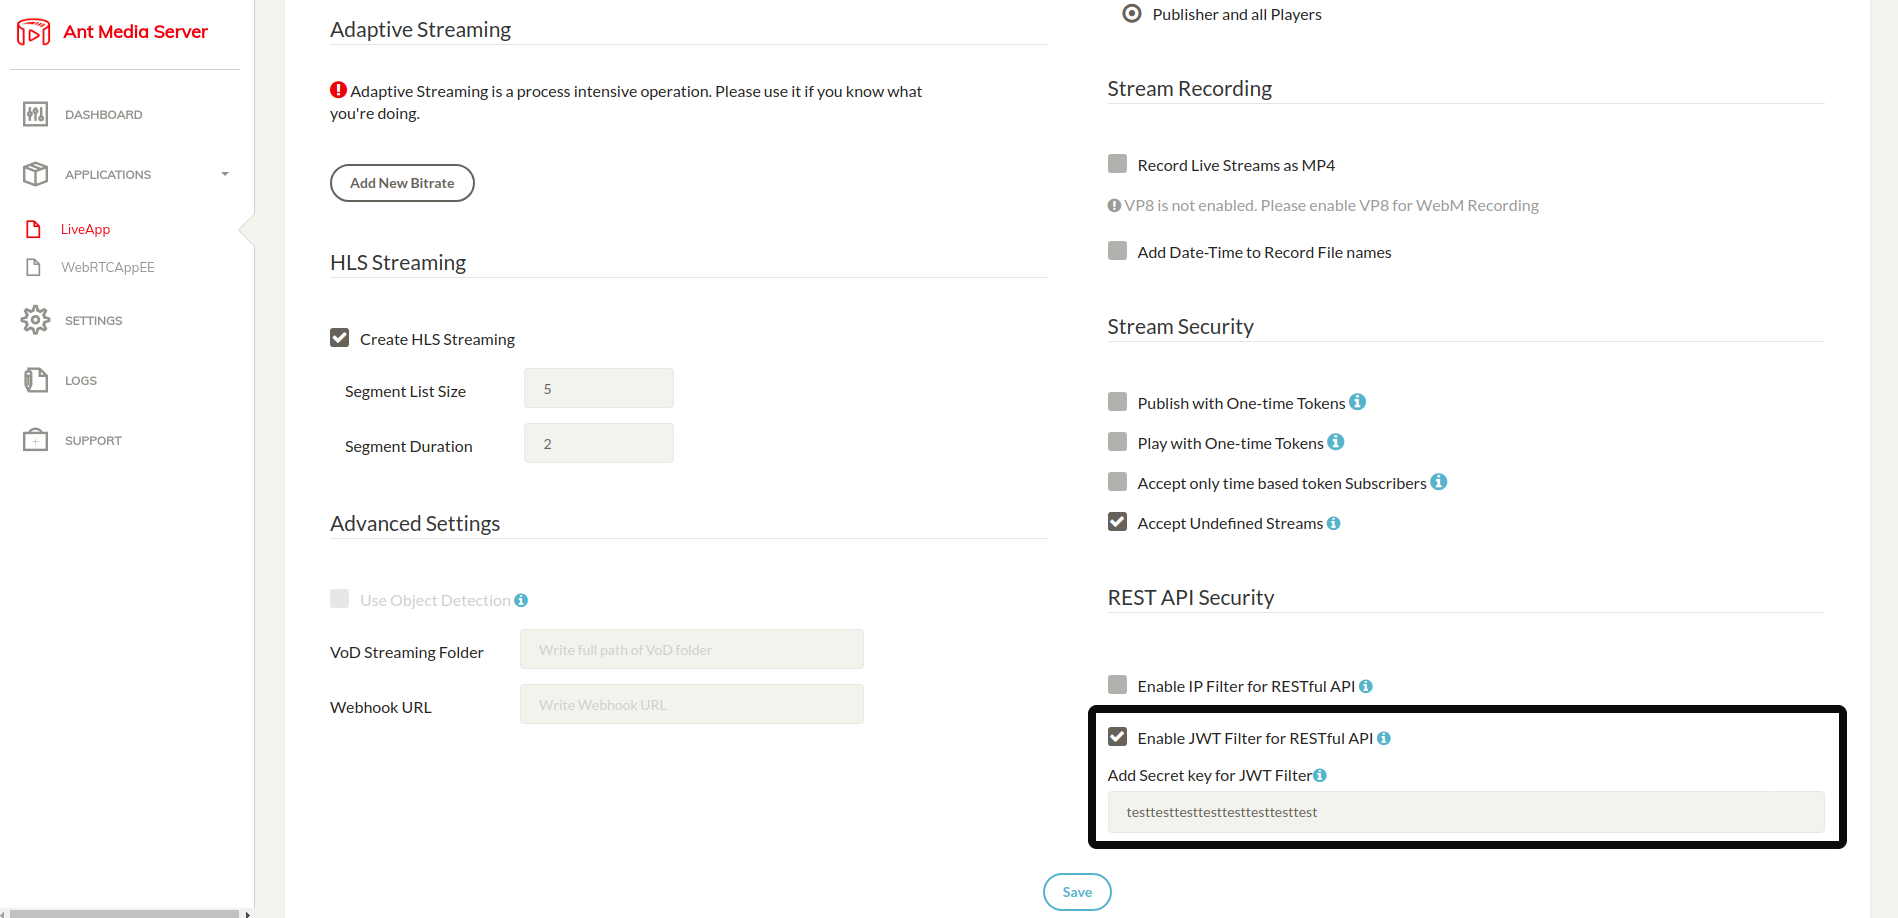
The first step is to enable the JWT REST API Filter in Ant Media Server. Go to the web panel, find the setting for JWT REST API Filter, and enable it. Also, enter the Secret key which will be used for encrypting with HMAC-SHA256 in the JWT REST API Filter.
Step 3: Generate a JWT Token
Next, generate a JWT token. For this example, let's assume our secret key is zautXStXM9iW3aD3FuyPH0TdK4GHPmHq. There are plenty of libraries available for JWT token creation, which can be found at Libraries for JWT. For this example, we'll use the Debugger at JWT.
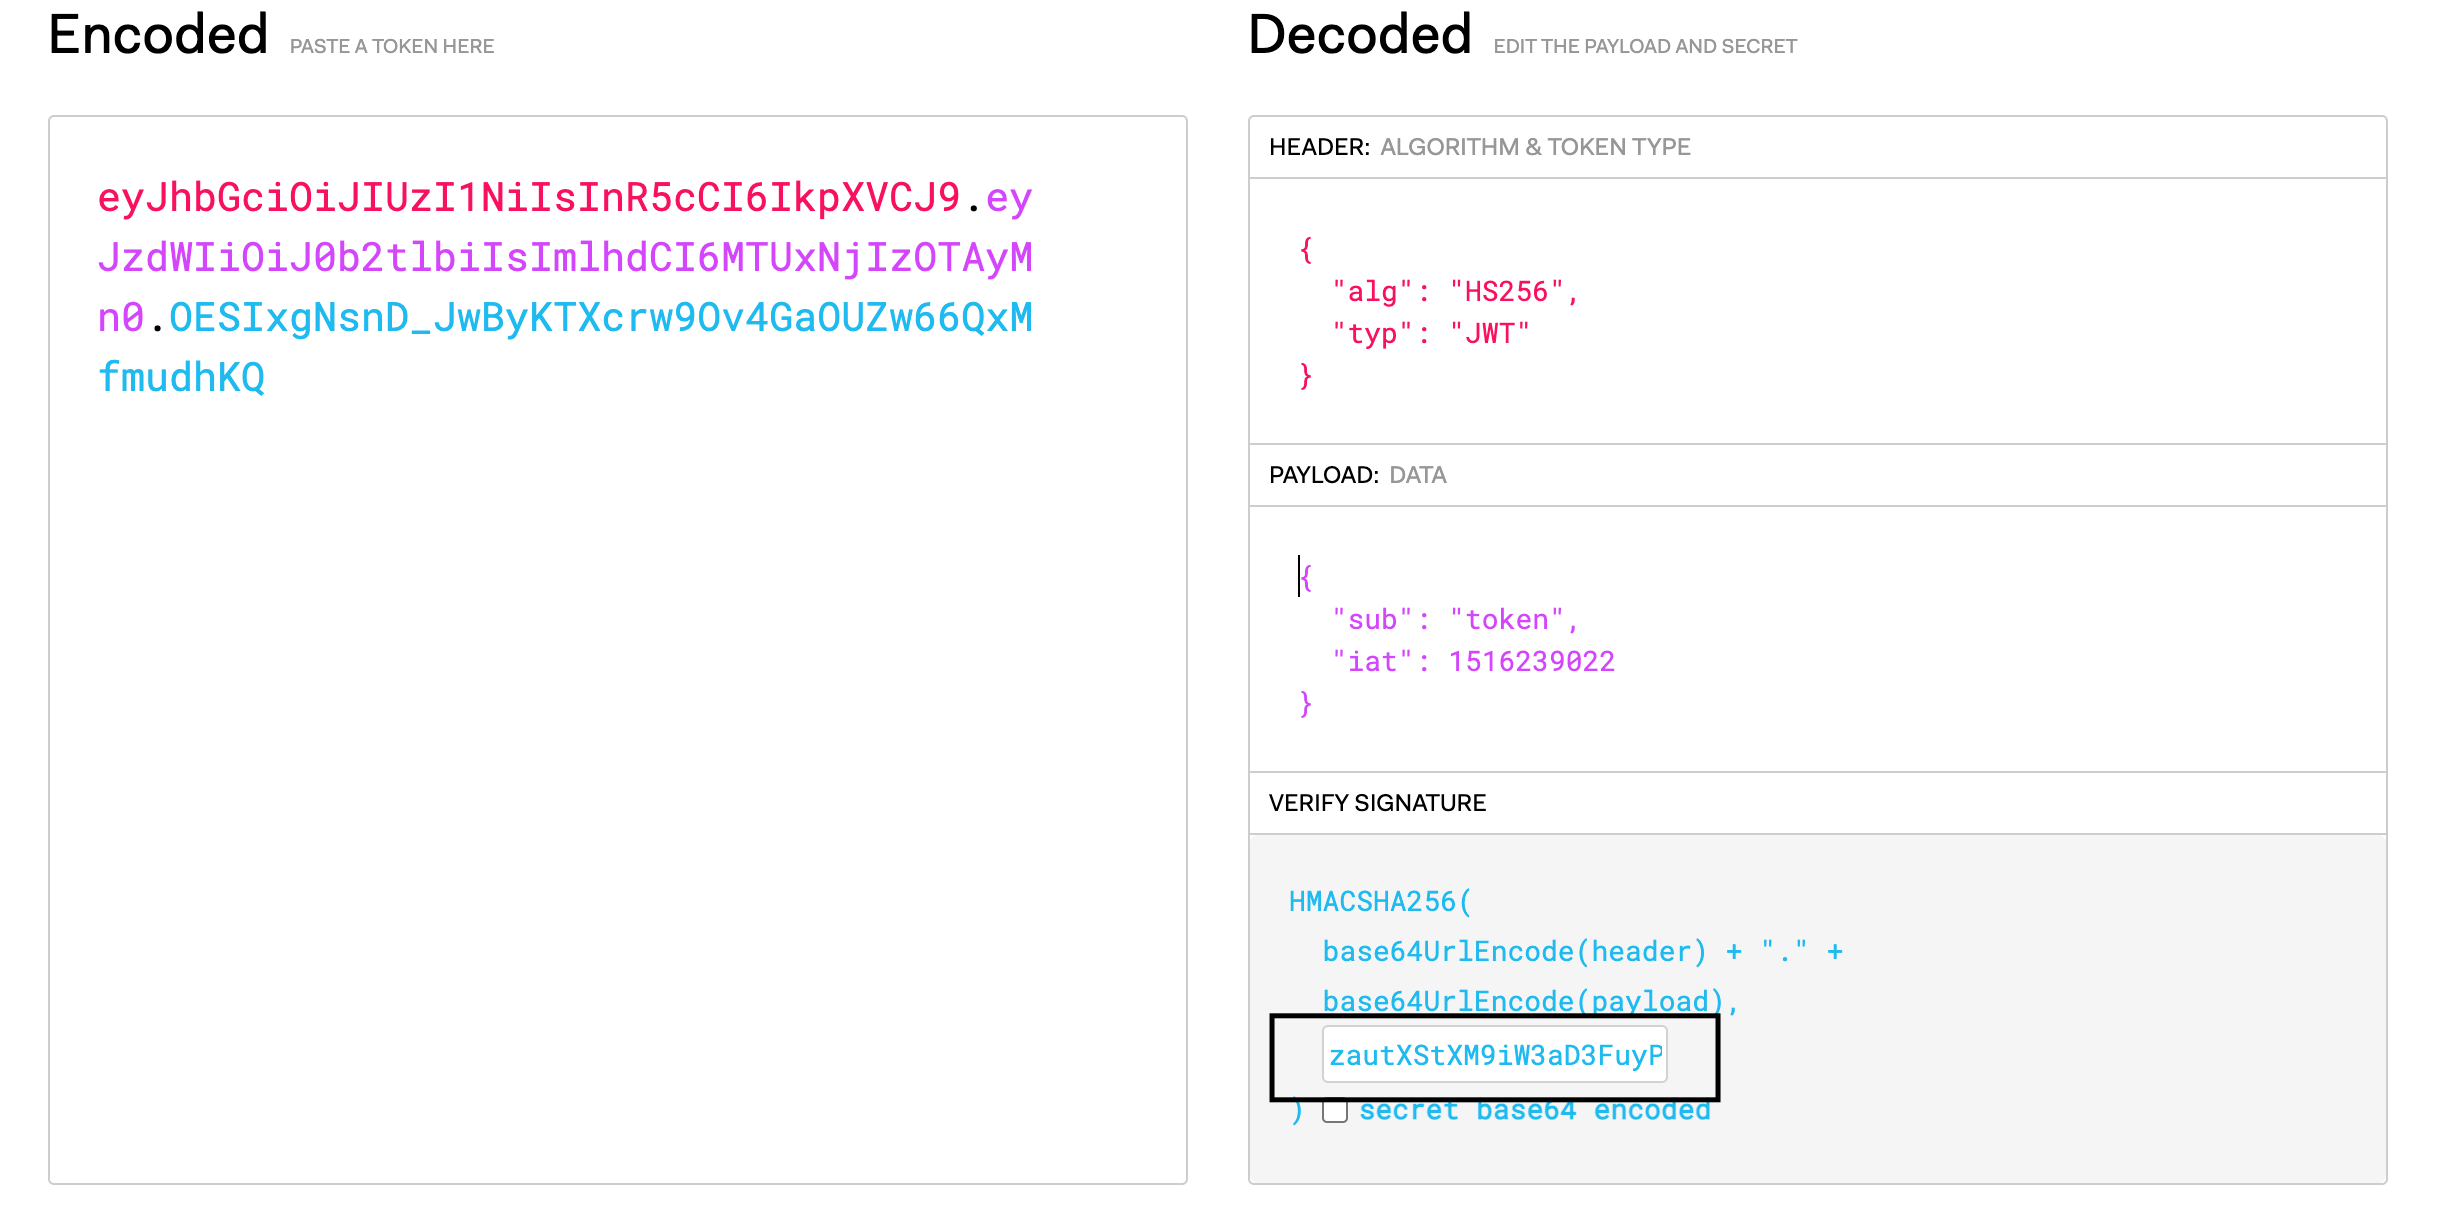
Use the HS256 algorithm and the secret key zautXStXM9iW3aD3FuyPH0TdK4GHPmHq to generate the token. This will be our JWT token to access the REST API:
eyJhbGciOiJIUzI1NiIsInR5cCI6IkpXVCJ9.eyJzdWIiOiJ0b2tlbiIsImlhdCI6MTUxNjIzOTAyMn0.OESIxgNsnD_JwByKTXcrw9Ov4GaOUZw66QxMfmudhKQ
Step 4: Generate JWT Token with Expiration Time(Optional)
It is also possible to generate a JWT token with an expiration time. For this, you can use the exp option in JWT. The token's expiration time is a Unix timestamp, and the token will become invalid once it expires.

Step 5: Use JWT Token for Accessing REST Filter API
To use the JWT token, simply add it to the Authorization header as shown below:
curl -X POST -H "Content-Type: application/json" -H "Authorization: {JWTToken}" "https://{domain:port}/{application}/rest/v2/broadcasts/create" -d '{"name":"streamName"}'
Step 6: Enable JWKS (Optional)
If you want to use the JSON Web Key Set (JWKS) feature, you need to have an OAuth server like auth0.com. You can also build your own OAuth server system with Hydra. For JWKS configurations, add parameters to the /usr/local/antmedia/webapps/<App-Name>/WEB-INF/red5-web.properties file:
settings.jwtControlEnabled=true
settings.jwksURL=YOUR_JWKS_URL
For example:
settings.jwtControlEnabled=true
settings.jwksURL=https://antmedia.us.auth0.com
Ant Media Server using JWKS needs the public keys used by the signing party to validate signatures. A JWKS's structure looks like this: https://antmedia.us.auth0.com/.well-known/jwks.json.
Once you're finished adding properties, restart the Ant Media Server instance.
sudo service antmedia restart
After these configurations are applied, you can start taking advantage of the JWKS feature in your structure, just like with JWT Filter.