Clustering with AWS
In this document, we’re going to explain how to setup a Scalable Ant Media Server Cluster in Amazon Web Services. Scaling is required when a single server cannot meet the required demand. You can also estimate your cost and server requirement through our cost calculator and down the page you can see the table for supported values as per server CPU resources.
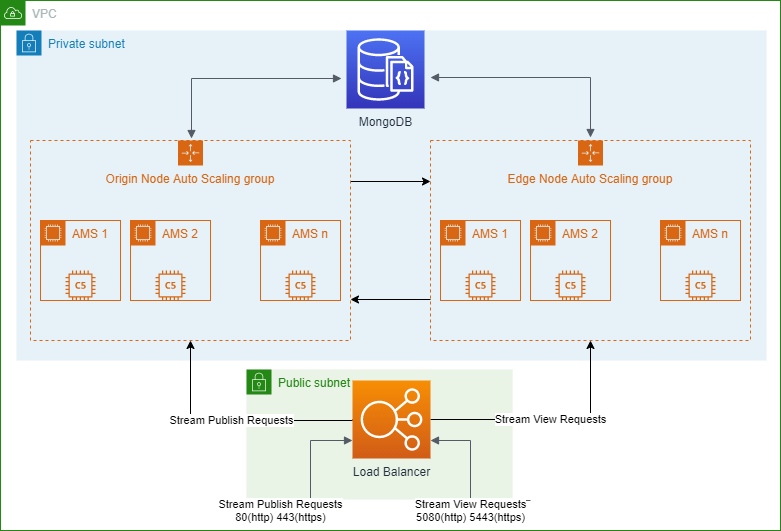
Here below is the diagram about how Ant Media Server is architecturized within AWS.
Lets start with brief definitions
- MongoDB Database Server: Ant Media Server uses MongoDB in clustering. Streams information are saved to MongoDB so that edge instances can learn any stream’s origin node.
- Load Balancer: LB is the entrance point for the publishers and players. Load Balancer accepts the requests from publishers or players and forwards the requests to the available node in the cluster.
- Origin Auto-Scalable Group: Nodes (Instances) in the origin group accepts the publish requests and ingest the incoming WebRTC stream. When an origin instance accepts a WebRTC stream, it saves the related information to the MongoDB Database Server. There may be one node or multiple node in origin group. It may even be manually or auto scalable. In our deployment, it’s auto-scalable in AWS.
- Edge Auto-Scalable Group: Node (Instances) in the edge group accepts the play requests. Then it learns from MongoDB which origin node has the related stream. After that it gets the stream from related origin node and sends the stream to the player.
Then continue with installing MongoDB Server.
Step 1: Install MongoDB Server
The procedure below shows how to start an instance in AWS EC2 service as well. In other words, if you have no experience about AWS, you can even install MongoDB Server as follows. If you know how to start an instance in AWS, just skip to “Install MongoDB to Your Instance”
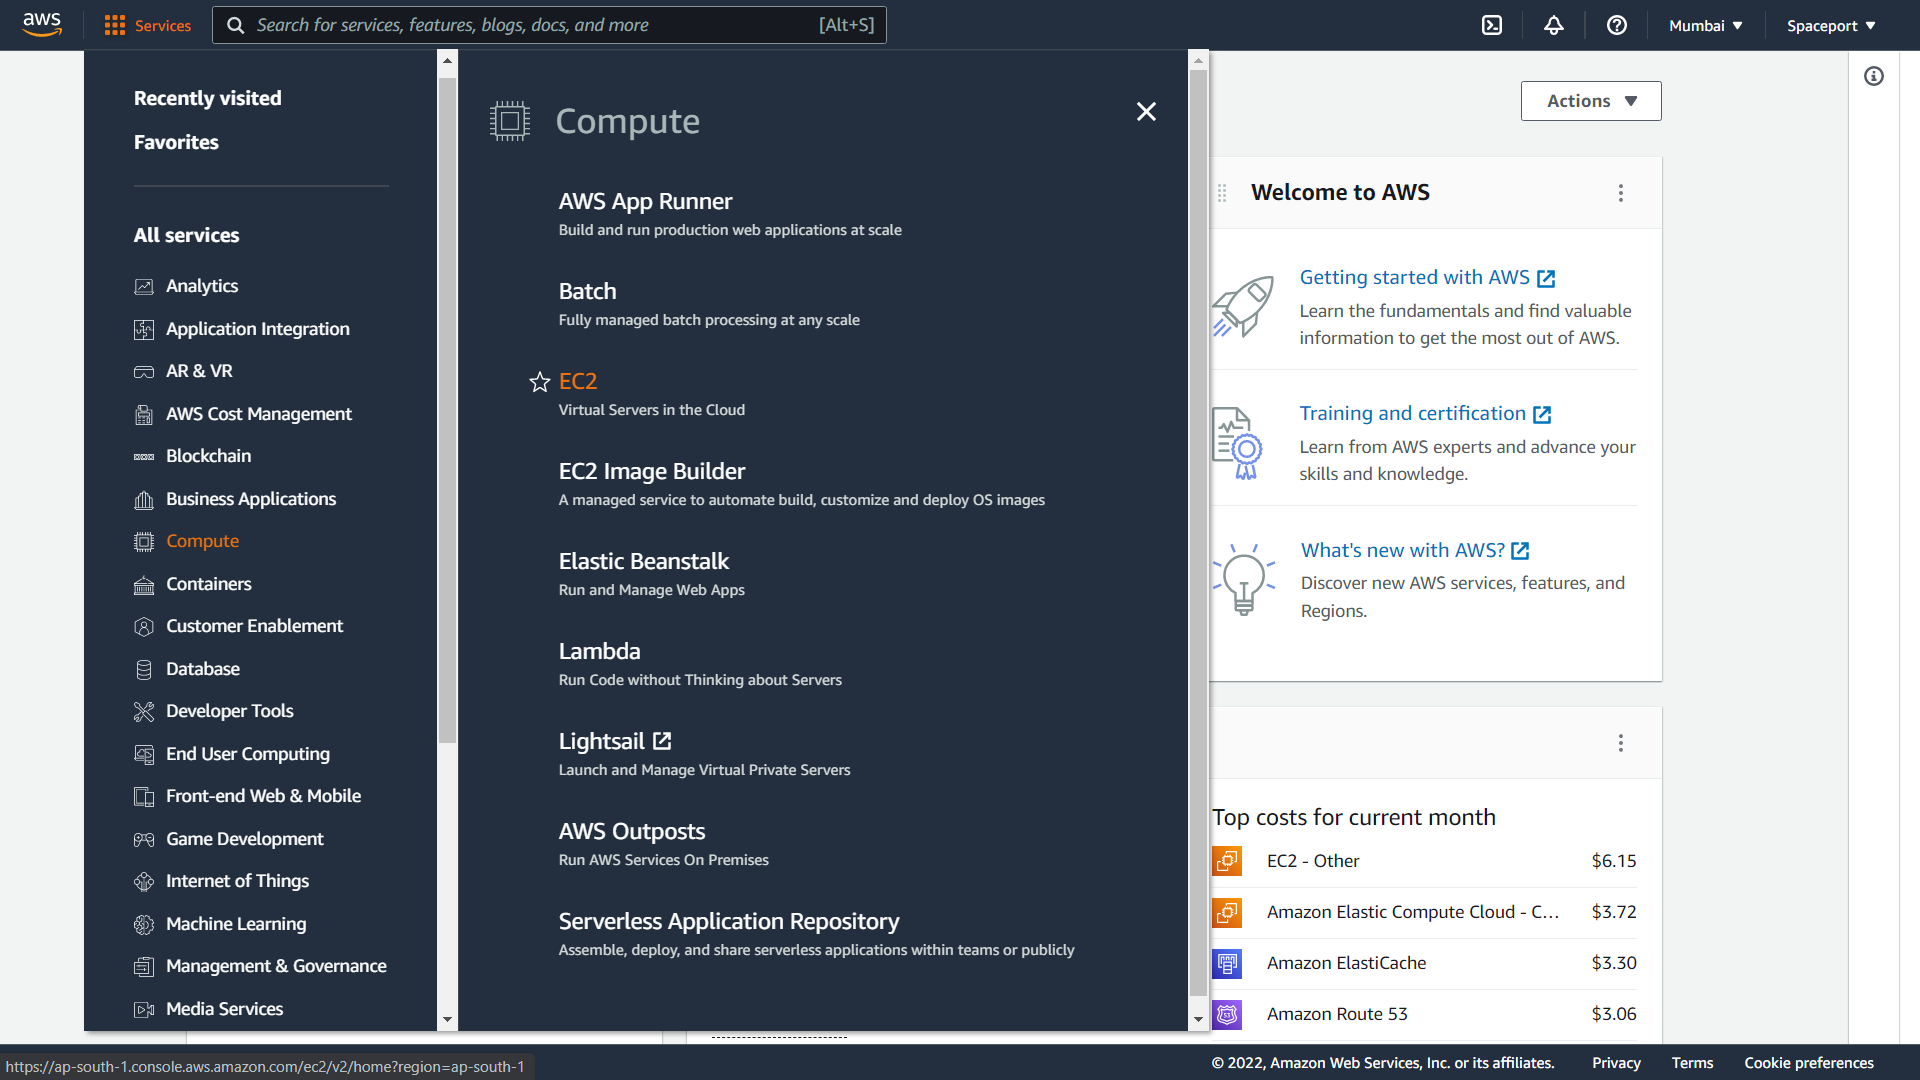
- Signup to AWS if you don’t have an account yet. Login to AWS Management Console. Then click EC2 Service as shown in the image below.
- Click “Launch” Instance.
-7072788e9e0fa64191907a7a90fc6d30.png)
- Search for “Ubuntu” and Select “Ubuntu 20.04”.
-f412cefd1433f813a7657e4ebebc6988.png)
- Choose Instance Type like m4.xlarge or m5.xlarge series. There are two points here.
- First one is you may optionally choose a bigger instance according to your streaming load.
- Second one don’t use any m5a instances because they have ARM architecture.
Then click “Review and Launch”.
-a9e6b21bdacb919570c47835f3817b17.png)
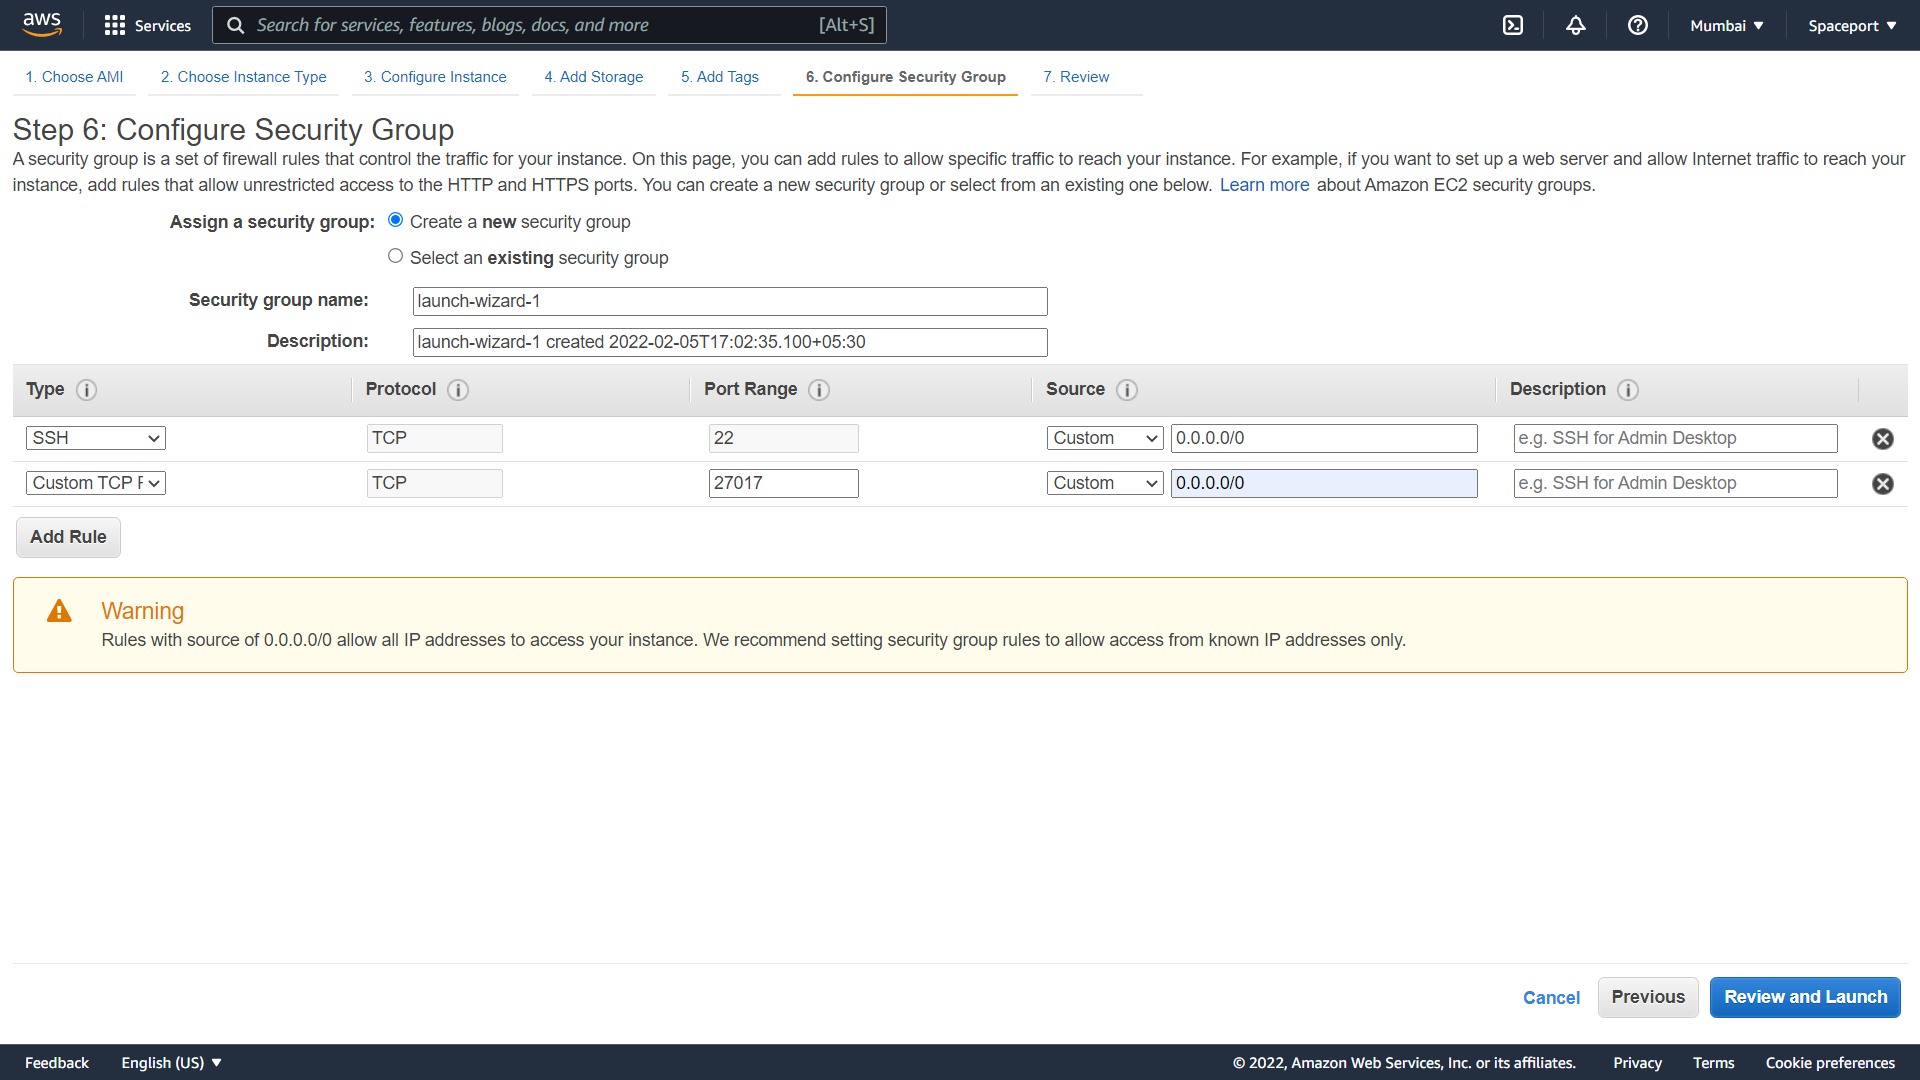
- Click “Configure Security Group” in the image.
- Add “22” and “27017” TCP ports as follows in the image. Warning is critical for security. We’ll restrict source into a VPC later. Just click “Review and Launch”.
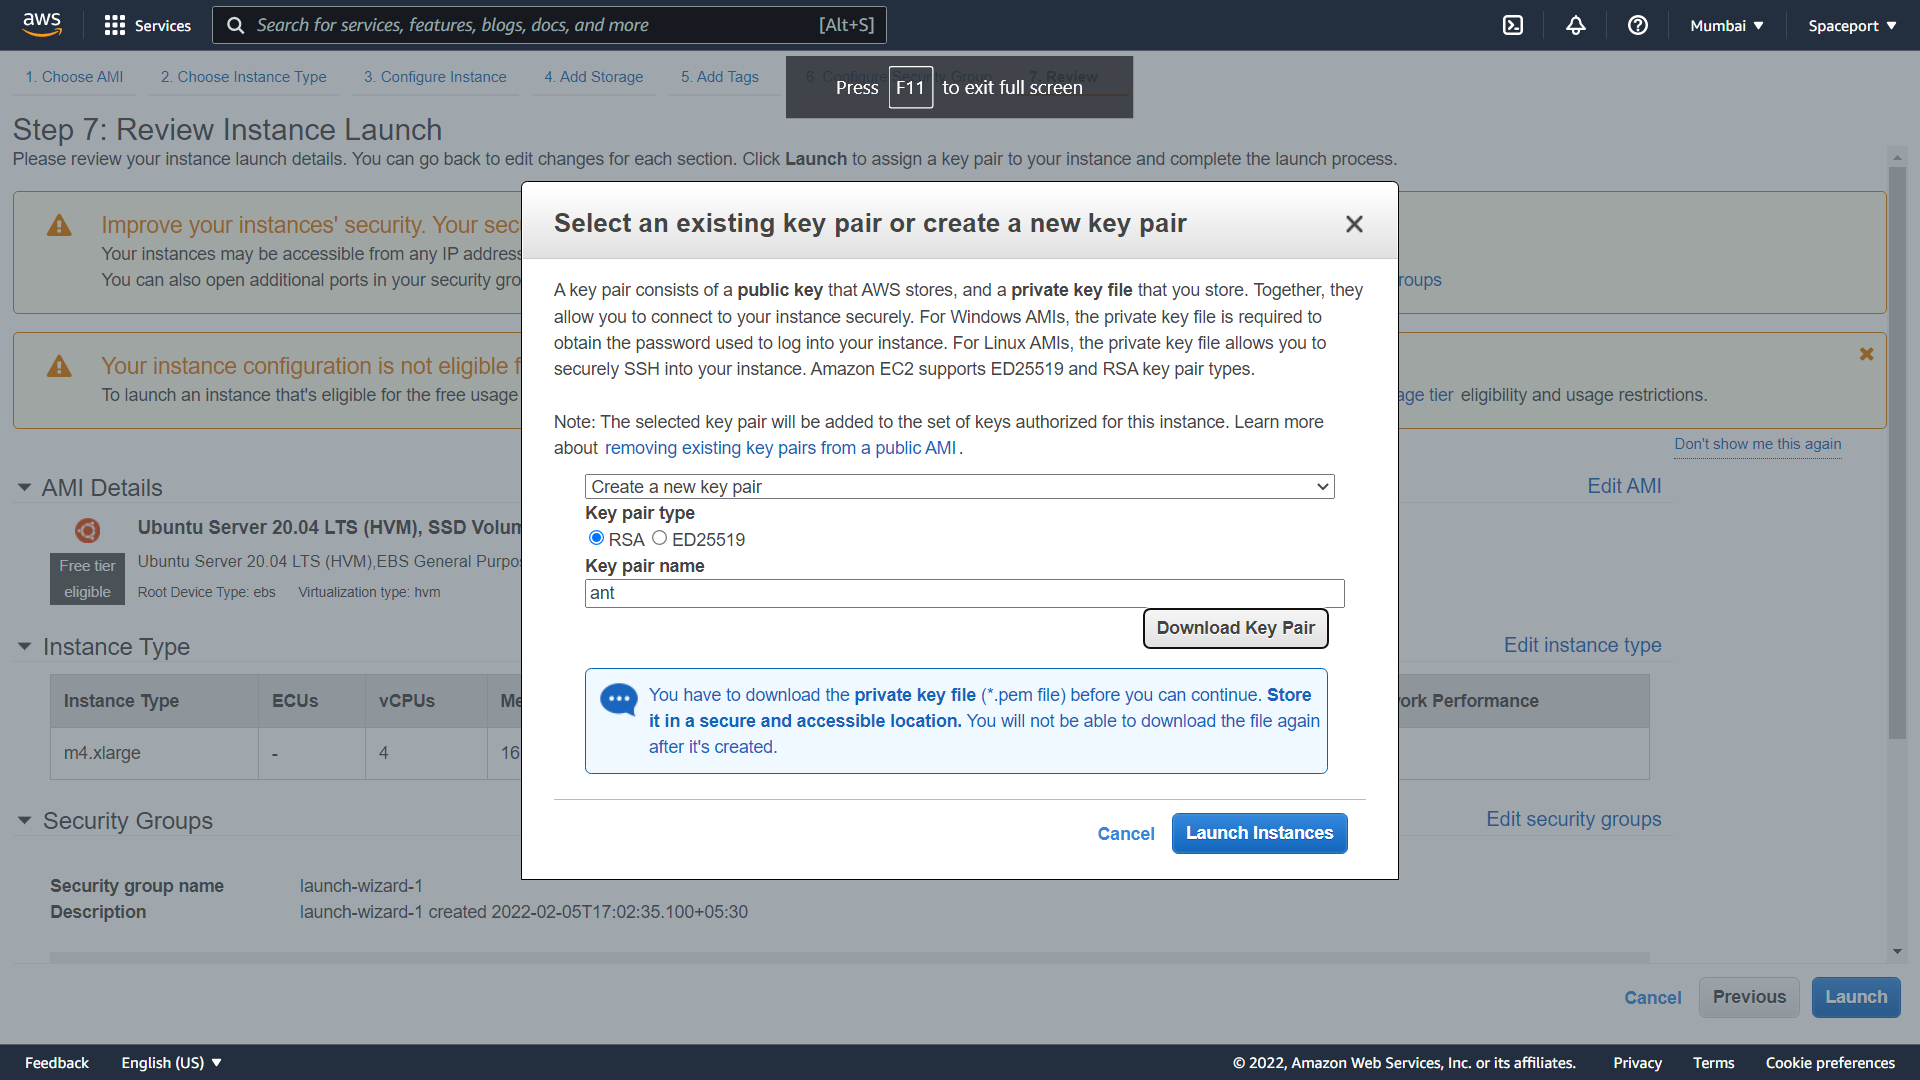
- In the coming window it will ask to specify key file. Choose “Create new key pair” and click “Download Key Pair” button. After key file is downloaded click “Launch Instances”.
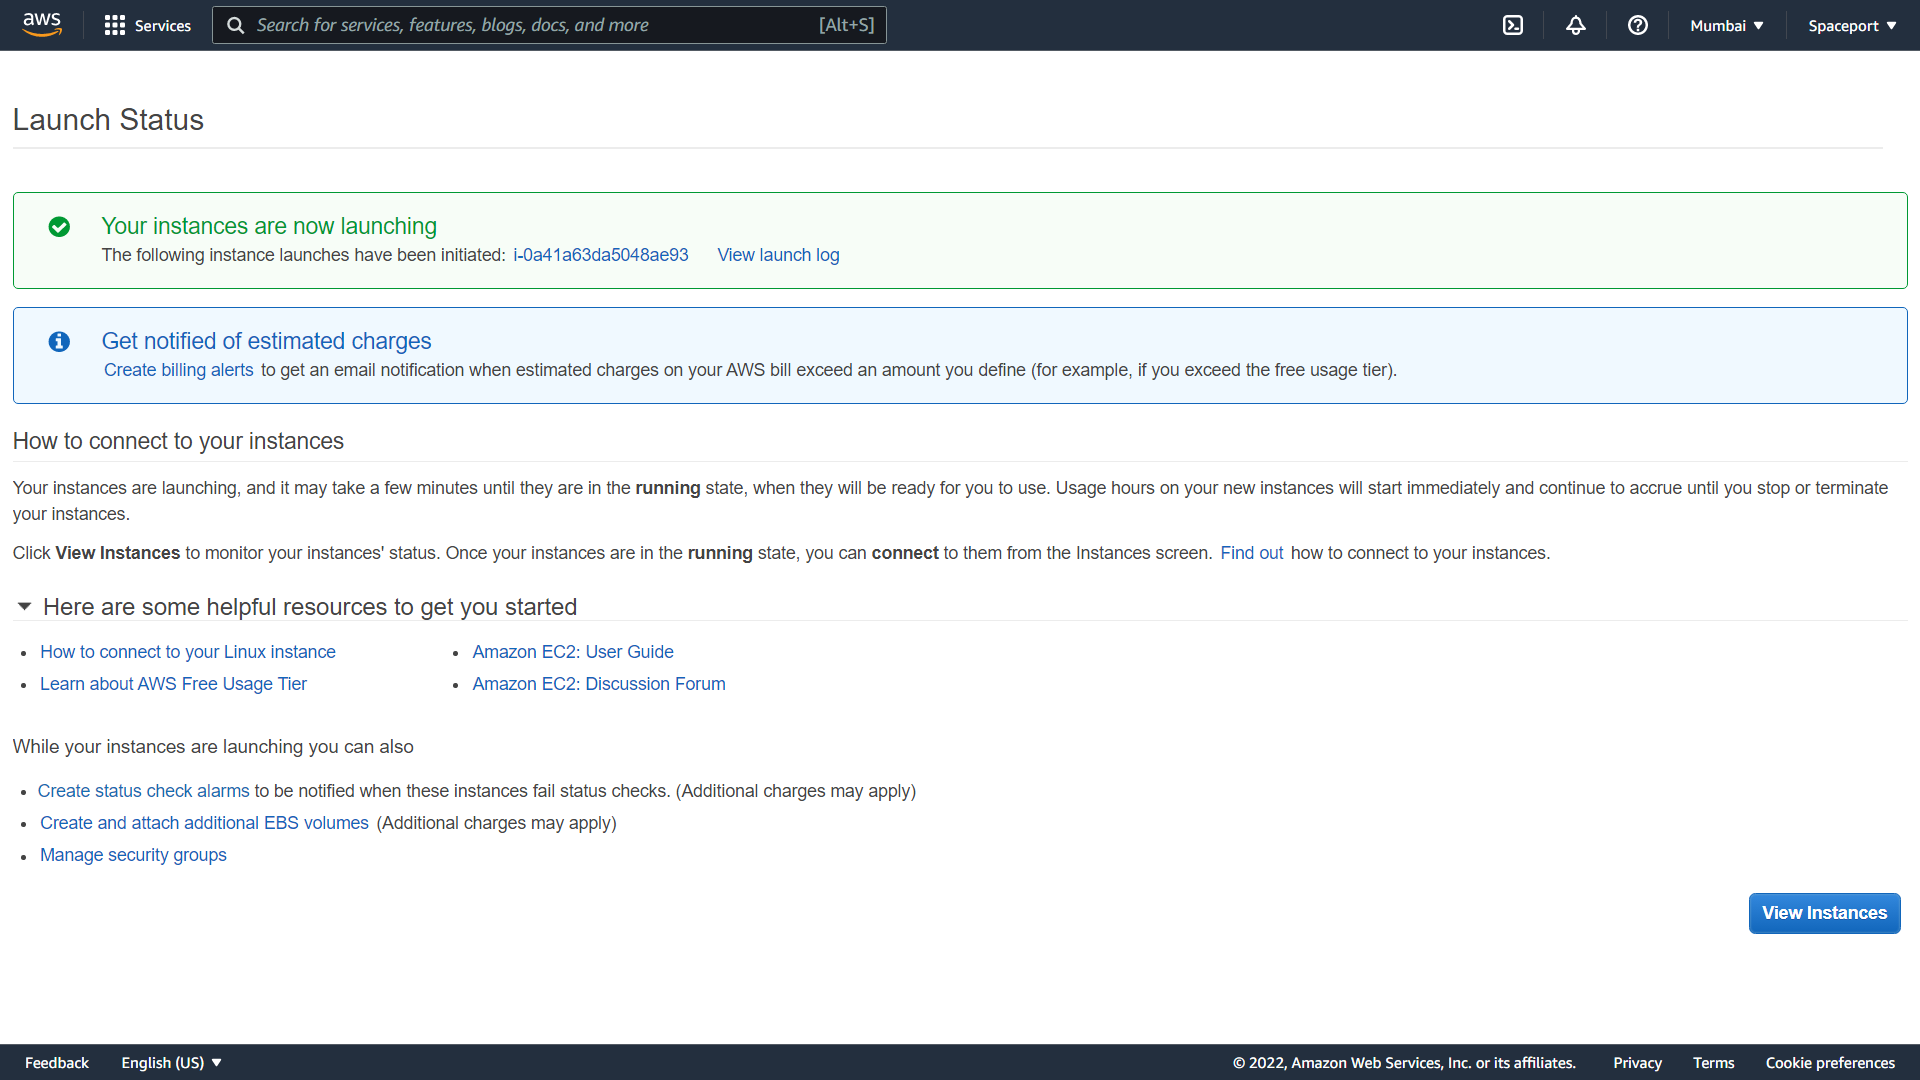
- Right now, your instances should be launching as shown in the image.
- Go to EC2 Instances and Click “Connect” button.

- It shows a dialog as follow and connect to instance via ssh.
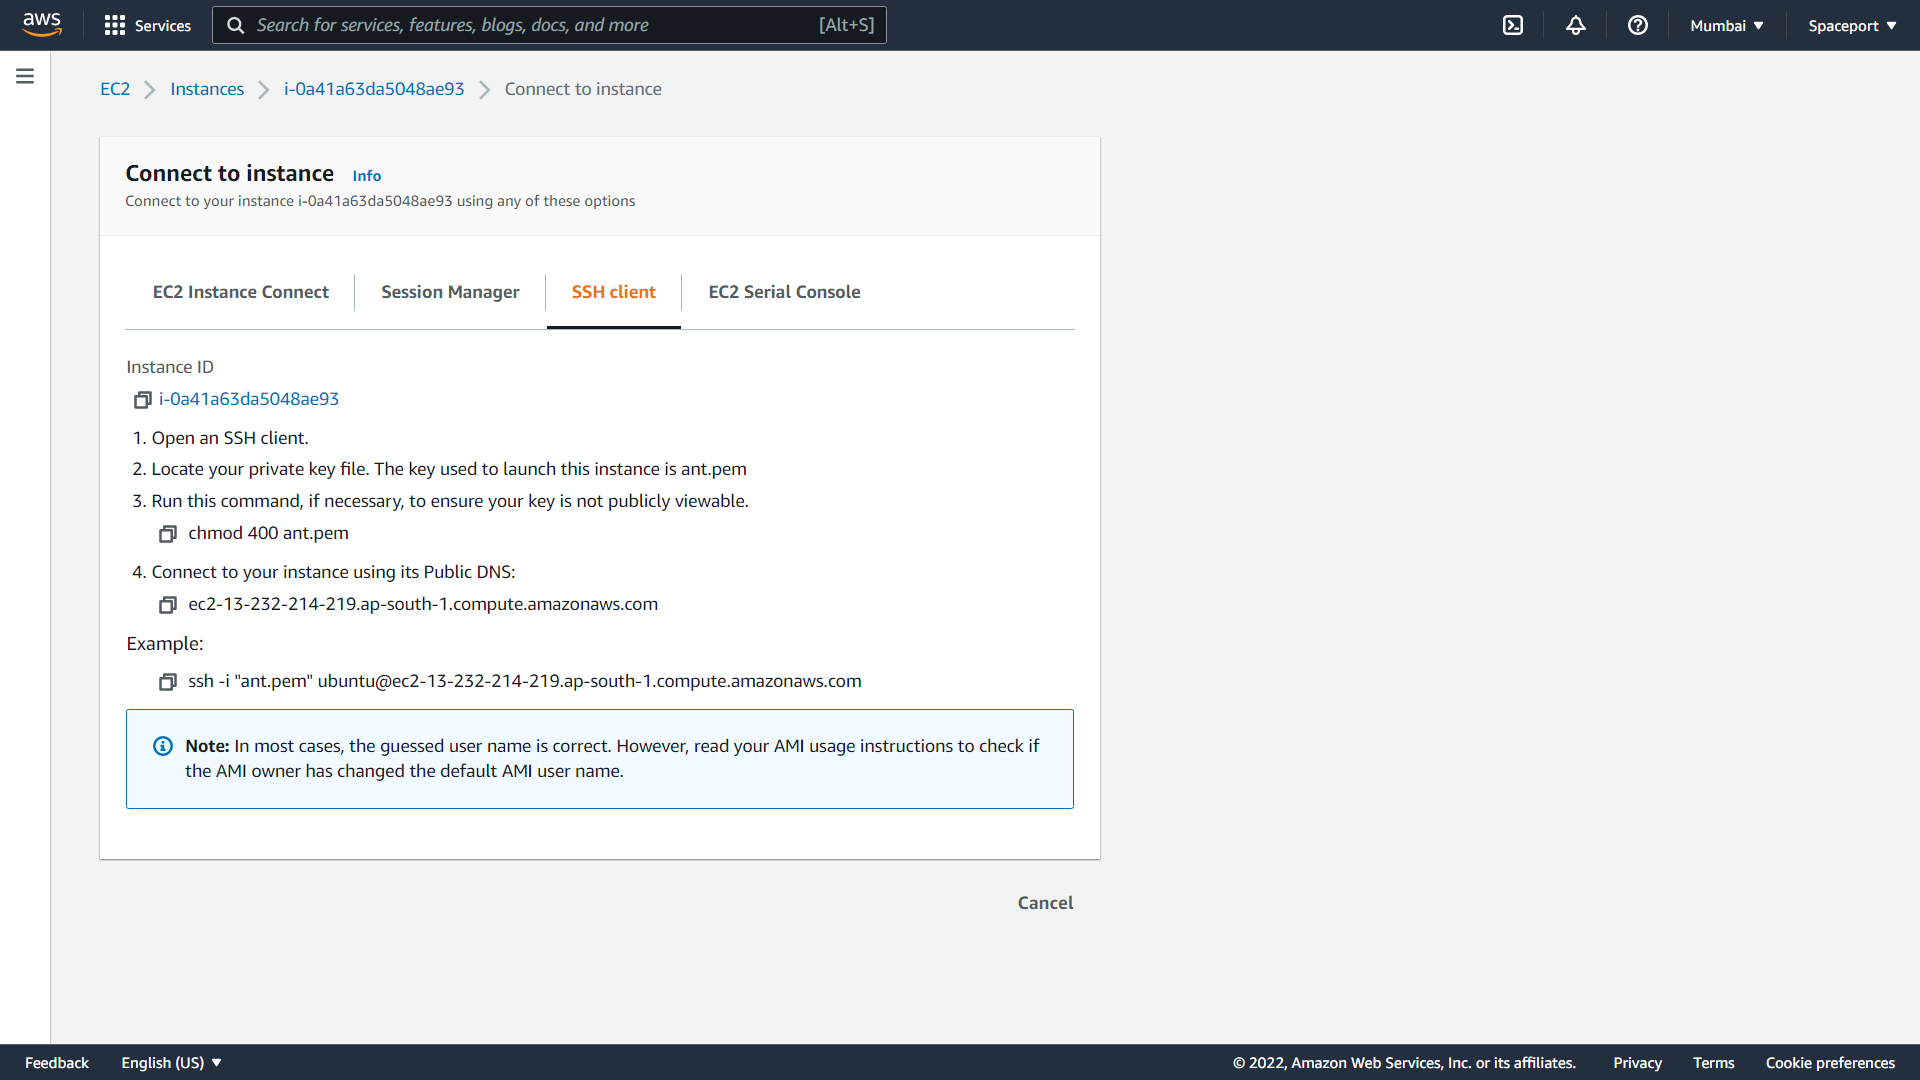
- Right now, you should connect to your instance. To Connect your instance, open a terminal and run a command something like below. Please change
{YOUR_KEY_FILE}and{INSTANCE_PUBLIC_IP}with your own credentials. For our case, they areant.pemand3.108.40.66.
ssh -i {YOUR_KEY_FILE} ubuntu@{INSTANCE_PUBLIC_IP}
Install MongoDB to Your Instance
- Connect your instance and download the following script.
wget https://raw.githubusercontent.com/ant-media/Scripts/master/install_mongodb.sh && chmod +x install_mongodb.sh
- Run the following commands in order to install MongoDB to your instance.
./install_mongodb.sh
If you want to enable authentication in MongoDB, you can simply provide the
--auto-createparameter to theinstall_mongodb.shscript. It will automatically create a username and password for you.
MongoDB installation is complete, just save your MongoDB instance’s local address somewhere. We will use it later.
Step 2: Install Scalable Origin Group
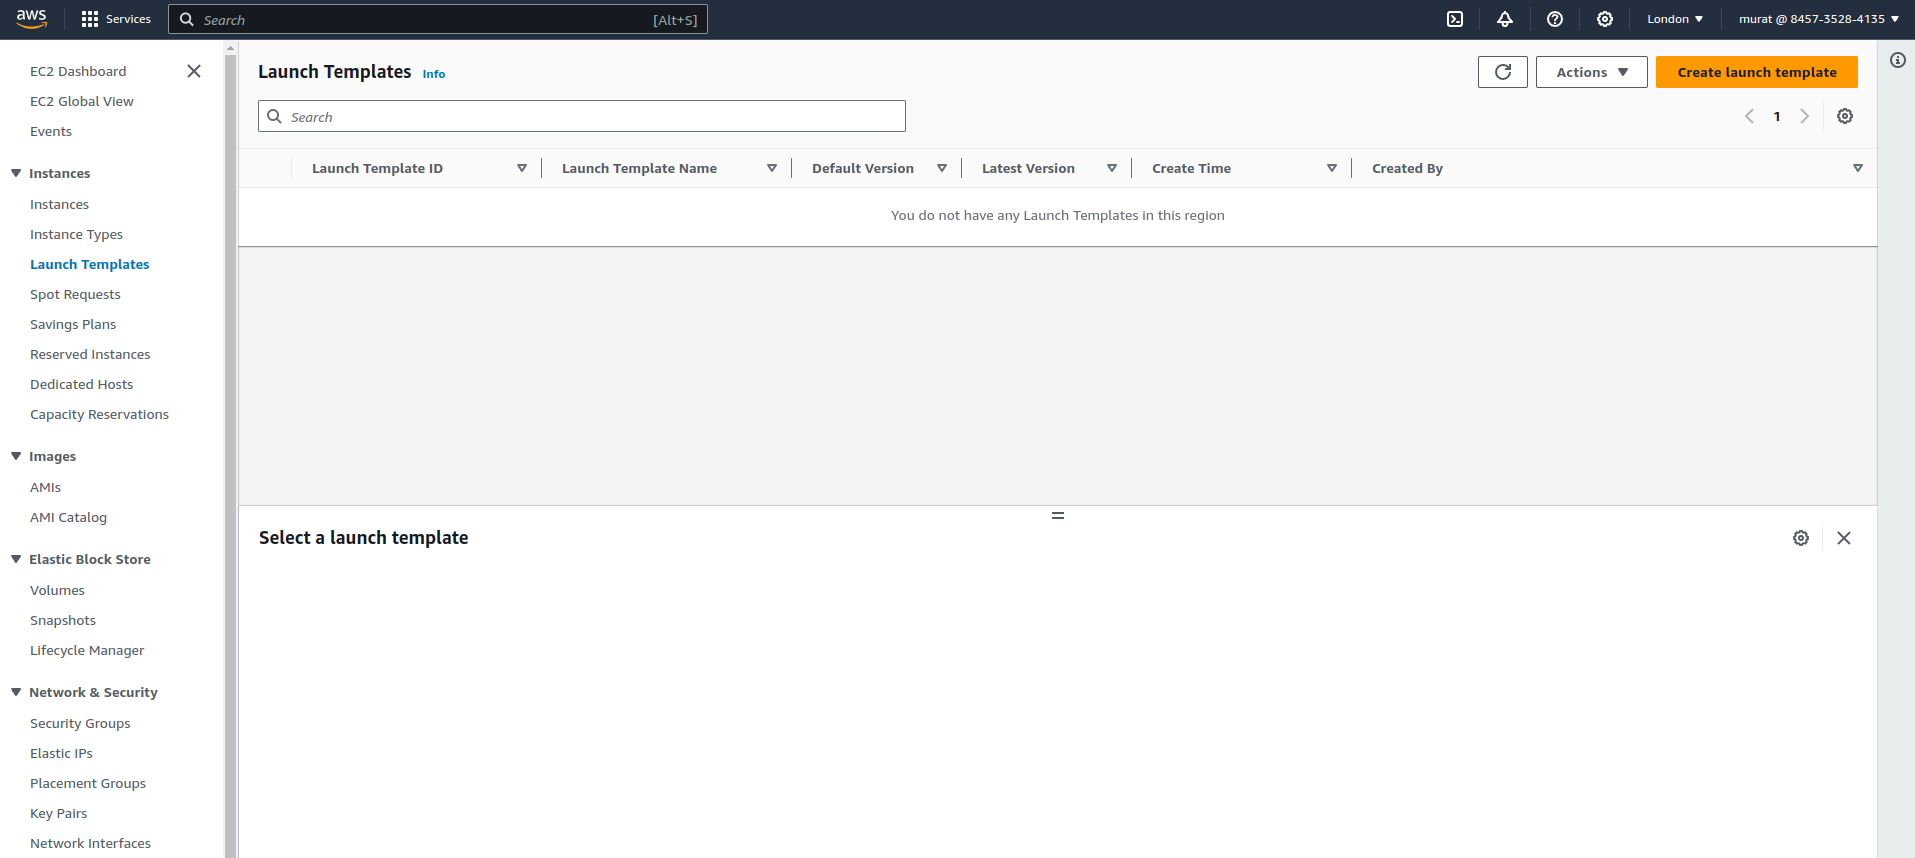
- Click
EC2 > Launch Templatesand ClickCreate Launch Template.
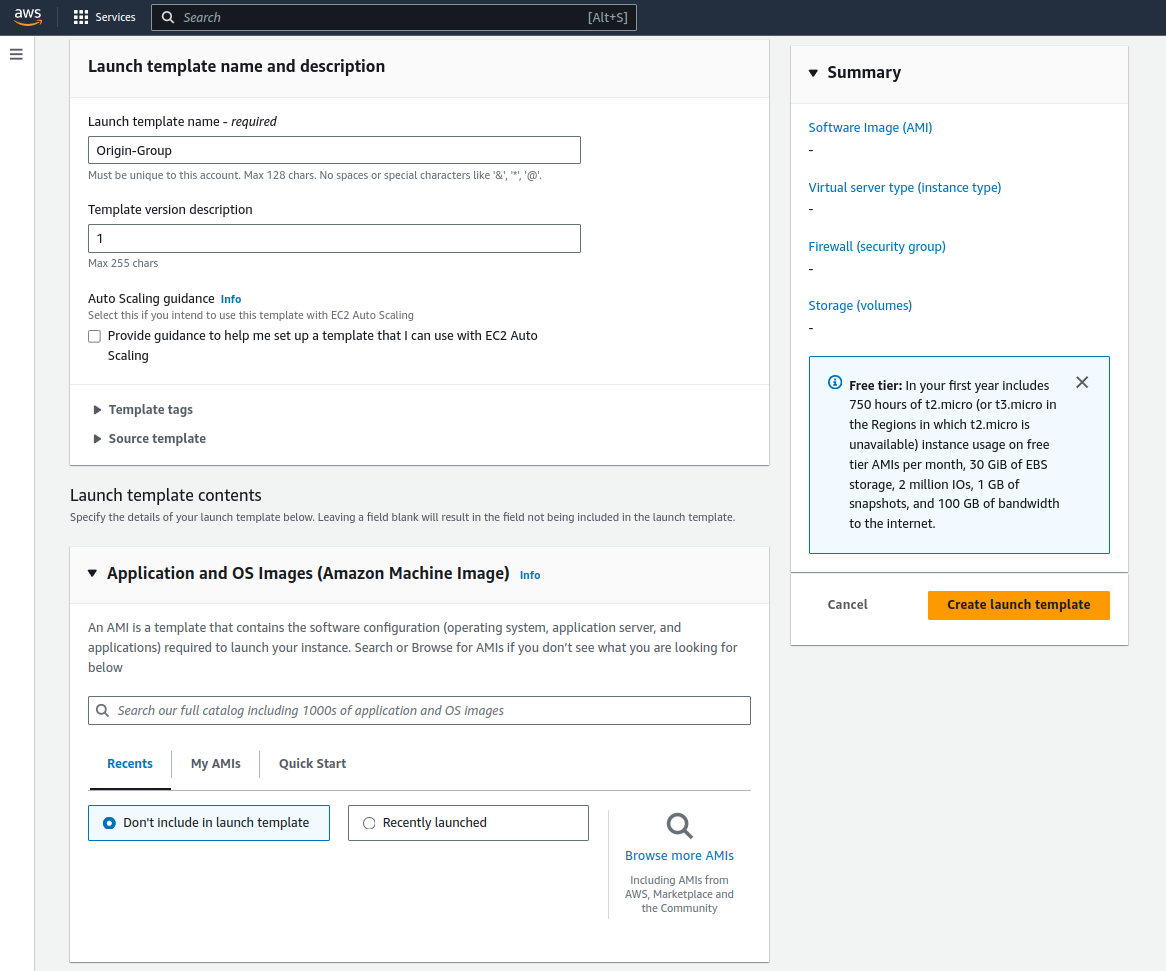
- Give a name something like “Origin-Group”.
- Enter version number.
- Then click Browse more AMIs under Application and OS Images
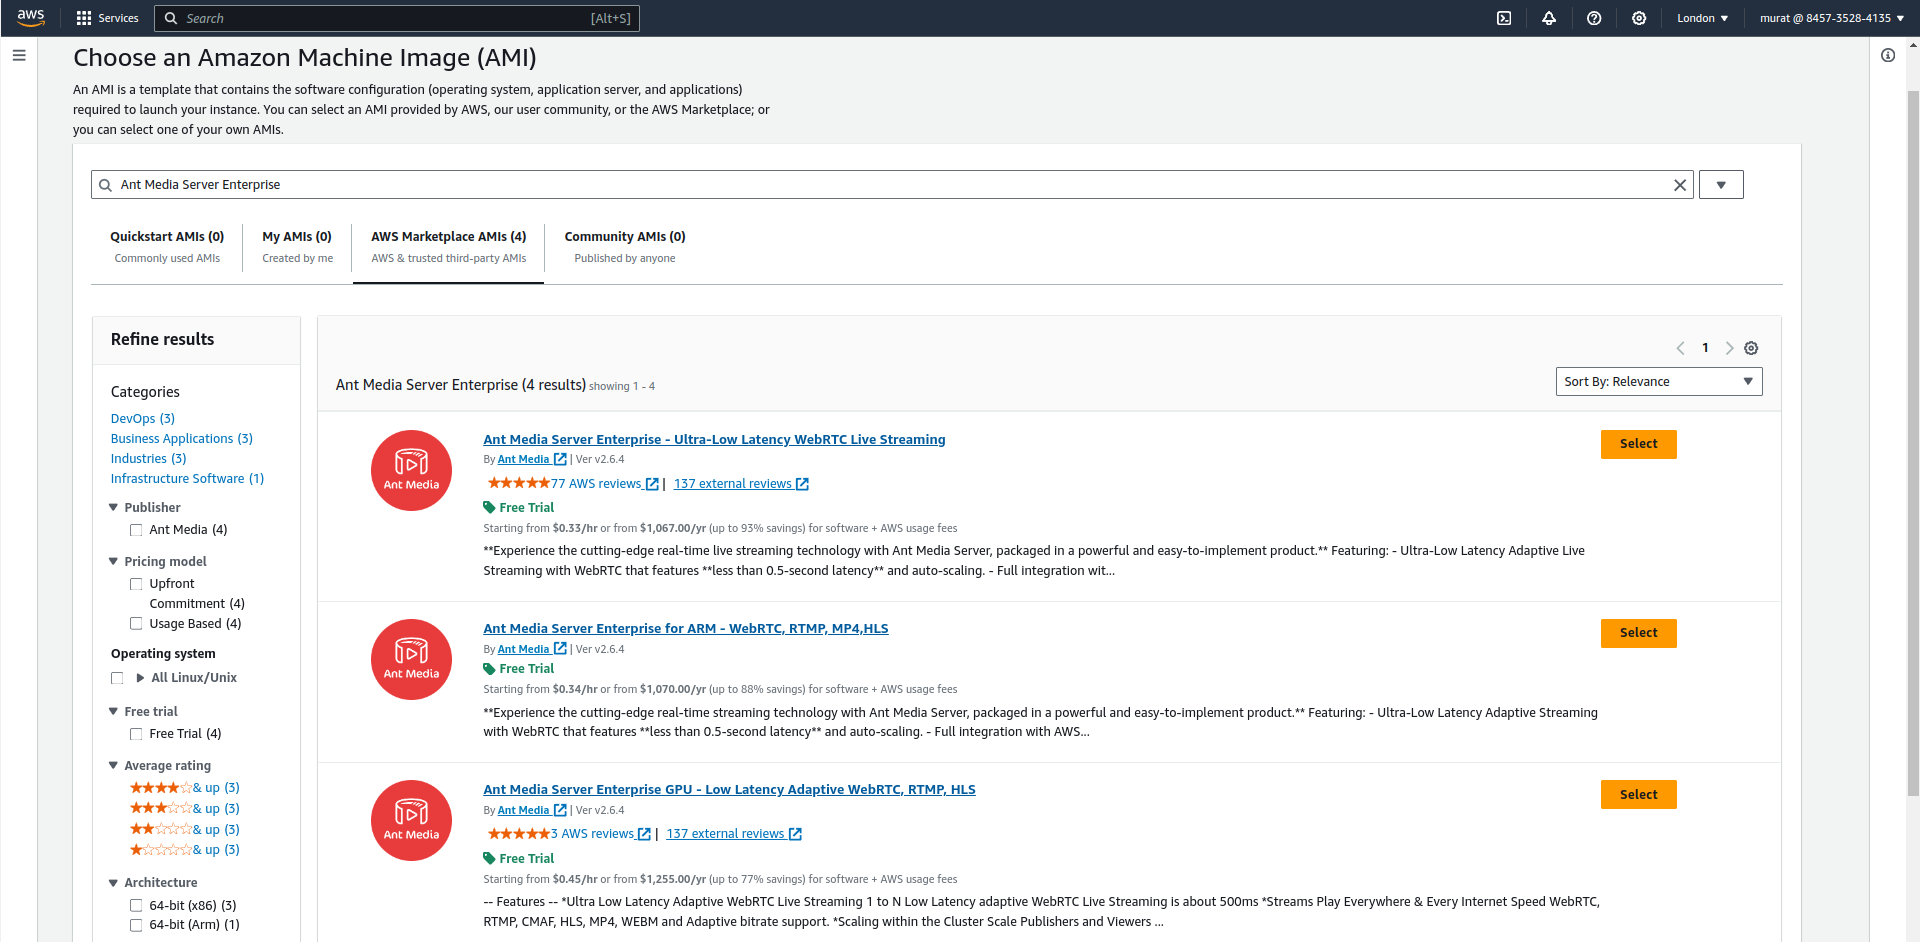
- Click on the AWS Marketplace AMIs menu, type "Ant Media Server Enterprise" into the search bar, and search. Then select the product "Ant Media Server Enterprise - Ultra-Low Latency WebRTC Live Streaming."
- Choose instance type and Key pair, in our sample we choose c5.xlarge. You can choose any instance type according to your project and after proceed to next step.
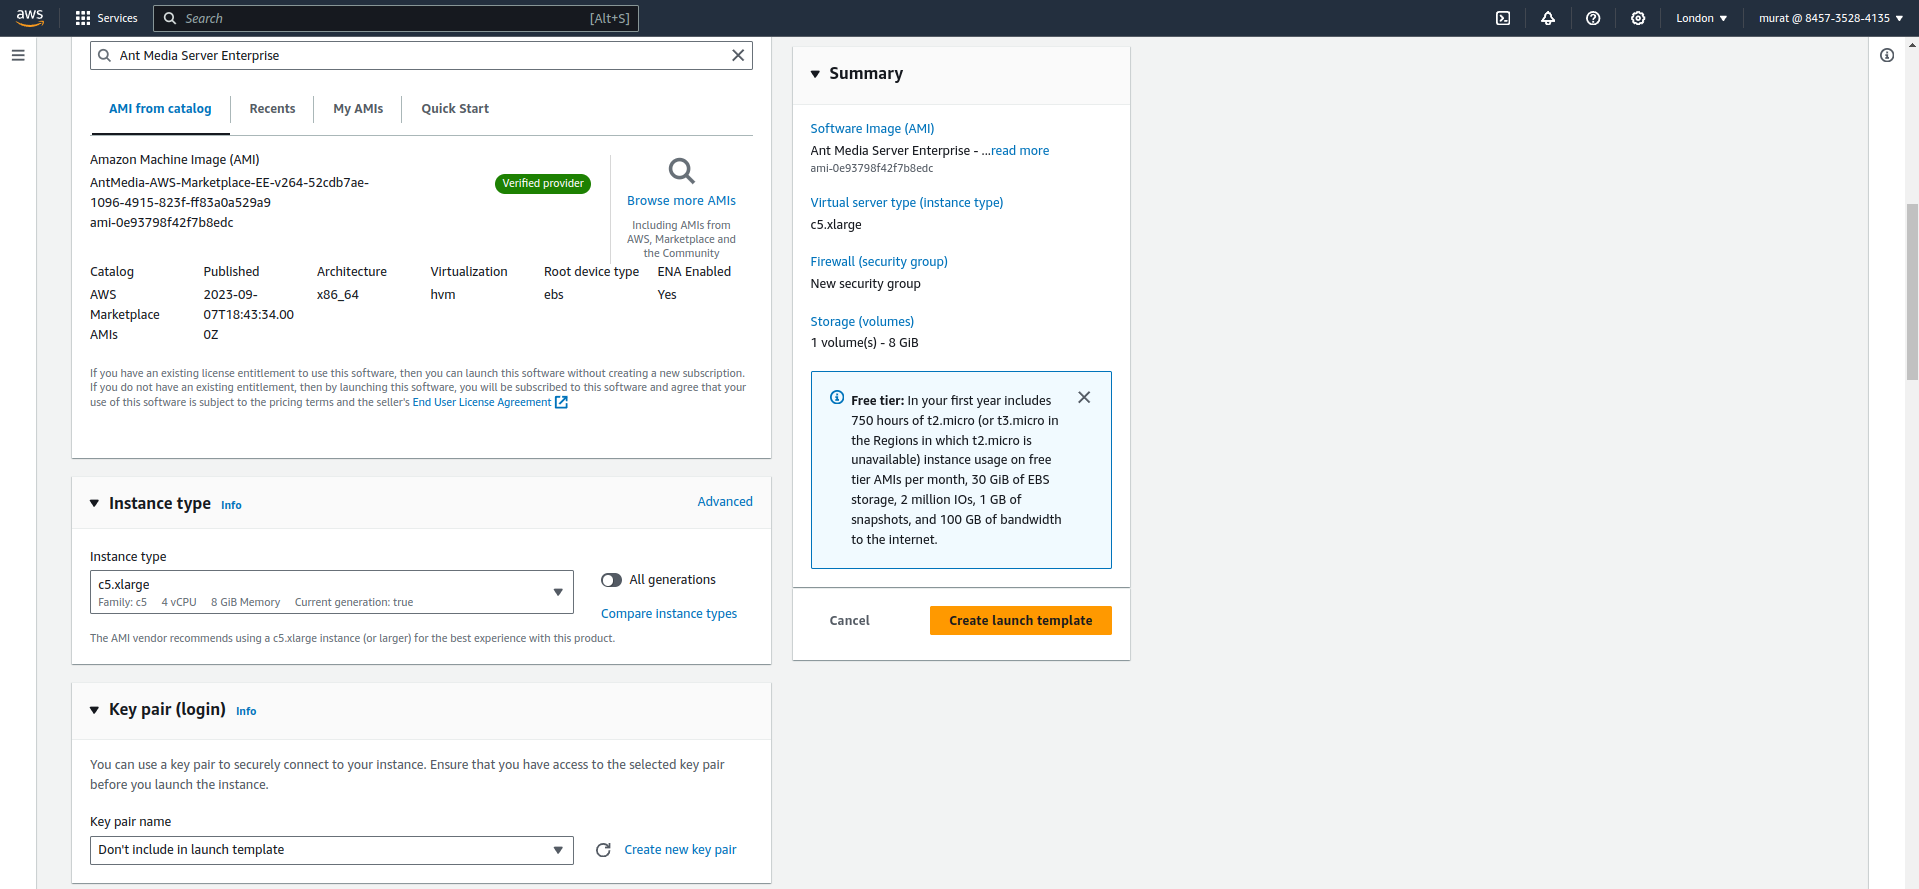
- In Network Settings, The Security Group will be created automatically.
Important Note:
UDP: 50000-60000 (WebRTC. In v2.4.3 and higher, the default range is 50000-60000. Prior to 2.4.3, the default value was 5000-65000.
TCP: 5000 (This port needs to open only in cluster mode for internal network communication).
-
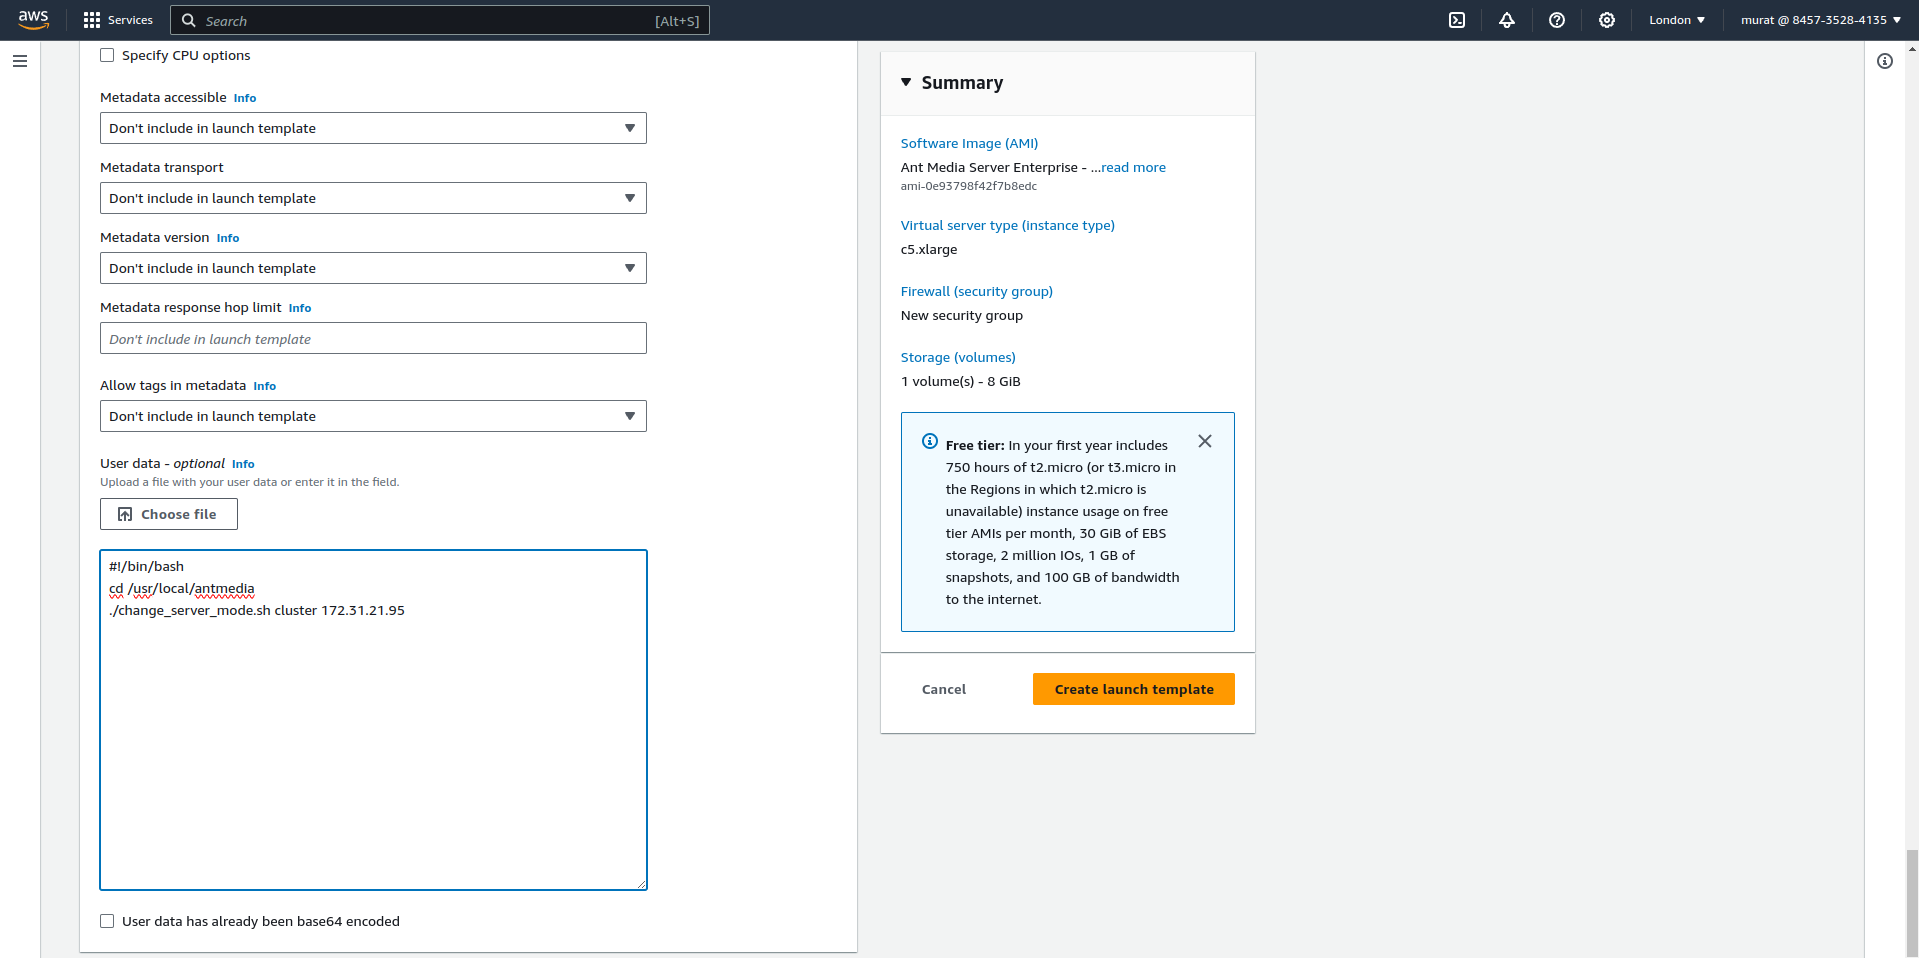
Then Click “Advanced Details” title. You will see the “User data” text area. Right now, copy the text below, change the “
{MongoIP}” field with the MongoDB IP Address in the script and paste it to the “User data”. -
After that Click “Skip to review”
#!/bin/bash
cd /usr/local/antmedia
./change_server_mode.sh cluster {MongoIP}
The form should be something like below.
- Click “Create Launch Template”.
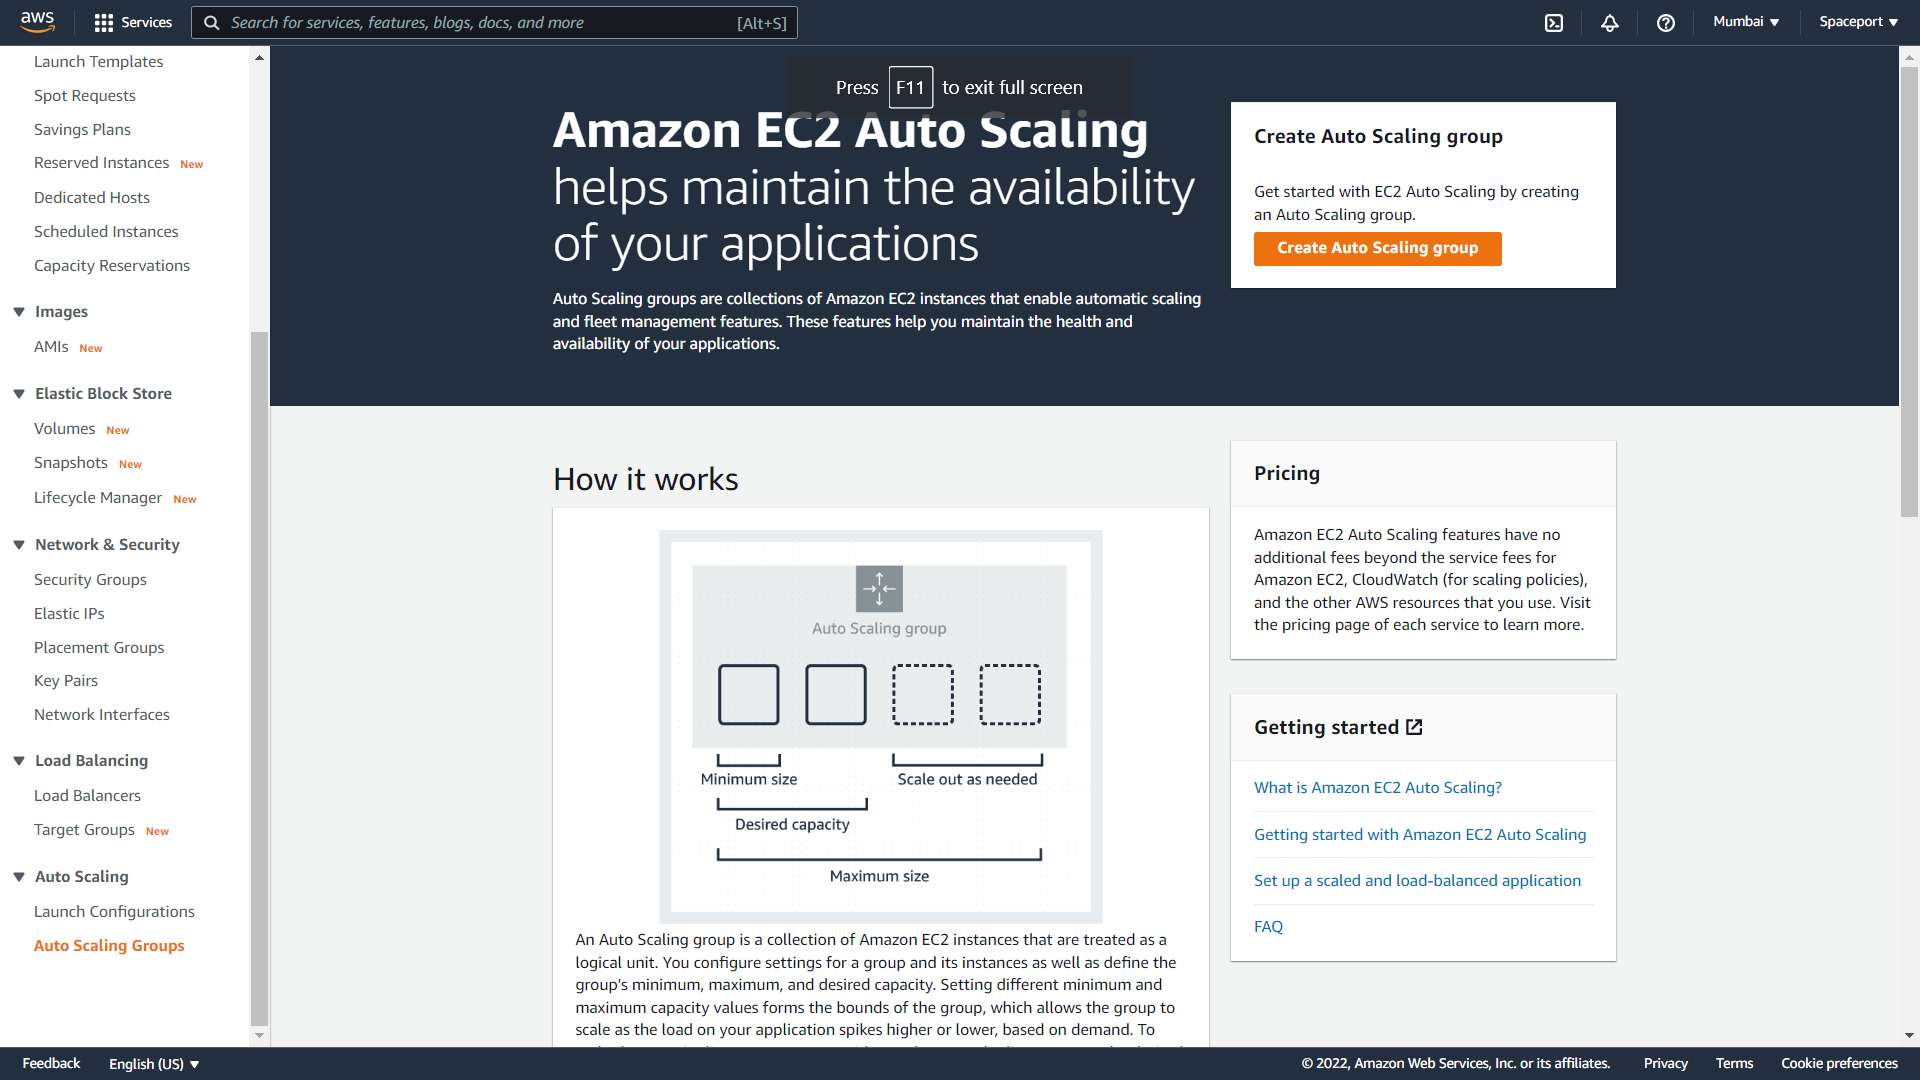
- After the launch template is created successfully, go to Auto Scaling Groups in EC2 section and create Auto Scaling Group.
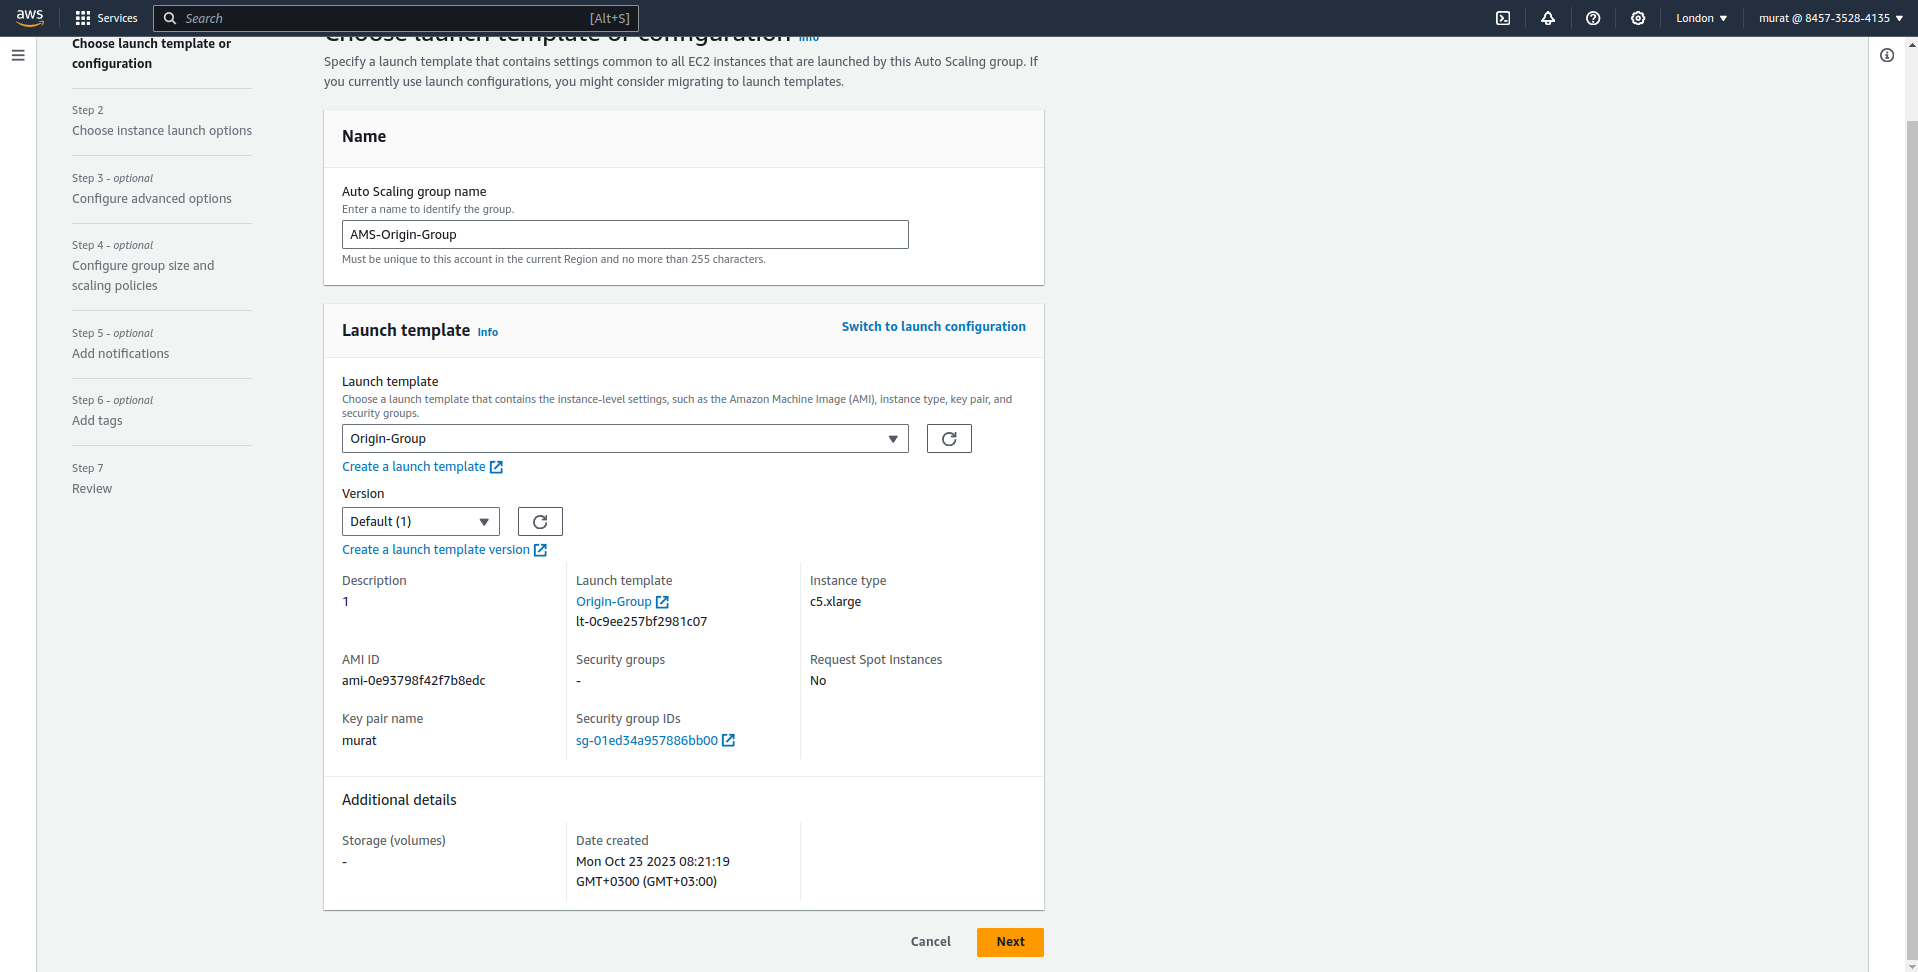
- Give a name to scaling group. We give “AMS-Origin-Group” as a name and then Select your launch template group that you have created earlier for origin group as shown in below image.
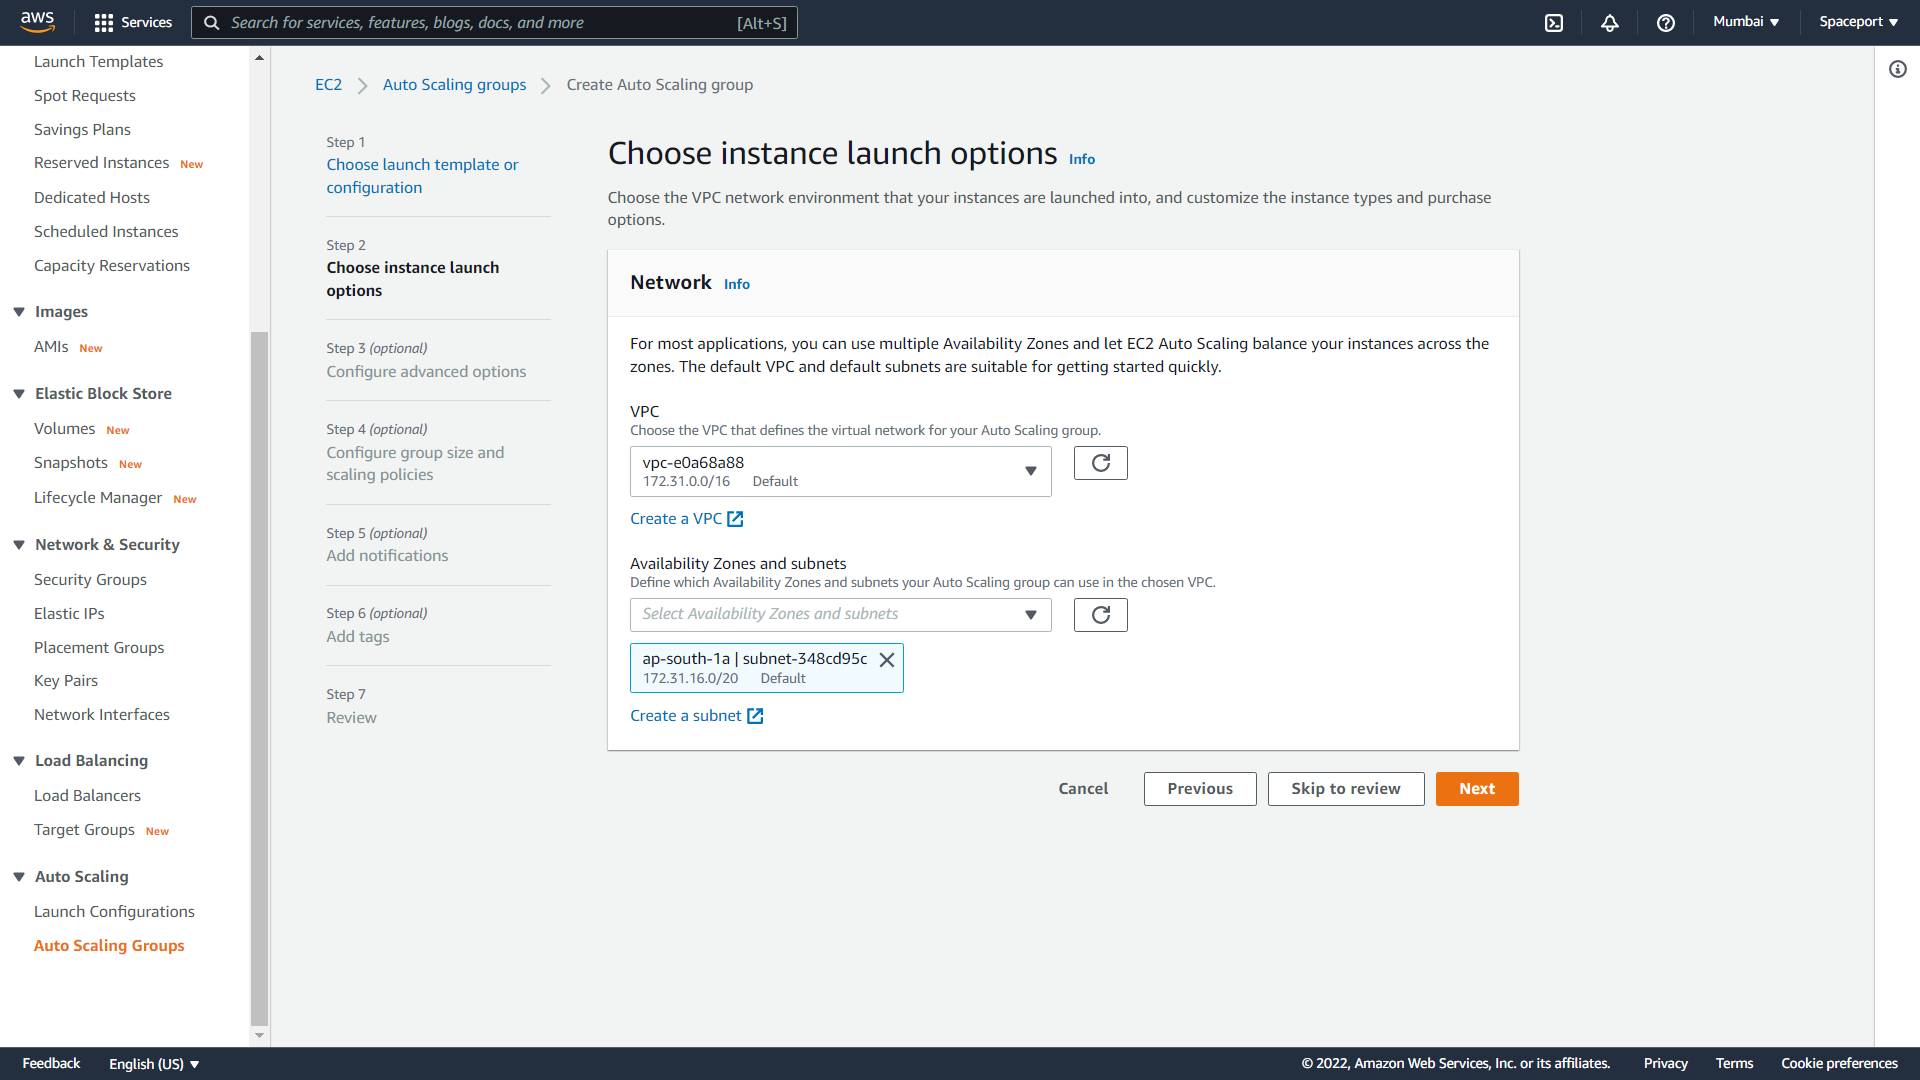
- Choose “ap-south-1a” subnet. We choose only one subnet to let all instances appear in the same subnet for having better connectivity.
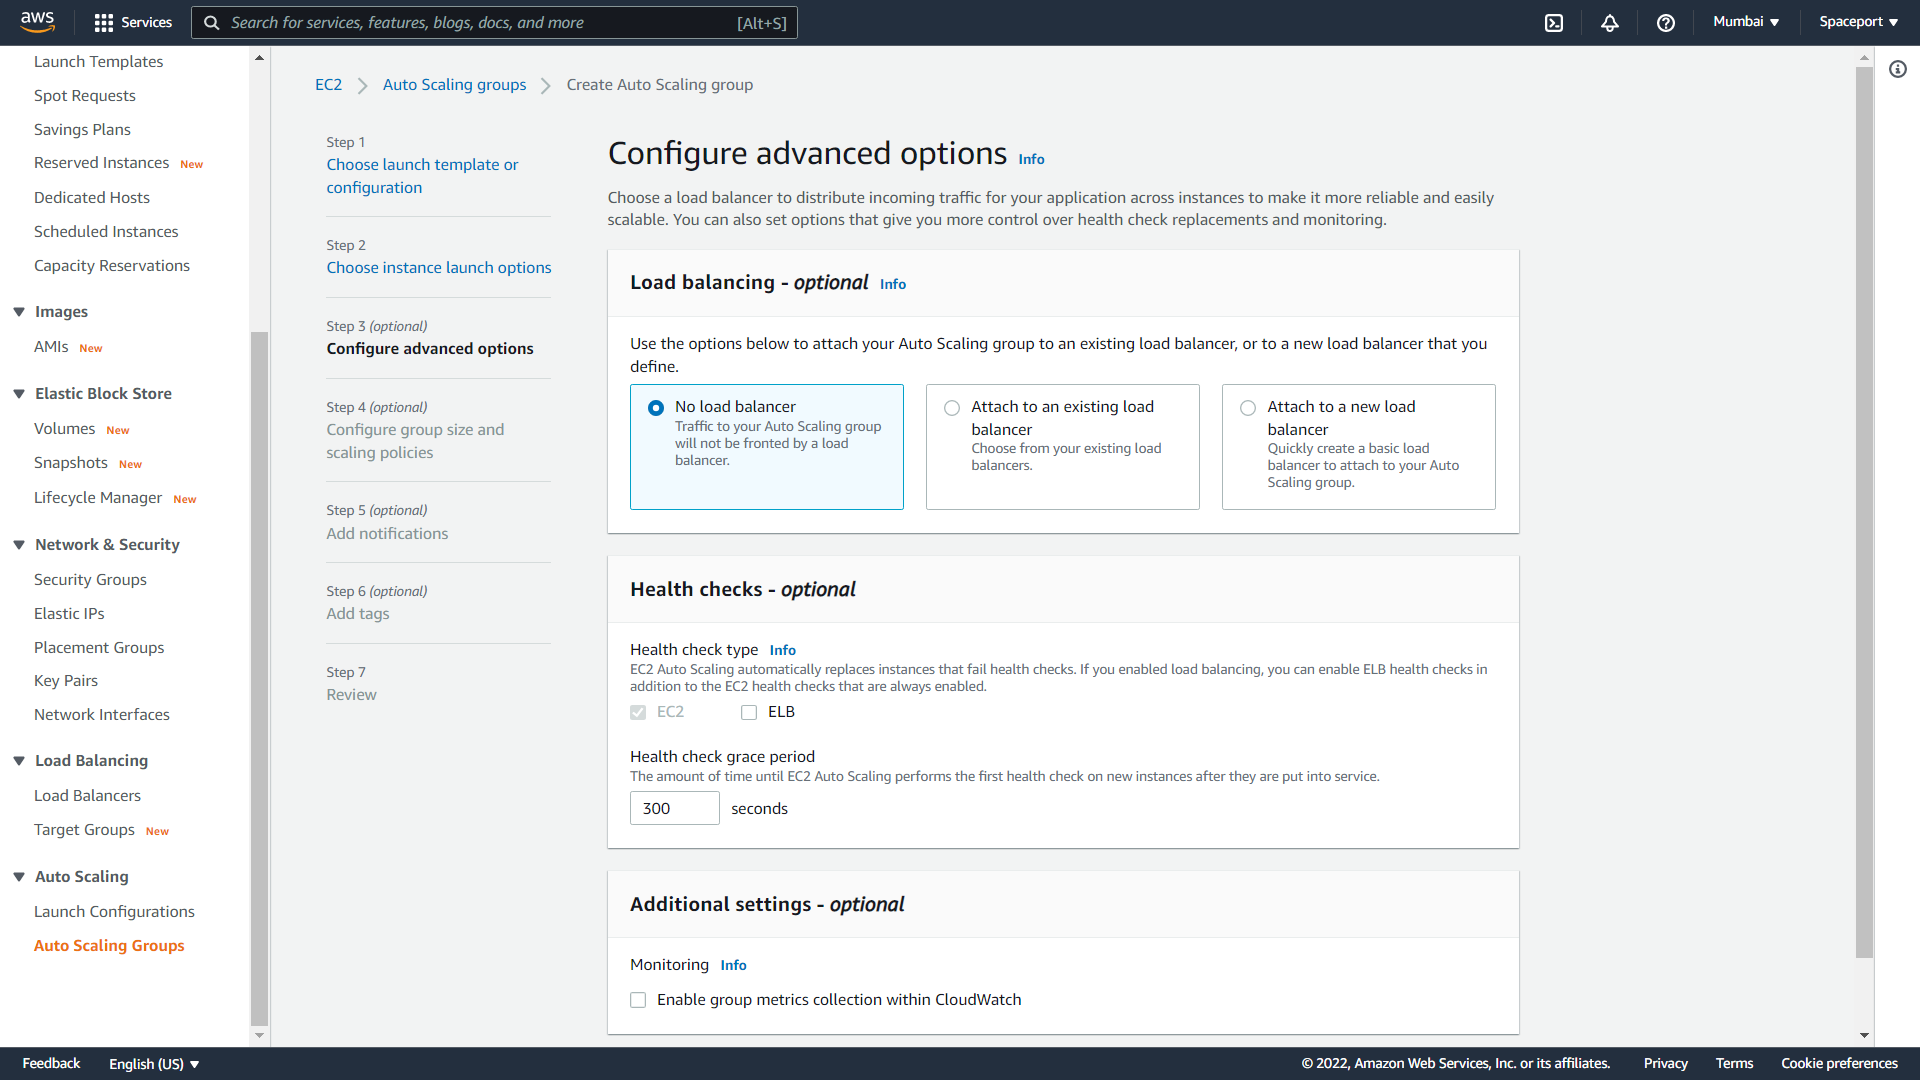
- In Configure advance options you need to select existing load balancer option that we will create later to attach auto scaling groups with it.
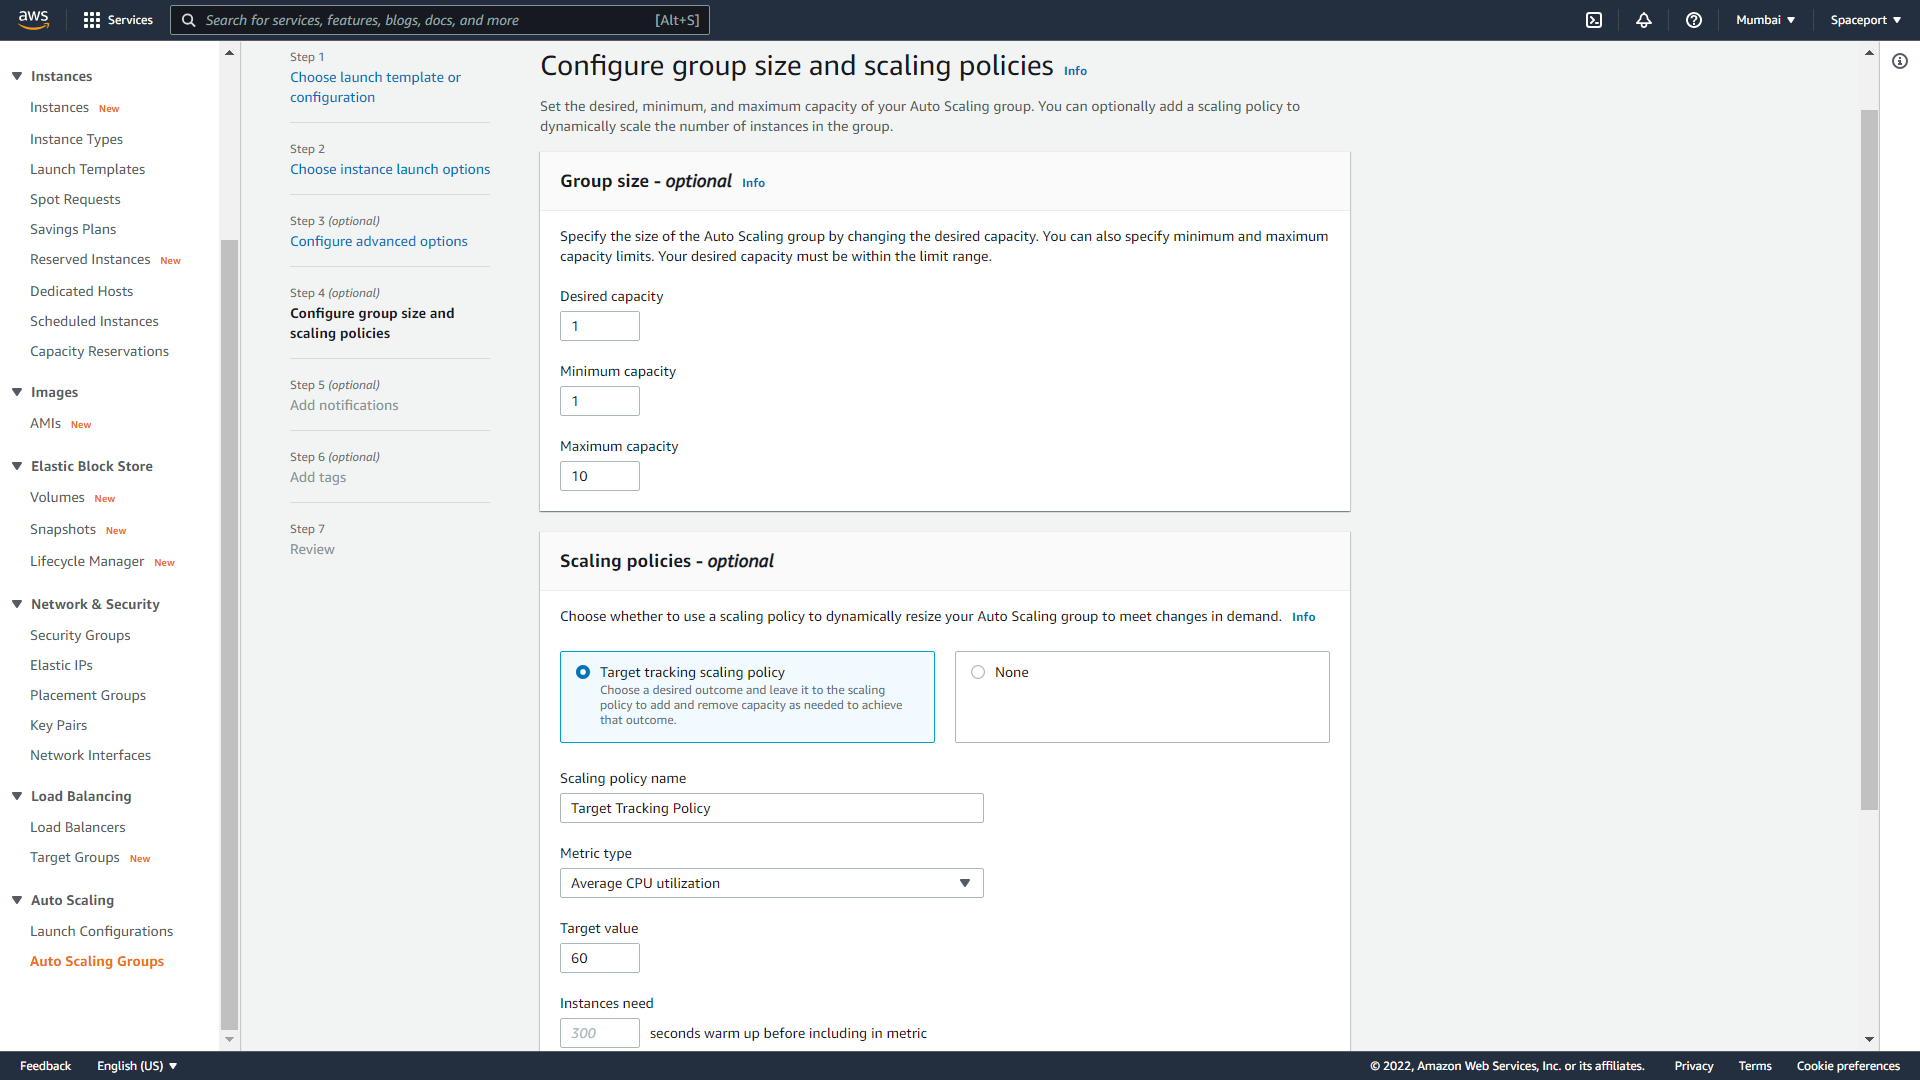
- Choose your scaling policy. In our sample below, our origin group will scale up to maximum 10 instances by providing Average CPU Utilization with %60. Then Click Next and Next.
- Lastly, Review screen will come and click the “Create Auto Scaling group”.
Step 3: Install Scalable Edge Group
Installing scalable edge group almost same as scalable origin group. Please go to Step 2 again and follow same steps one more time. Just don’t forget to change naming (for instance give group name as Edge Group) and configure scaling policy and instance type according to your needs. If you have any question or problem with this, please let us know through support@antmedia.io.
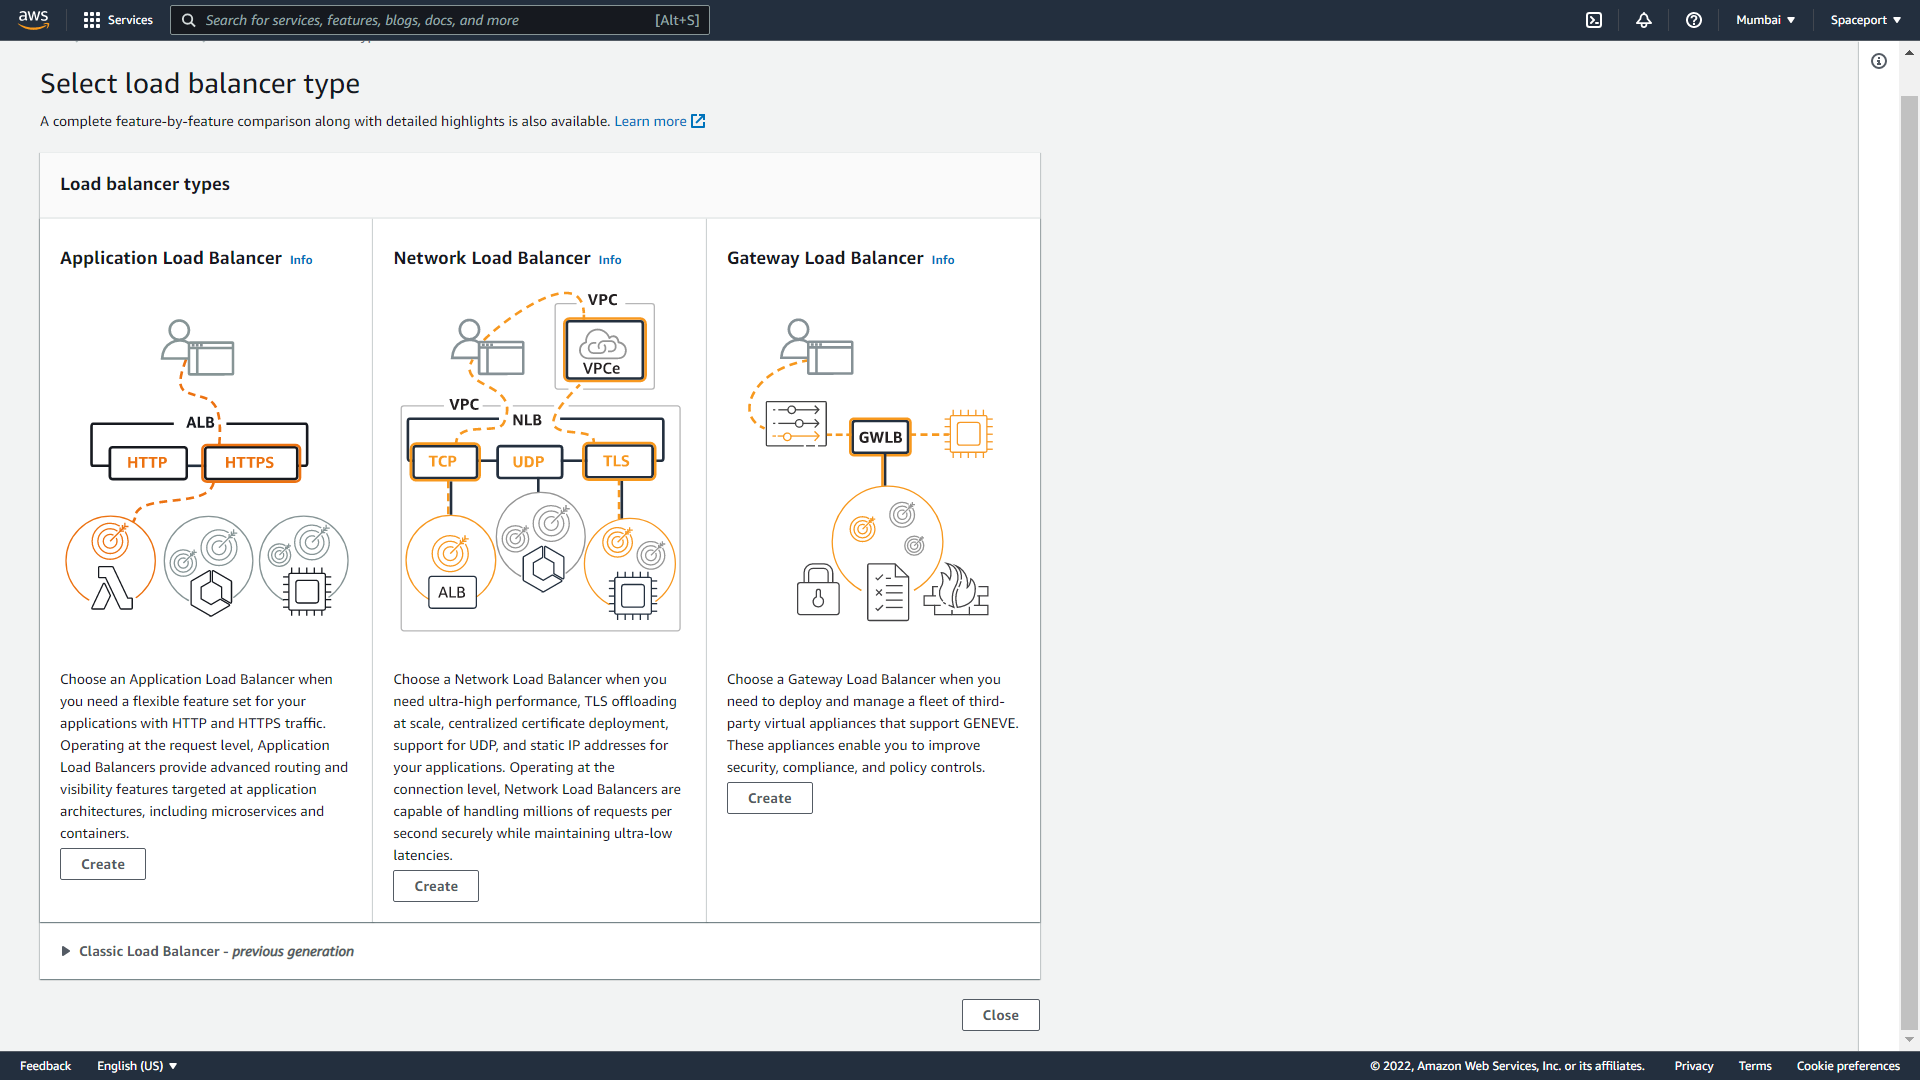
Step 4: Install Load Balancer
- Click the
Load Balancing > Load Balancerson EC2 Service and Click the “Create” button under Application Load Balancer.
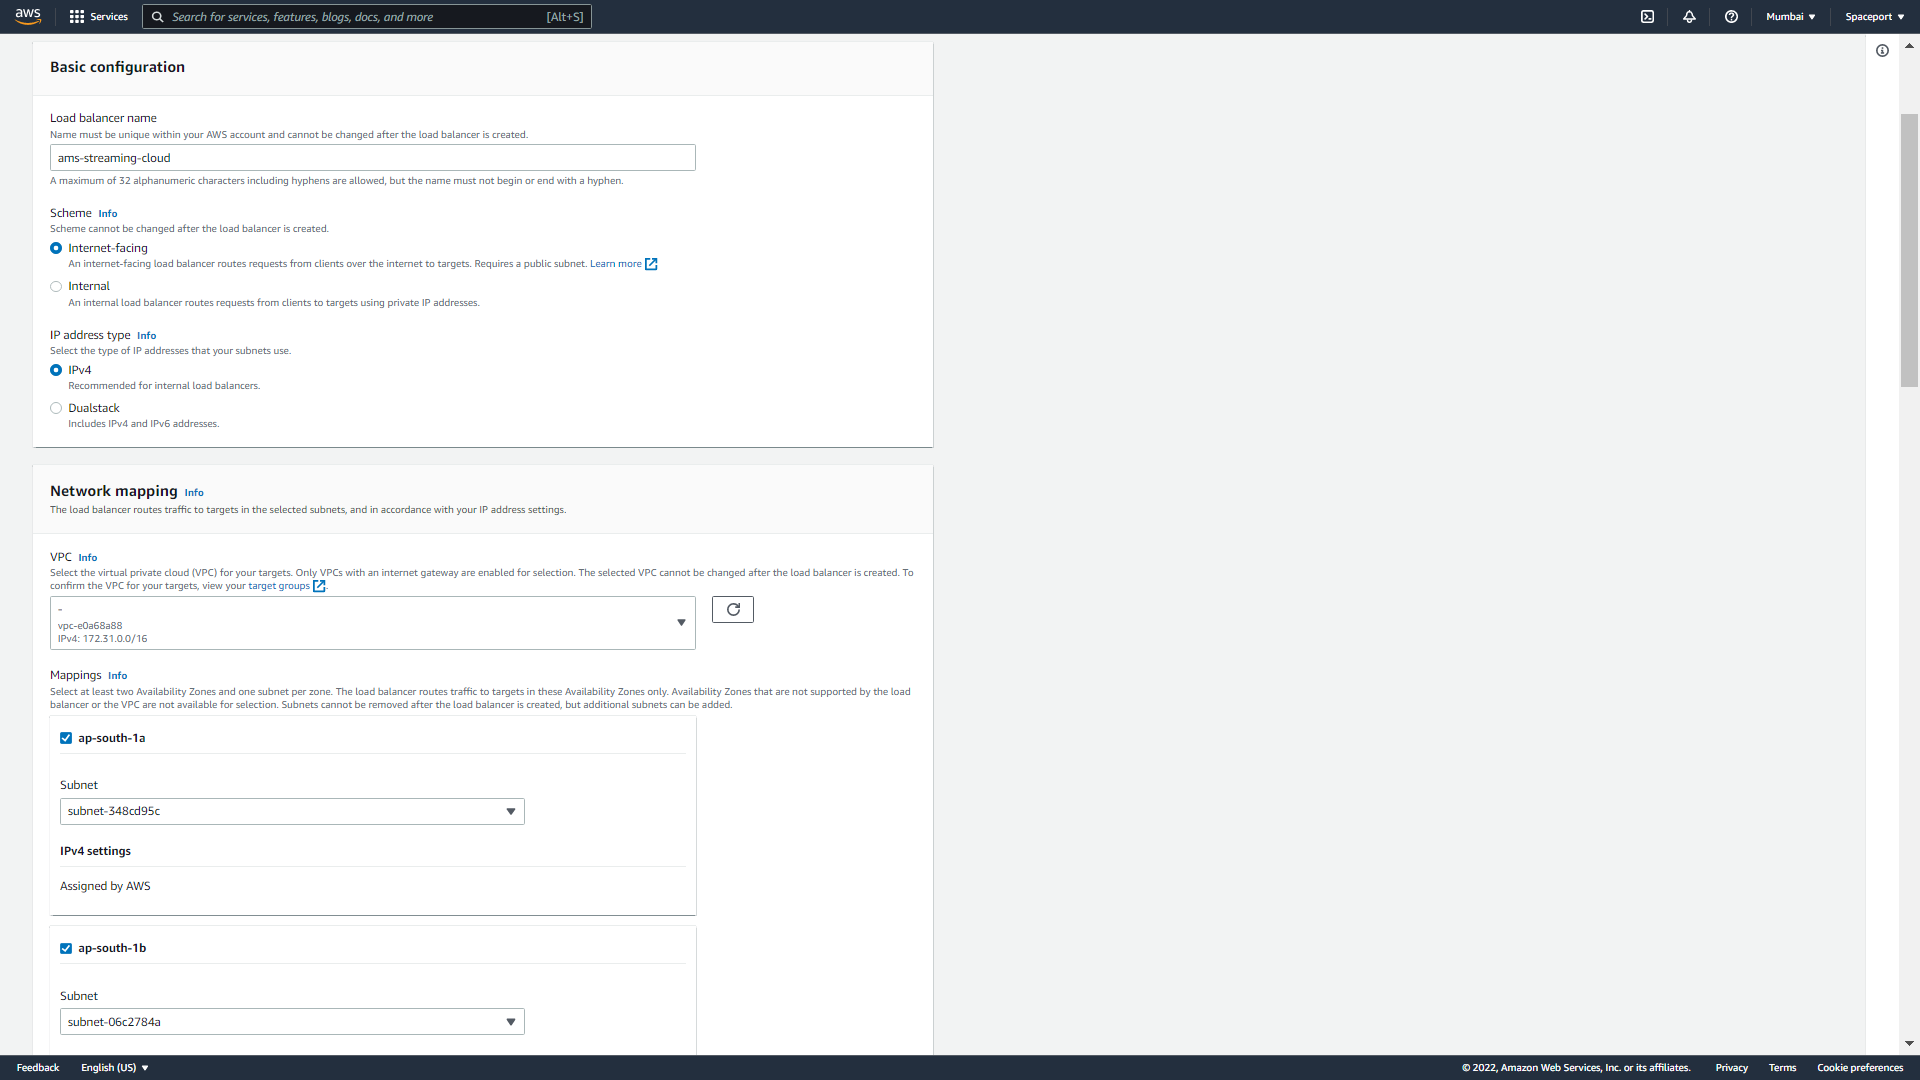
- Give a name to your Load Balancer and basic configuration should be like in image below and choose ap-south-1a and ap-south-1b for availability zones.
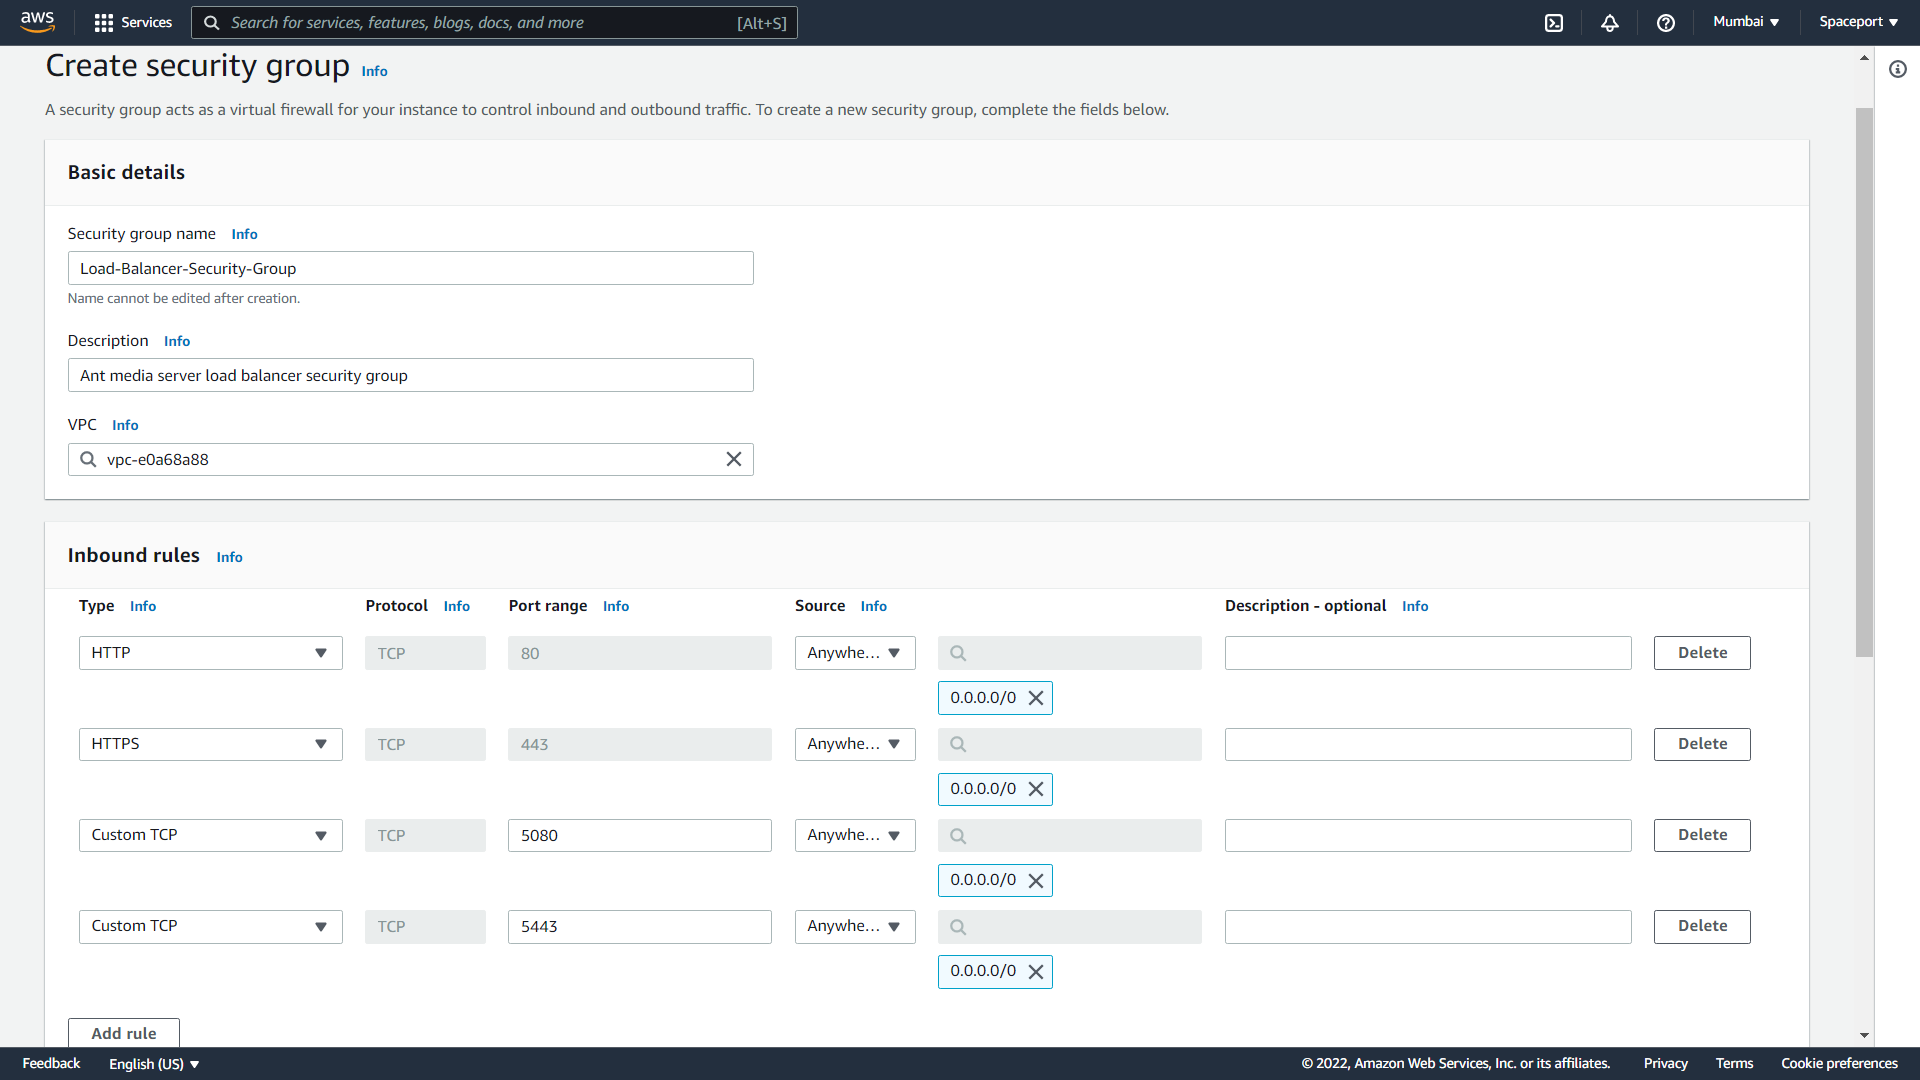
- Now we need to choose load balancer security group which we will create by clicking create new security group option.
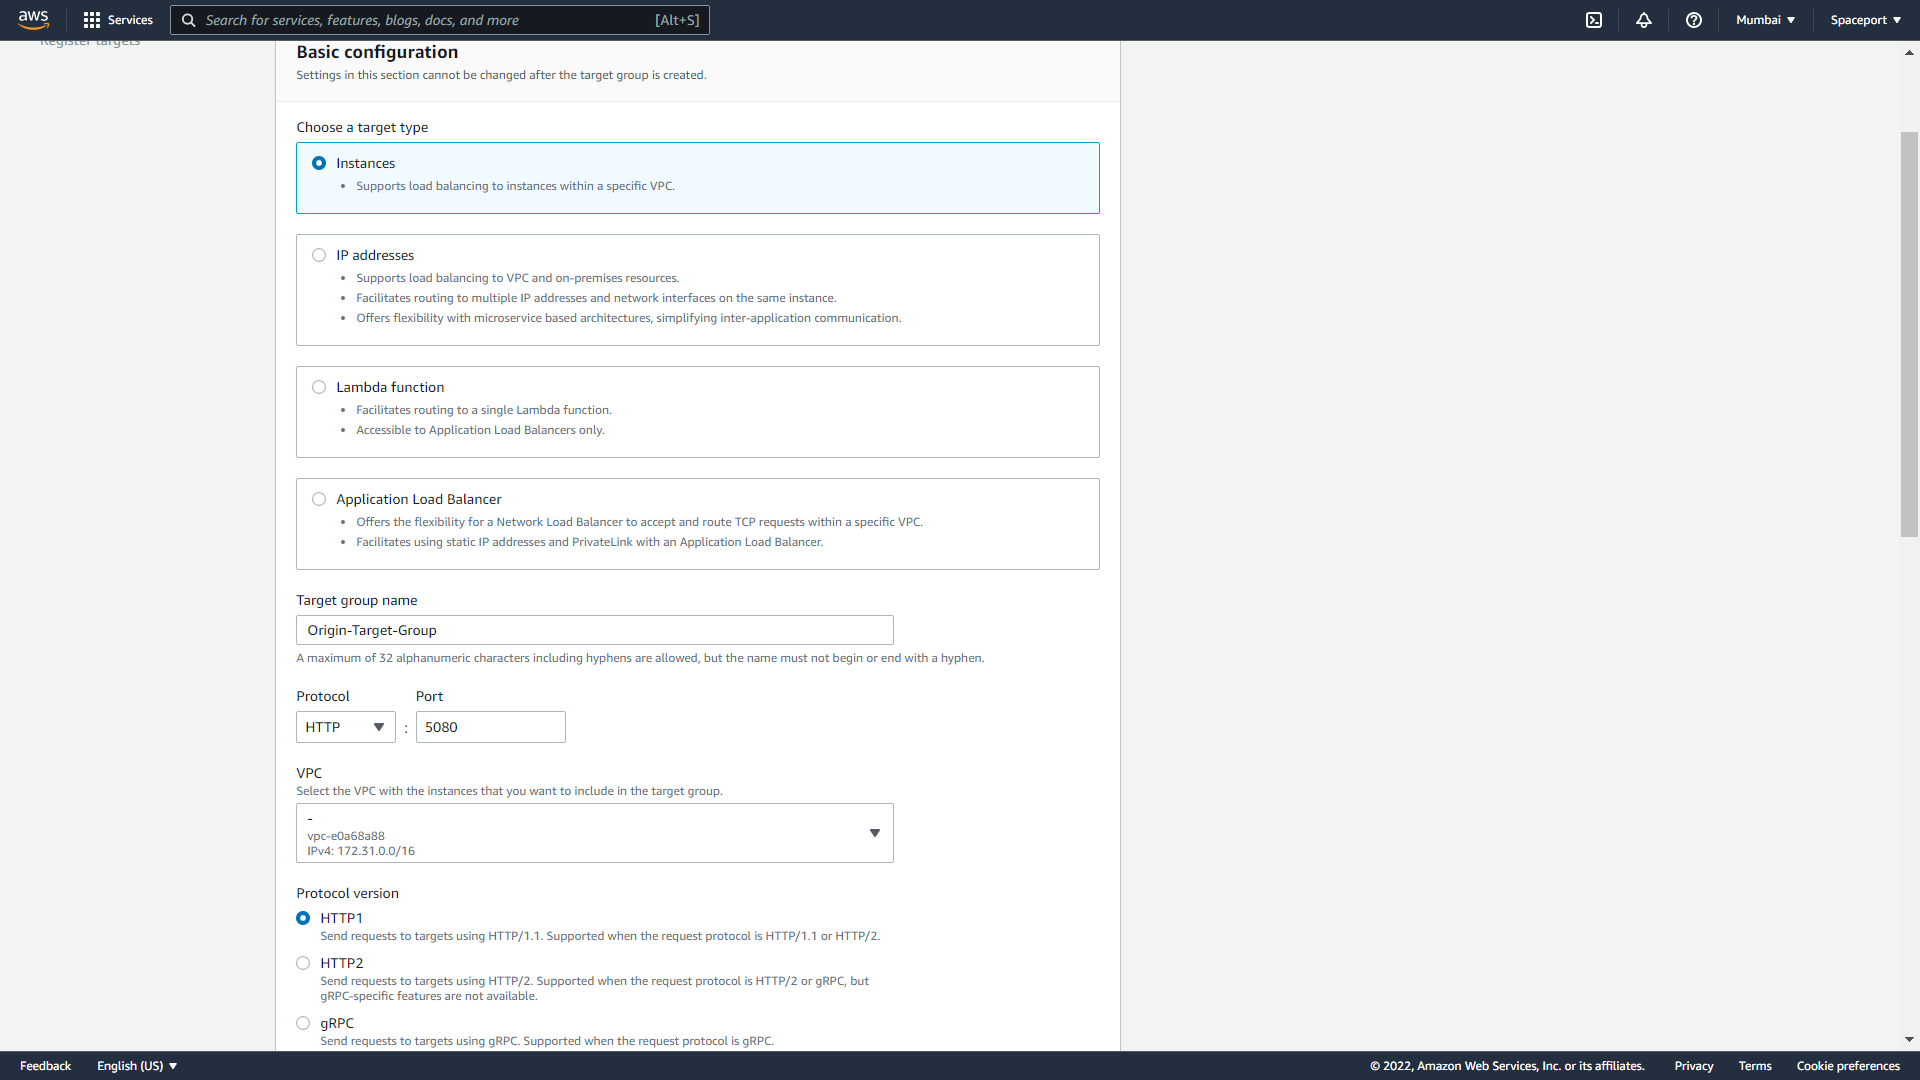
- Before moving further in Load balancer configuration we need to create target groups for both Origin & Edge and forward with HTTP through 5080 port. In the Register Targets group, do nothing, just proceed because we bind target later. In below example we have created origin target group and same for Edge will be created.
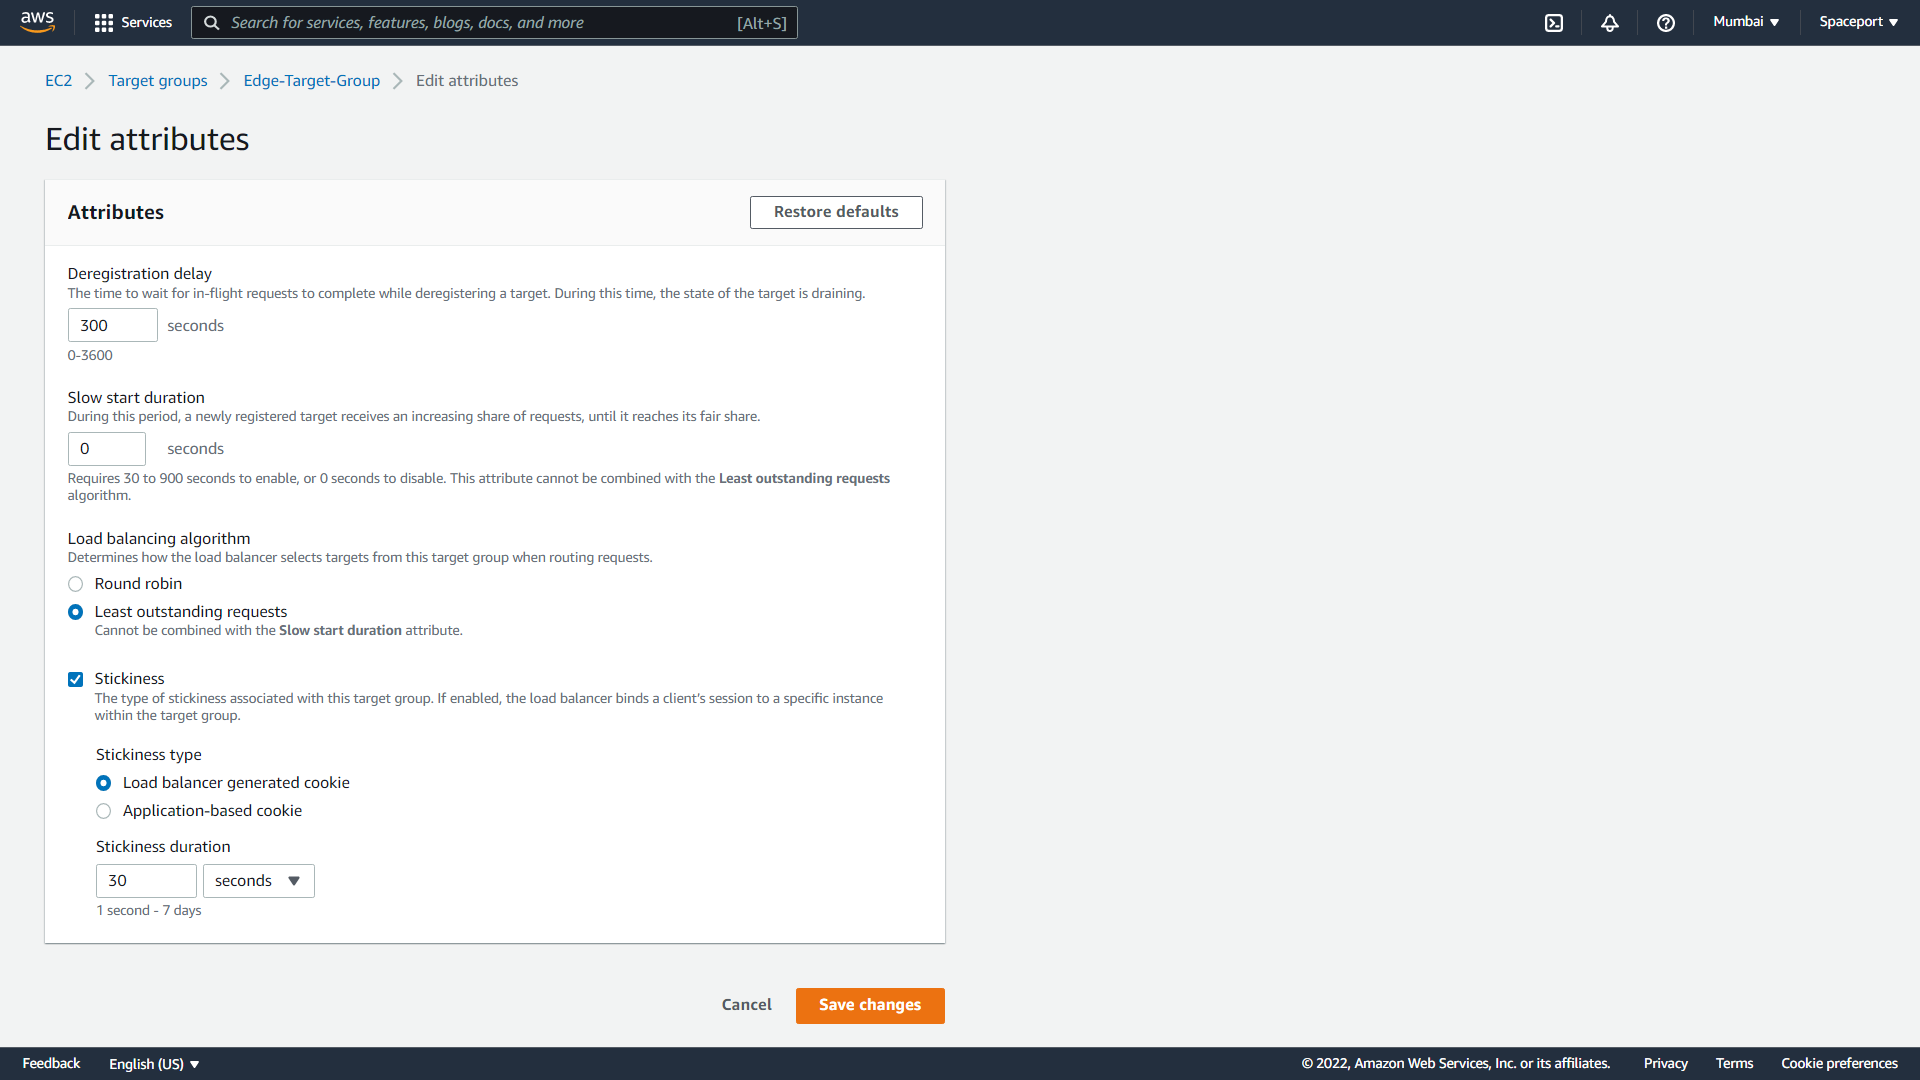
- After creating Target Groups, again go to
EC2 > Target Groups > Edit attributesand change the Load Balancing algorithm for Edge and Origin as below.
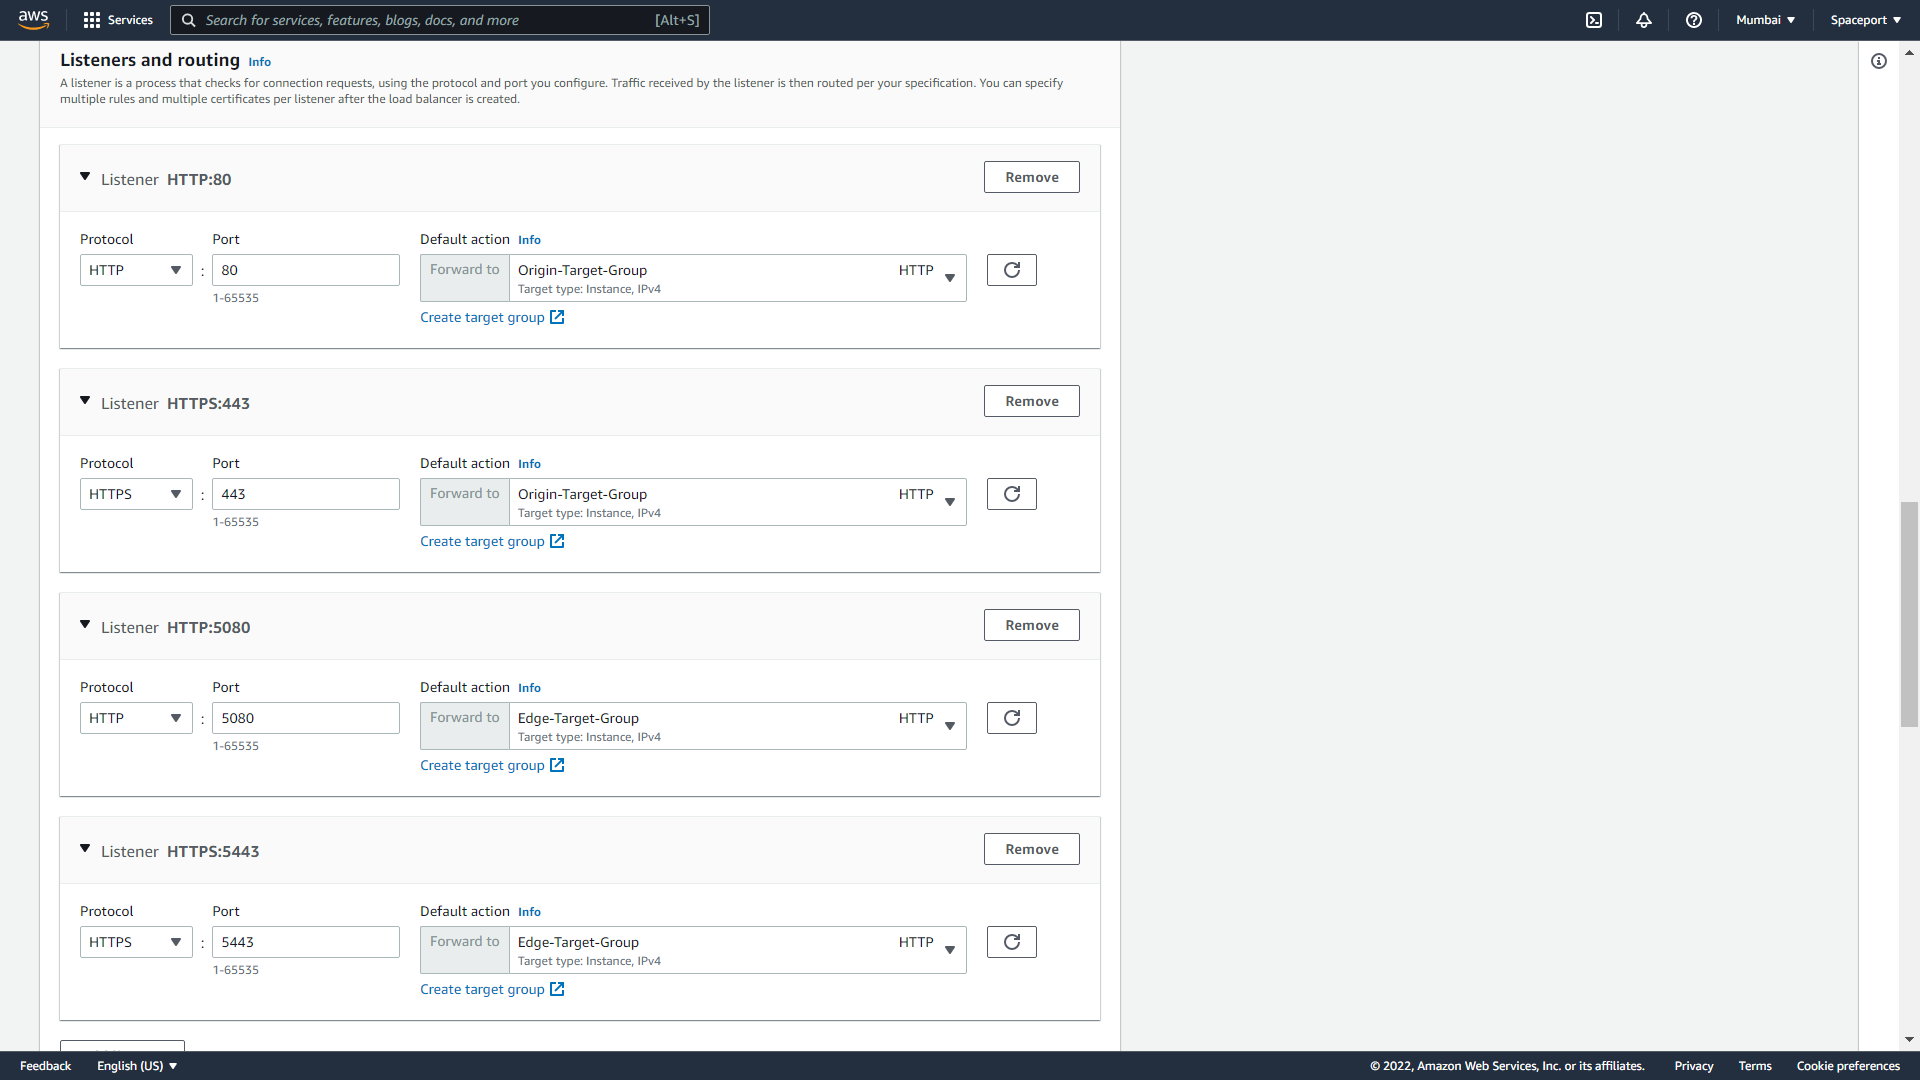
- Now continue load balancer configuration, choose both HTTP and HTTPS by clicking “Add listener”. The port settings should be like in the image below and we need to bind target groups now to forward requests to origin & edge target groups. Also in Auto scaling groups advance configuration please attach the created load balancer now.
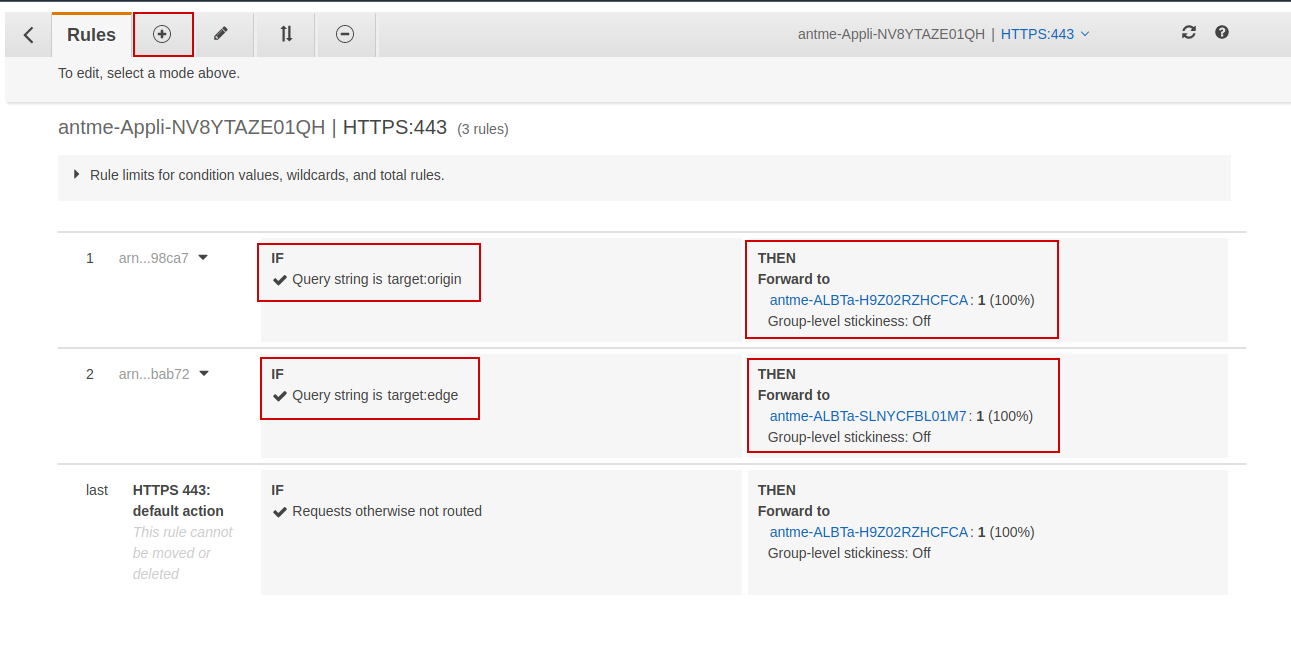
- For the next versions, you need to configure as follows. After adding these rules, you can reach edge/origin using a single url for example https://yourdomain.com/WebRTCAppEE/index.html?target=origin to the origin cluster and https://yourdomain.com/WebRTCAppEE/index.html?target=edge to the edge. You will be able to reach. In other words, we are eliminating the 5443, 443 port separation.
Click Load Balancer > Your LoadBalancer > HTTPS: 443 > View/Edit Rules and add 2 rules as below.
- Now Choose your domain certificate in Secure listener settings for secure streaming (If you don’t know how to create certificate for ACM, please follow this guide and create load balancer. Also don’t forget to add CNAME for your load balancer. For instance, every load balancer has a DNS name like “xxxx.ap-south-1.elb.amazonaws.com” so that you need to add CNAME for your subdomain that points to your load balancer address.
Right now Everything is ok. Just let me give a brief information about the difference between publish and play. In our load balancer configuration, we forward HTTP(80) and HTTPS(443) to Origin Group and we forward HTTP(5080) and HTTPS(5443) to Edge Group. It means that we should connect 80 or 443 ports to publish and connect 5080 or 5443 to play streams. Otherwise, play requests goes to origin group and publish request goes to edge group and it’s likely create some performance issues according to your configurations.
Quick Link: How to configure RTMP Load Balancer in AWS ?
Logging in Web Panel
You can login to web panel via the https://your-domain-name/ and login with “JamesBond” and the first instances instance-id in your origin group. If you don’t know the instance-id, you need to change your password.
In the latest version, we store passwords with MD5 encryption. You can encrypt your password using the following methods:
Via Terminal:
echo -n 'new-password' | md5sum
Alternatively, you can use an online MD5 encrypter page, such as https://www.md5online.org/md5-encrypt.html
SSH into your MongoDB instance and execute the following commands in the terminal:
$ mongo
use serverdb
db.getCollection('User').find()
db.User.updateOne({"_id": "[Replace with user ID]"}, {$set:{password: "[Replace with encrypted password]"}})
The command will provide an output similar to the following:
{ "_id" : ObjectId("5e978ef3c9e77c0001228040"), "className" : "io.antmedia.rest.model.User", "email" : "JamesBond", "password" : "e4e6ca42342f95978a17c6257593c1e1", "userType" : "ADMIN" }
Enable IP Filtering
Please visit: How to enable IP filter behind a load balancer for Ant Media Server?
Test Flight
For publishing please visit the https://your-domain-name/WebRTCAppEE/ and click the Start Publishing button. The default stream id is stream1 For playing please visit the https://your-domain-name:5443/WebRTCAppEE/player.html and click the Start Playing button. The default stream will be played.
As you figure out, we connect default https port(443) for publishing and 5443 port for playing. Because we configure load balancer to forward default port(443) to origin group and 5443 to edge group.