Scale AMS with Azure ARM (Azure Resource Manager)
Azure Resource Manager (ARM) is a service provided by Microsoft as part of its Azure cloud computing platform that allows for centralized resource management. Azure Resource Manager allows you to easily automate and orchestrate the deployment of Ant Media Server clusters using a single file.
Creating Azure Resource Group
Let's now dive into setting up the ARM template and proceed step by step.
-
Sign in to Azure Portal Sign in to your Azure account and navigate to portal.azure.com
-
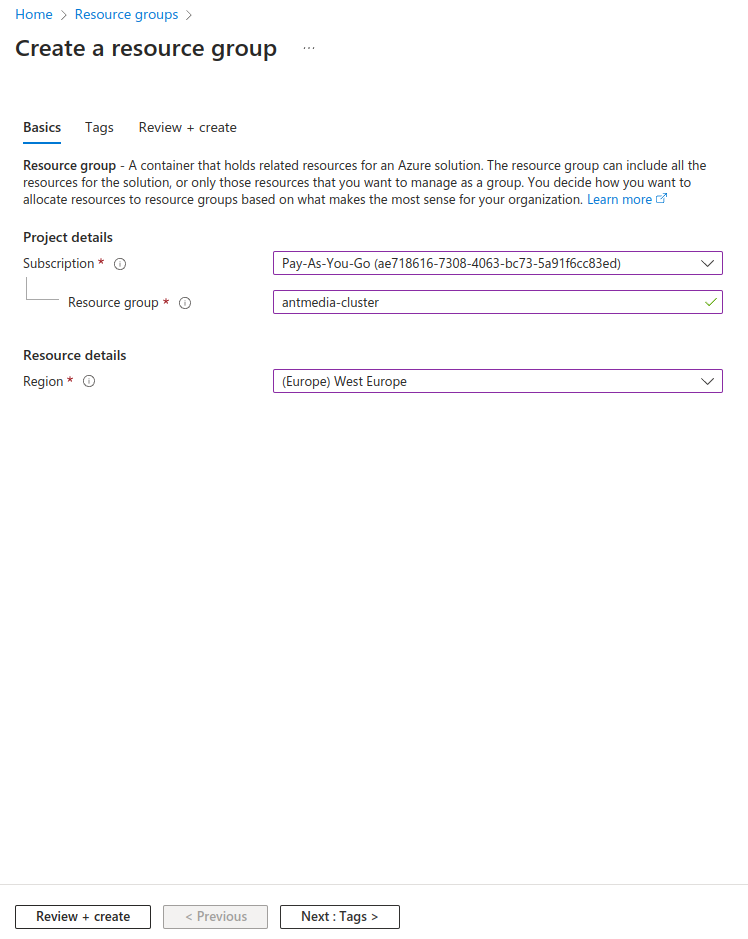
Search
Resource groupsfrom the search bar, then click the New button to create a new resource group. Specify the resource group name and location.
Azure Resource Manager Custom Deployment Template
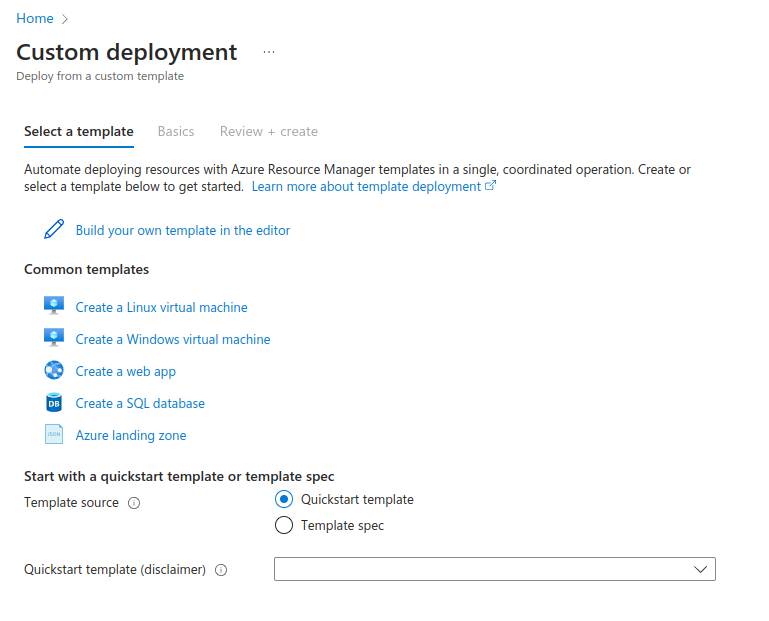
- Search "Deploy a custom template" from the search bar, then click the Build your own template in the editor button to upload the template that you download from here and then upload the template by using Load file.
- After uploading the ARM template, you will see a screen like the one below. Fill in the required parameters.
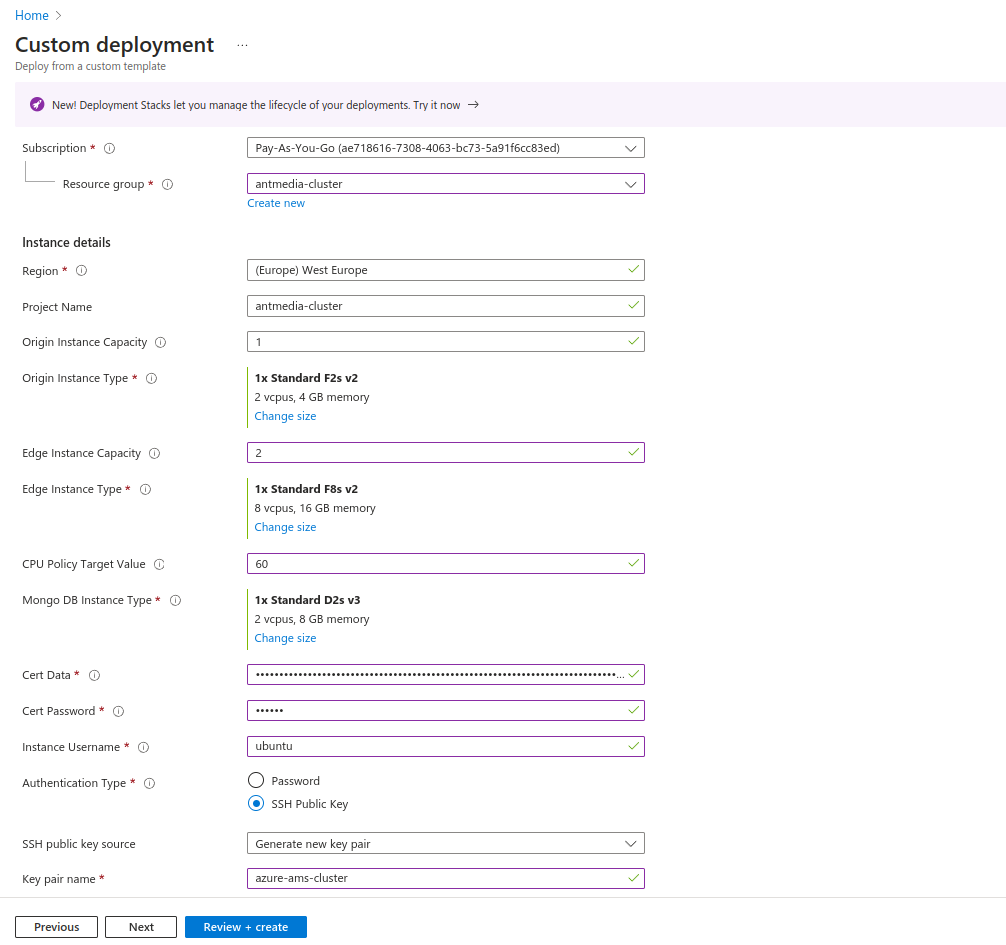
Resource Group: The resource group where the cluster will be installed.
Region: The region where the cluster will be deployed.
Origin Instance Capacity: The number of instances that will be created in the origin group.
Origin Instance Type: The origin node instance type.
Edge Instance Capacity: The number of instances that will be created in the edge group.
Edge Instance Type: The edge node instance type.
CPU Policy Target Value: Average CPU utilization of the auto-scaling group. When the server reaches a 60% CPU utilization average, new servers will be added.
MongoDB Instance Type: MongoDB's instance type
Cert Data: The base64 version of your certificate in pfx format.
Cert Password: Password for your certificate
Authentication Type: Whether the connection/SSH method to all instances will be password or SSH key. If you choose the password, you must fill in the password field.
Certification processes (Cert Data and Cert Password)
If you do not have a certificate, you can check this link to create one.
- Convert the existing or newly created certificate to pfx format as shown below (Enter the password you entered here in the Cert Password field.).
openssl pkcs12 -inkey /etc/letsencrypt/live/azure.antmedia.cloud/privkey.pem -in /etc/letsencrypt/live/azure.antmedia.cloud/cert.pem -export -out azure.antmedia.cloud.pfx
- Now convert the *.pfx format to base64 as follows:.
openssl base64 -in azure.antmedia.cloud.pfx -out azure.antmedia.cloud.base64
Replace the azure.antmedia.cloud domain with your own domain.
-
Enter the content of the resulting file with the .base64 extension into Cert Data field.
-
After filling in all fields, click Review + Create button to start the deployment process. Wait for the deployment completion of the AMS cluster to complete. This process usually takes a few minutes but may vary depending on the size and configuration of the cluster.
Connecting to the Cluster
Now that the cluster is created and ready, let’s connect to it.
- Navigate to the Application Gateway service.
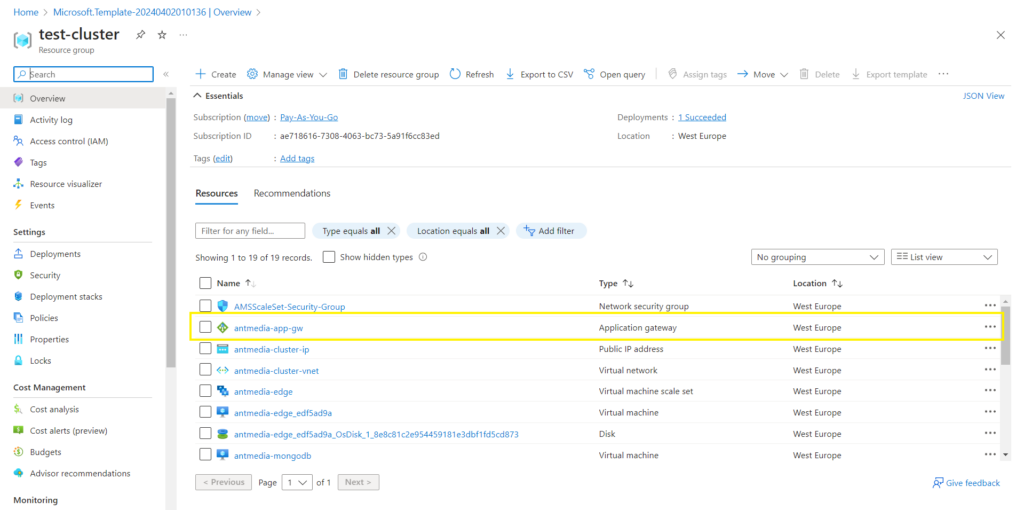
- You can connect to your cluster via the application gateway Public IP or you can update your DNS records based on the certificate hostname.
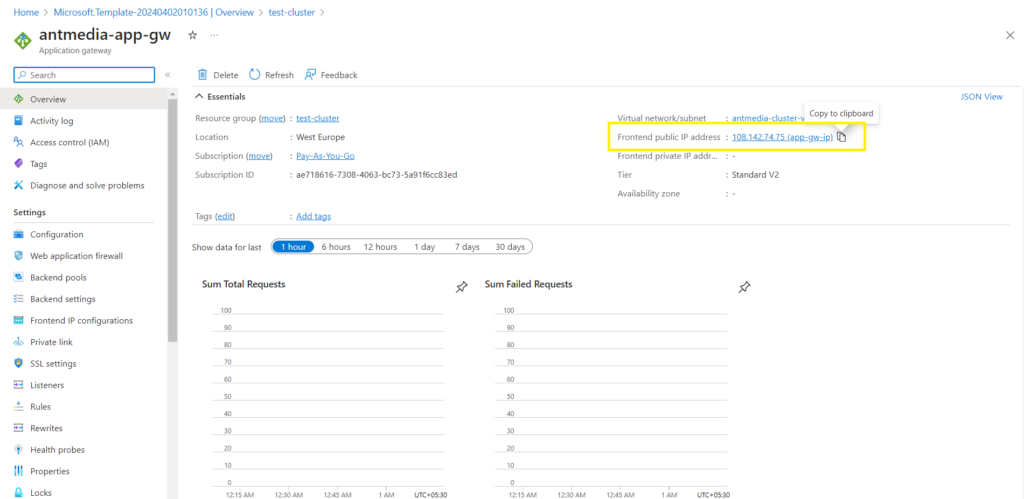
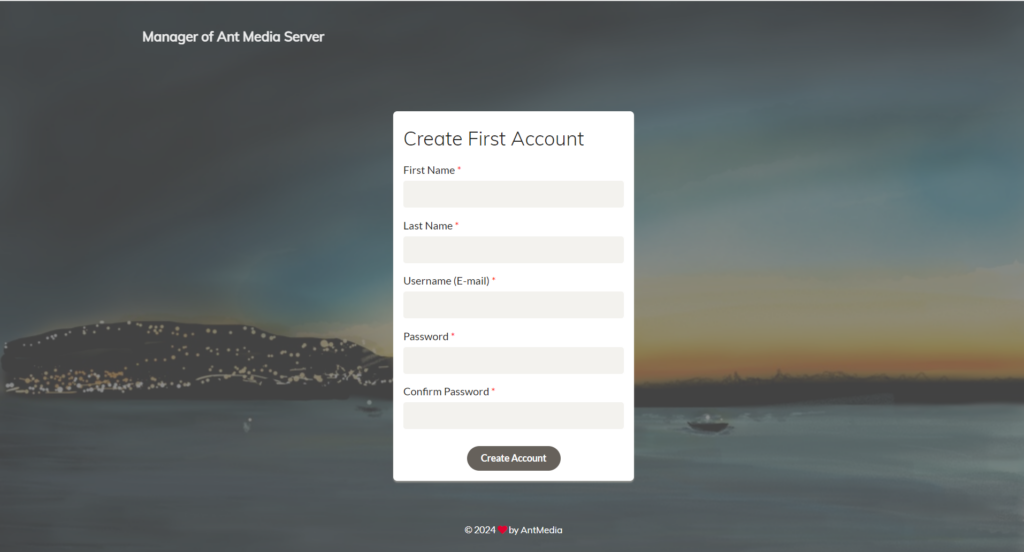
- Once you reach the application gateway IP address, you will see the Ant Media Server Web panel dashboard and can create your login credentials.
- The common name of the certificate was
azure.antmedia.cloud, after I entered the IP address of the Application Gateway from DNS as an A record, I was able to access the Ant Media Server cluster with the domain directly.
- The origin node pool is routed to port 443 whereas the edge nodes can be reached on port 5443.
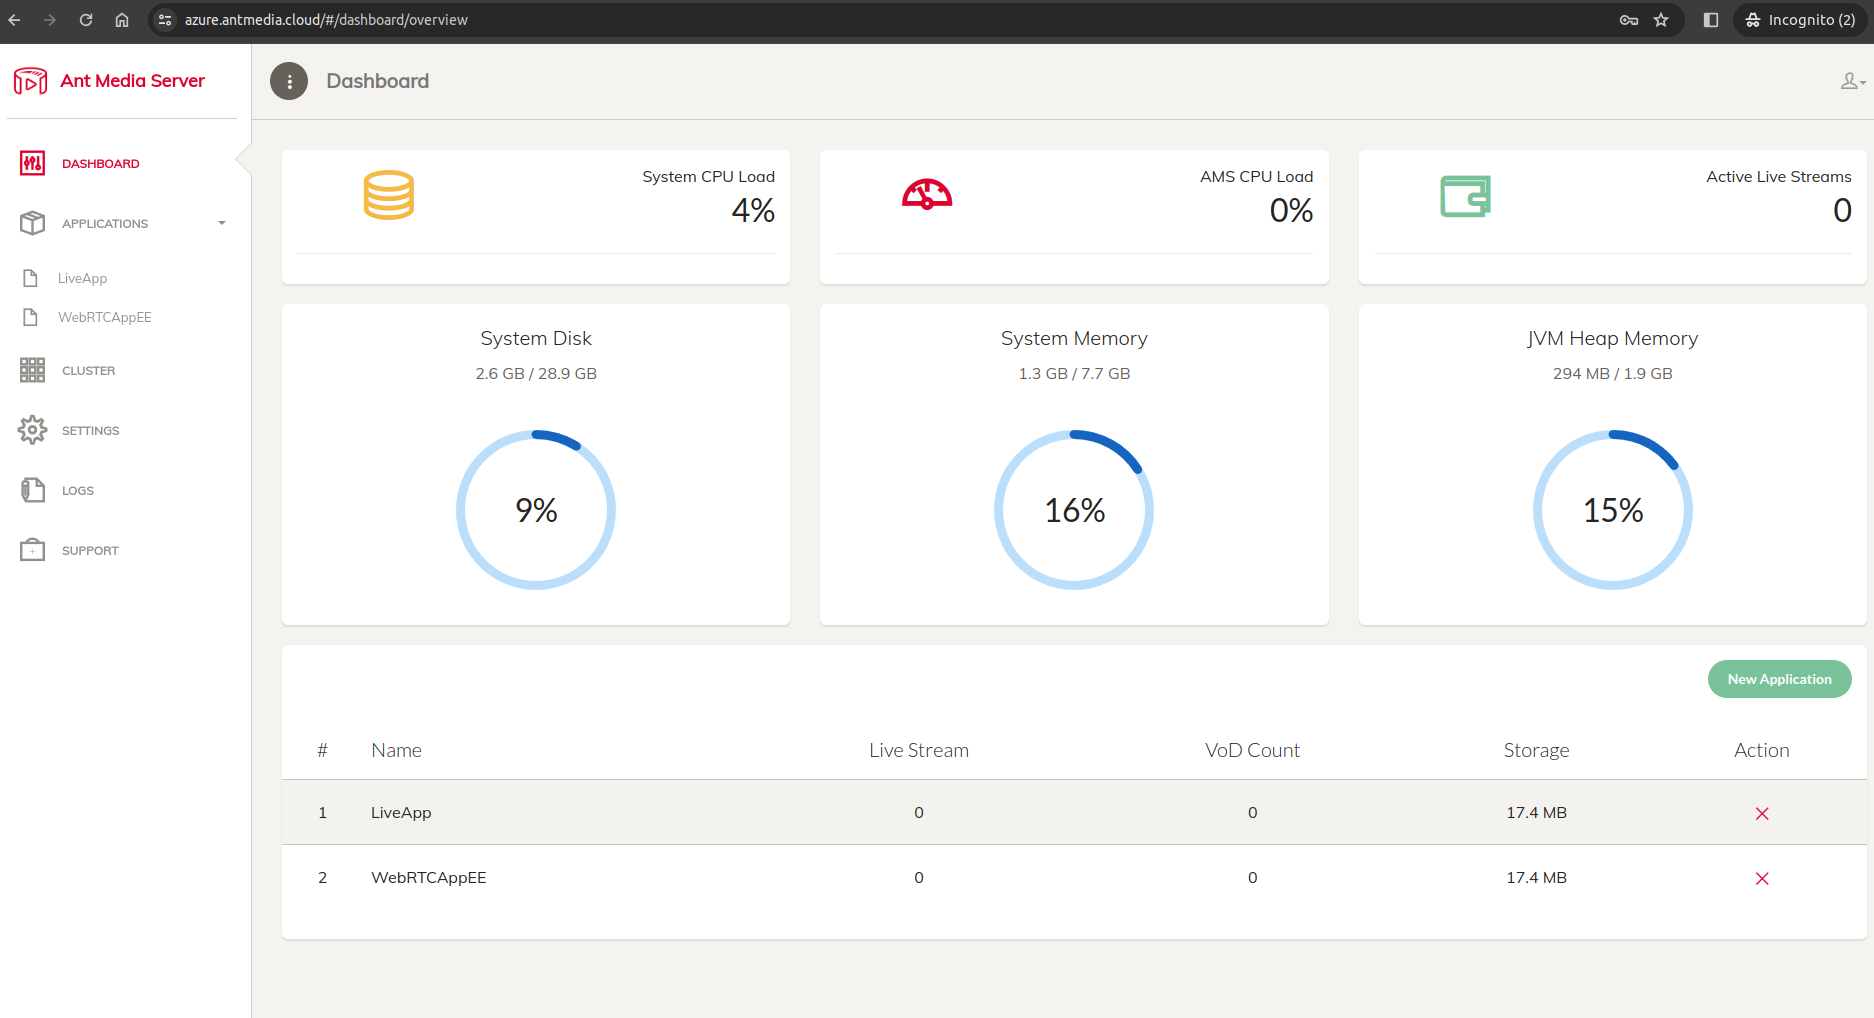
Congratulations! Your Ant Media Cluster has been deployed.
If you have any questions, please just drop your query at GitHub discussions.