How to Ingest SRT with vMix
vMix is a software vision mixer available for the Windows operating system. The software is developed by StudioCoast PTY LTD. Like most vision mixing software, it allows users to switch inputs, mix audio, record outputs and live stream cameras, videos files, audio, and more in resolutions of up to 4K. It can stream up to three destinations at one time.
In this tutorial, we assume that you have installed vMix on your personal computer.
Provide sources
Click the add input button and add an input for the broadcast. As an example, I will add a display input.

As you can see, my input has been added successfully, and its preview can be seen:

Configure vMix
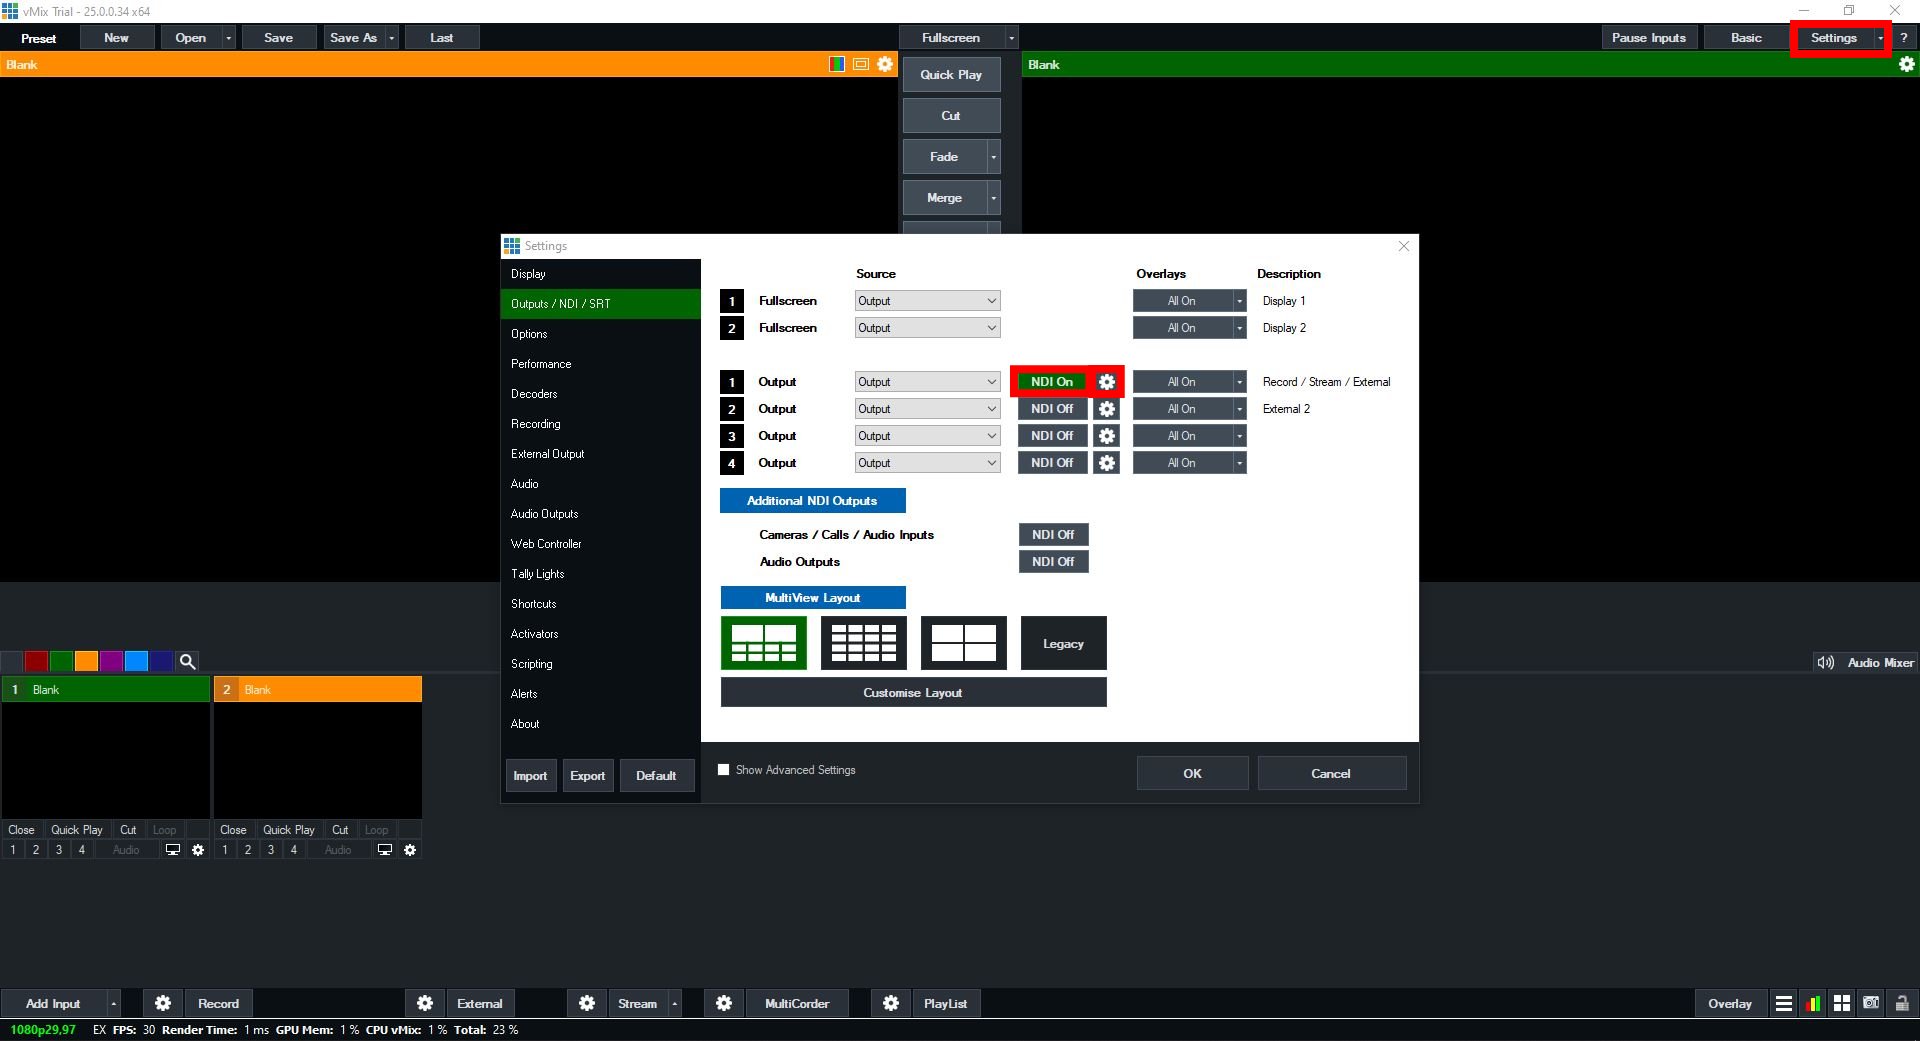
- Click to the setting button on the top right.
- Switch to the NDI On in first output
- Click setting icon in first output
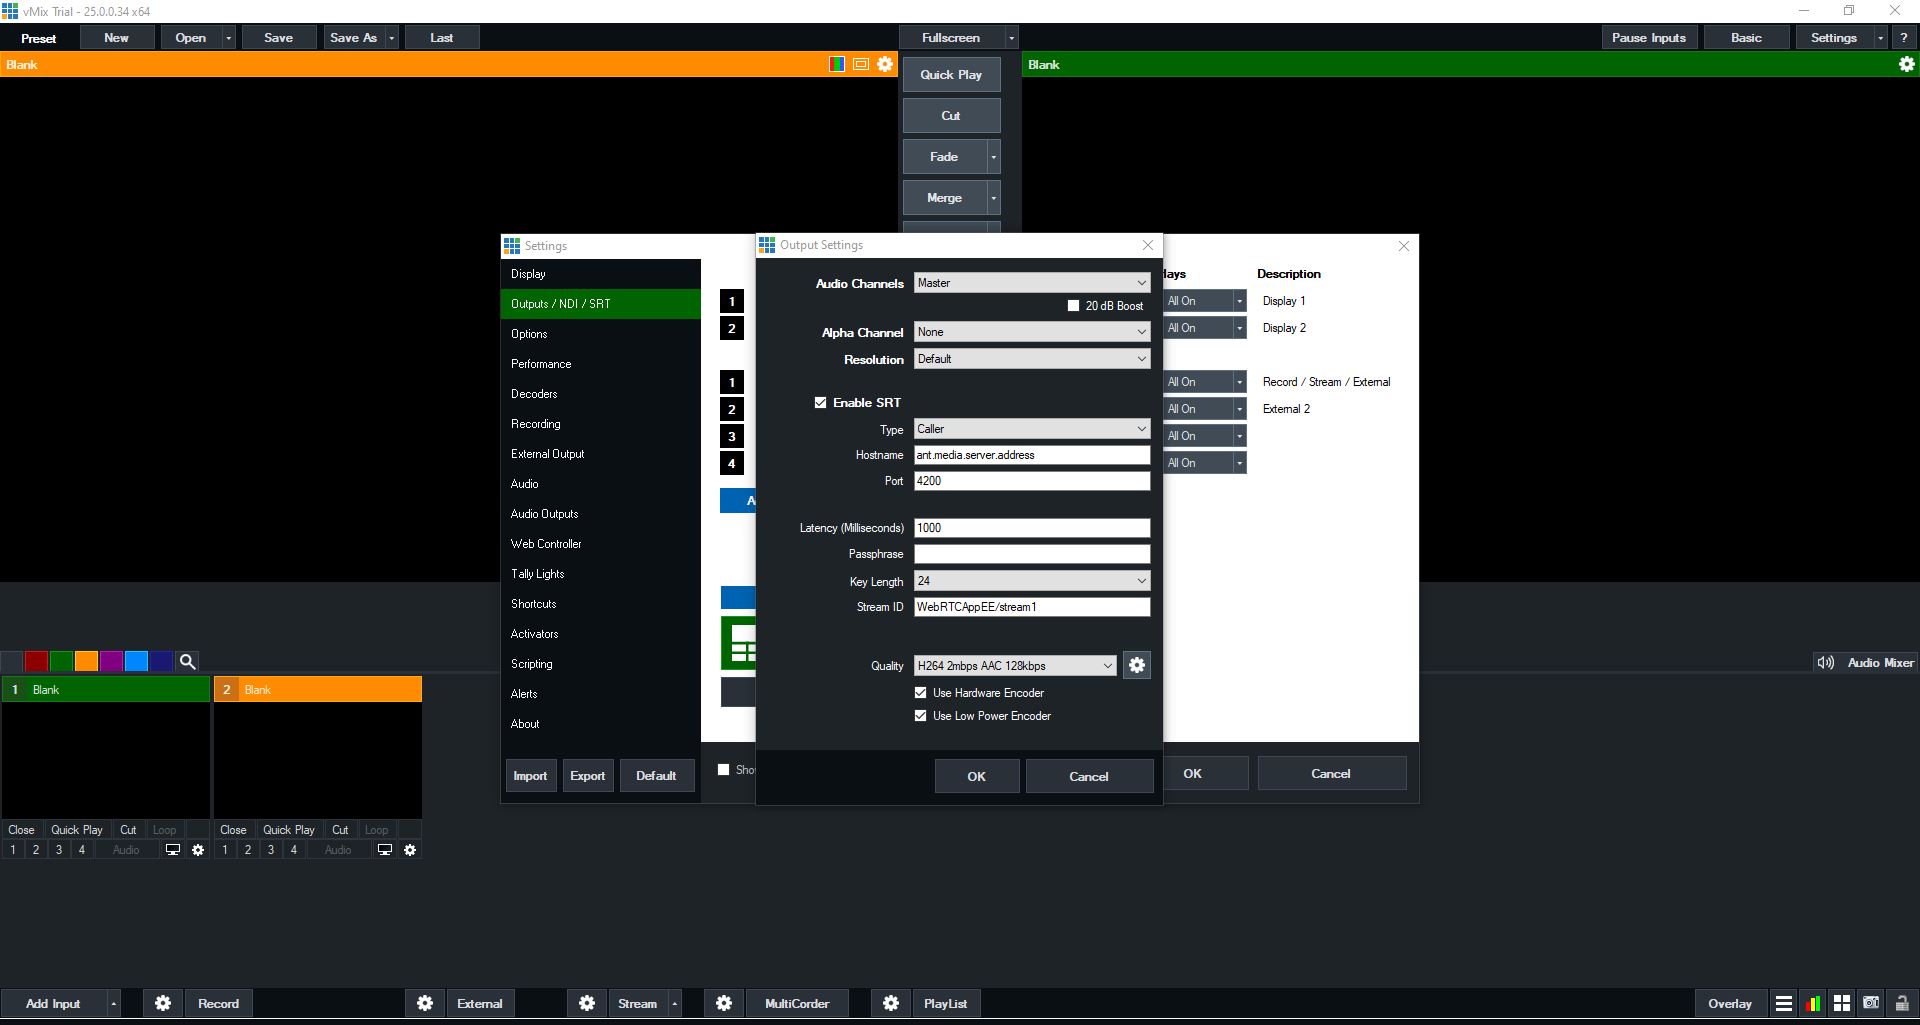
- Click Enable SRT on settings
- In the Hostname box, type your Ant Media Server URL without port. It's like
ant.media.server.address - In the Port box, type your Ant Media Server SRT port number. It's like
4200 - In the Stream ID box, type your App name and stream ID. It's like
WebRTCAppEE/stream1
Tuning
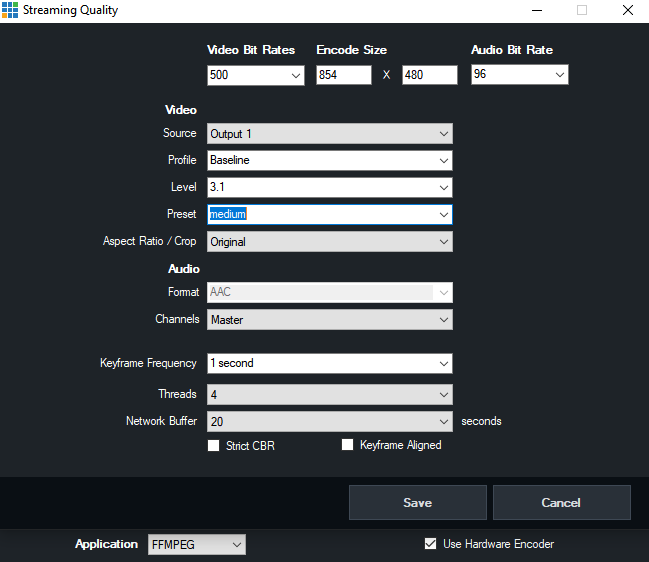
You can use predefined settings but if you click on the gear button next to the quality options, you can select one the options.
- Profile should be
baselineandkeyframe latencyshould be1. - You can set your
leveland yourpresetaccording to your configuration but3.1andmedium presetis good enough to have a good quality stream. - You can enable the
hardware encoderfor using yourGPUin theencoding process.
Start streaming
After configuring according to your needs and setting the server address, you can start the streaming by clicking to stream button at the bottom of the dashboard.
As you can see from the following screenshot, it started to stream.
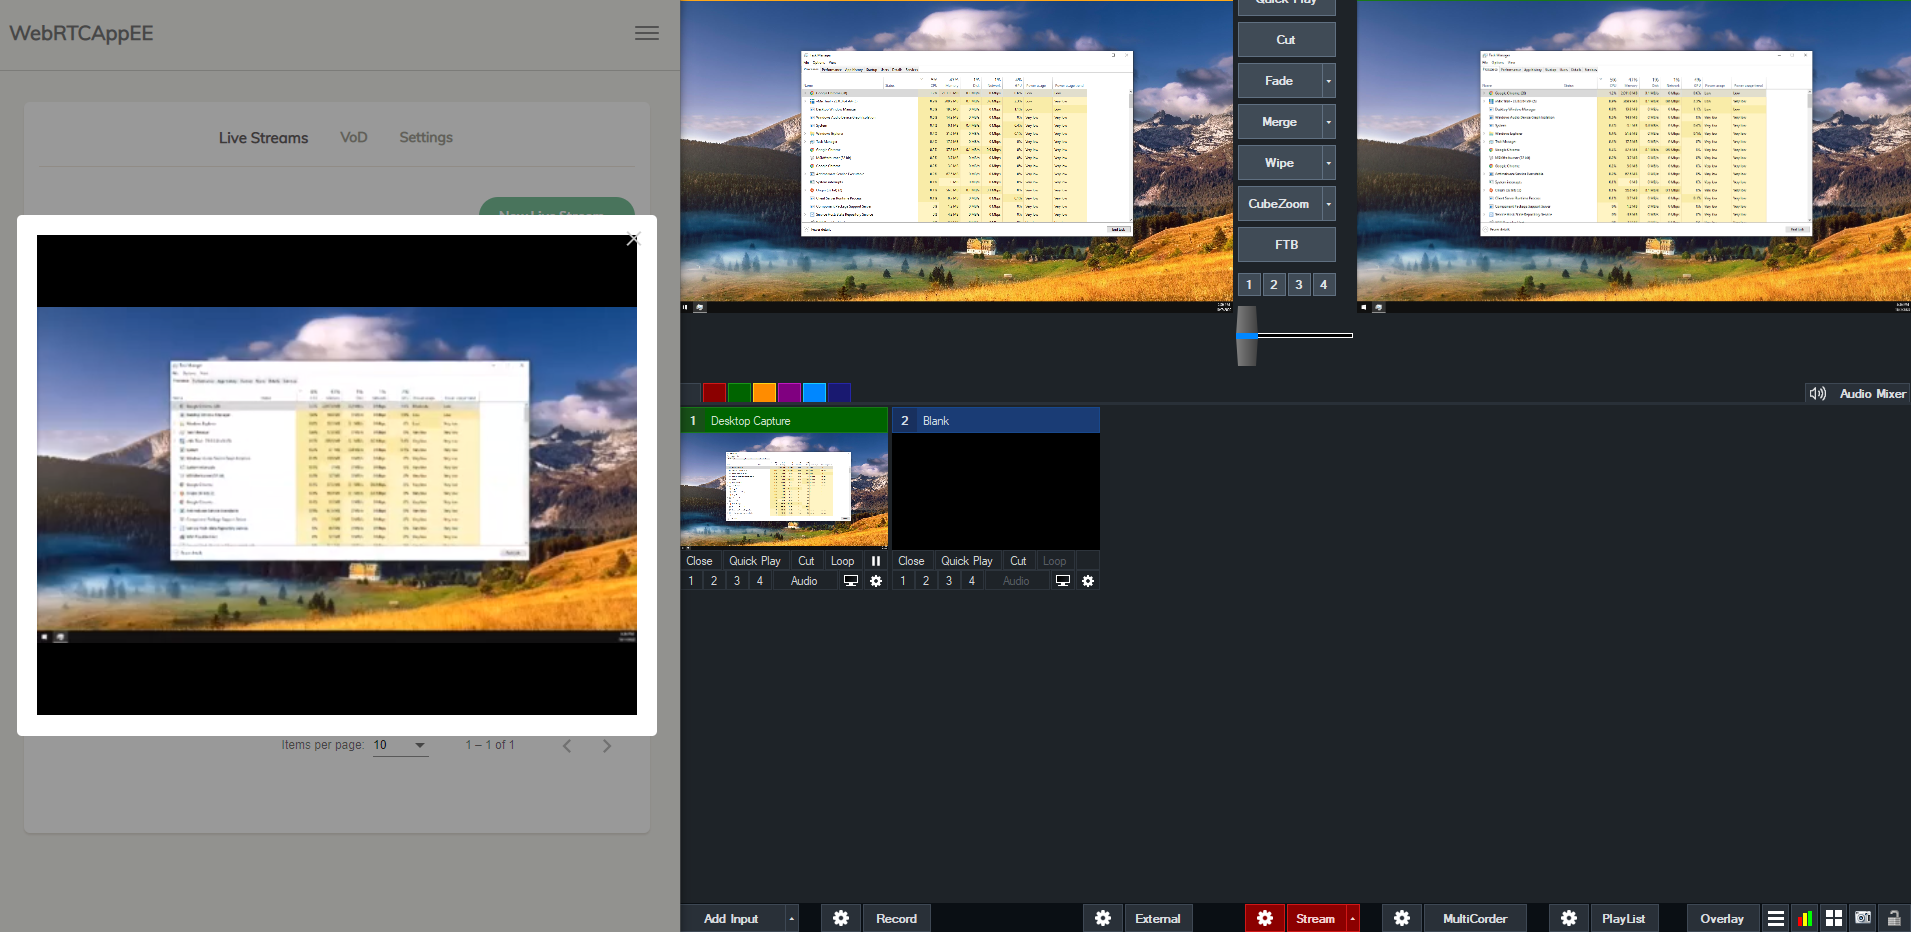
Now you are publishing with vMix!