Are you an iOS developer looking to create real-time WebRTC iOS streaming applications? Building a WebRTC iOS application has never been easier!
In this guide, we’ll show you how to create an iOS app project in Xcode, add the WebRTC-iOS-SDK dependency, and publish and play WebRTC live streams in just a few simple steps.
Join us on this exciting journey to make real-time streaming easy, scalable, and cost-effective with WebRTC on iOS.
Additionally, I’m excited to share with you that the next blog posts will be about how to screen share like a pro on iOS and make video conferencing easier for developers. For today, let’s get started publishing and playing live streams in this step-by-step guide!
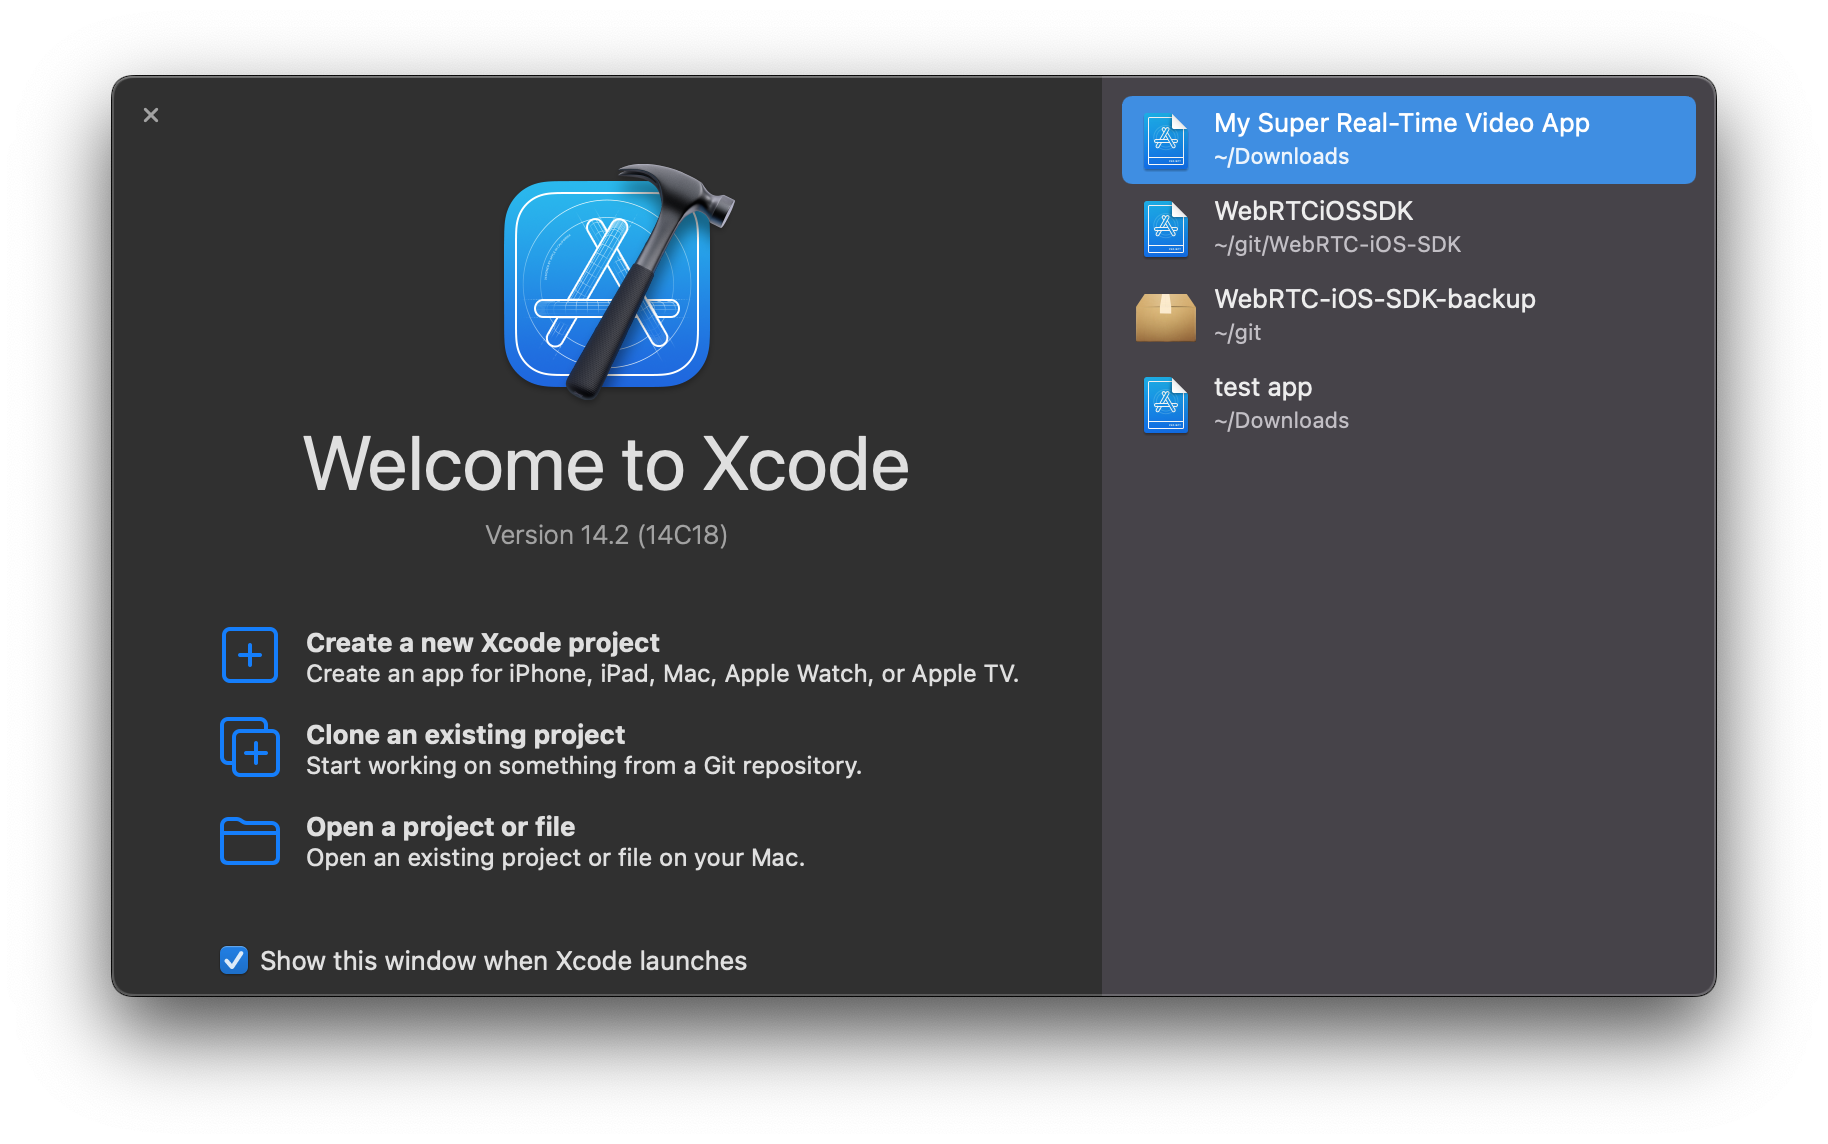
Step 1: Create an iOS App Project in Xcode
– Open Xcode and Click Create a New Xcode Project
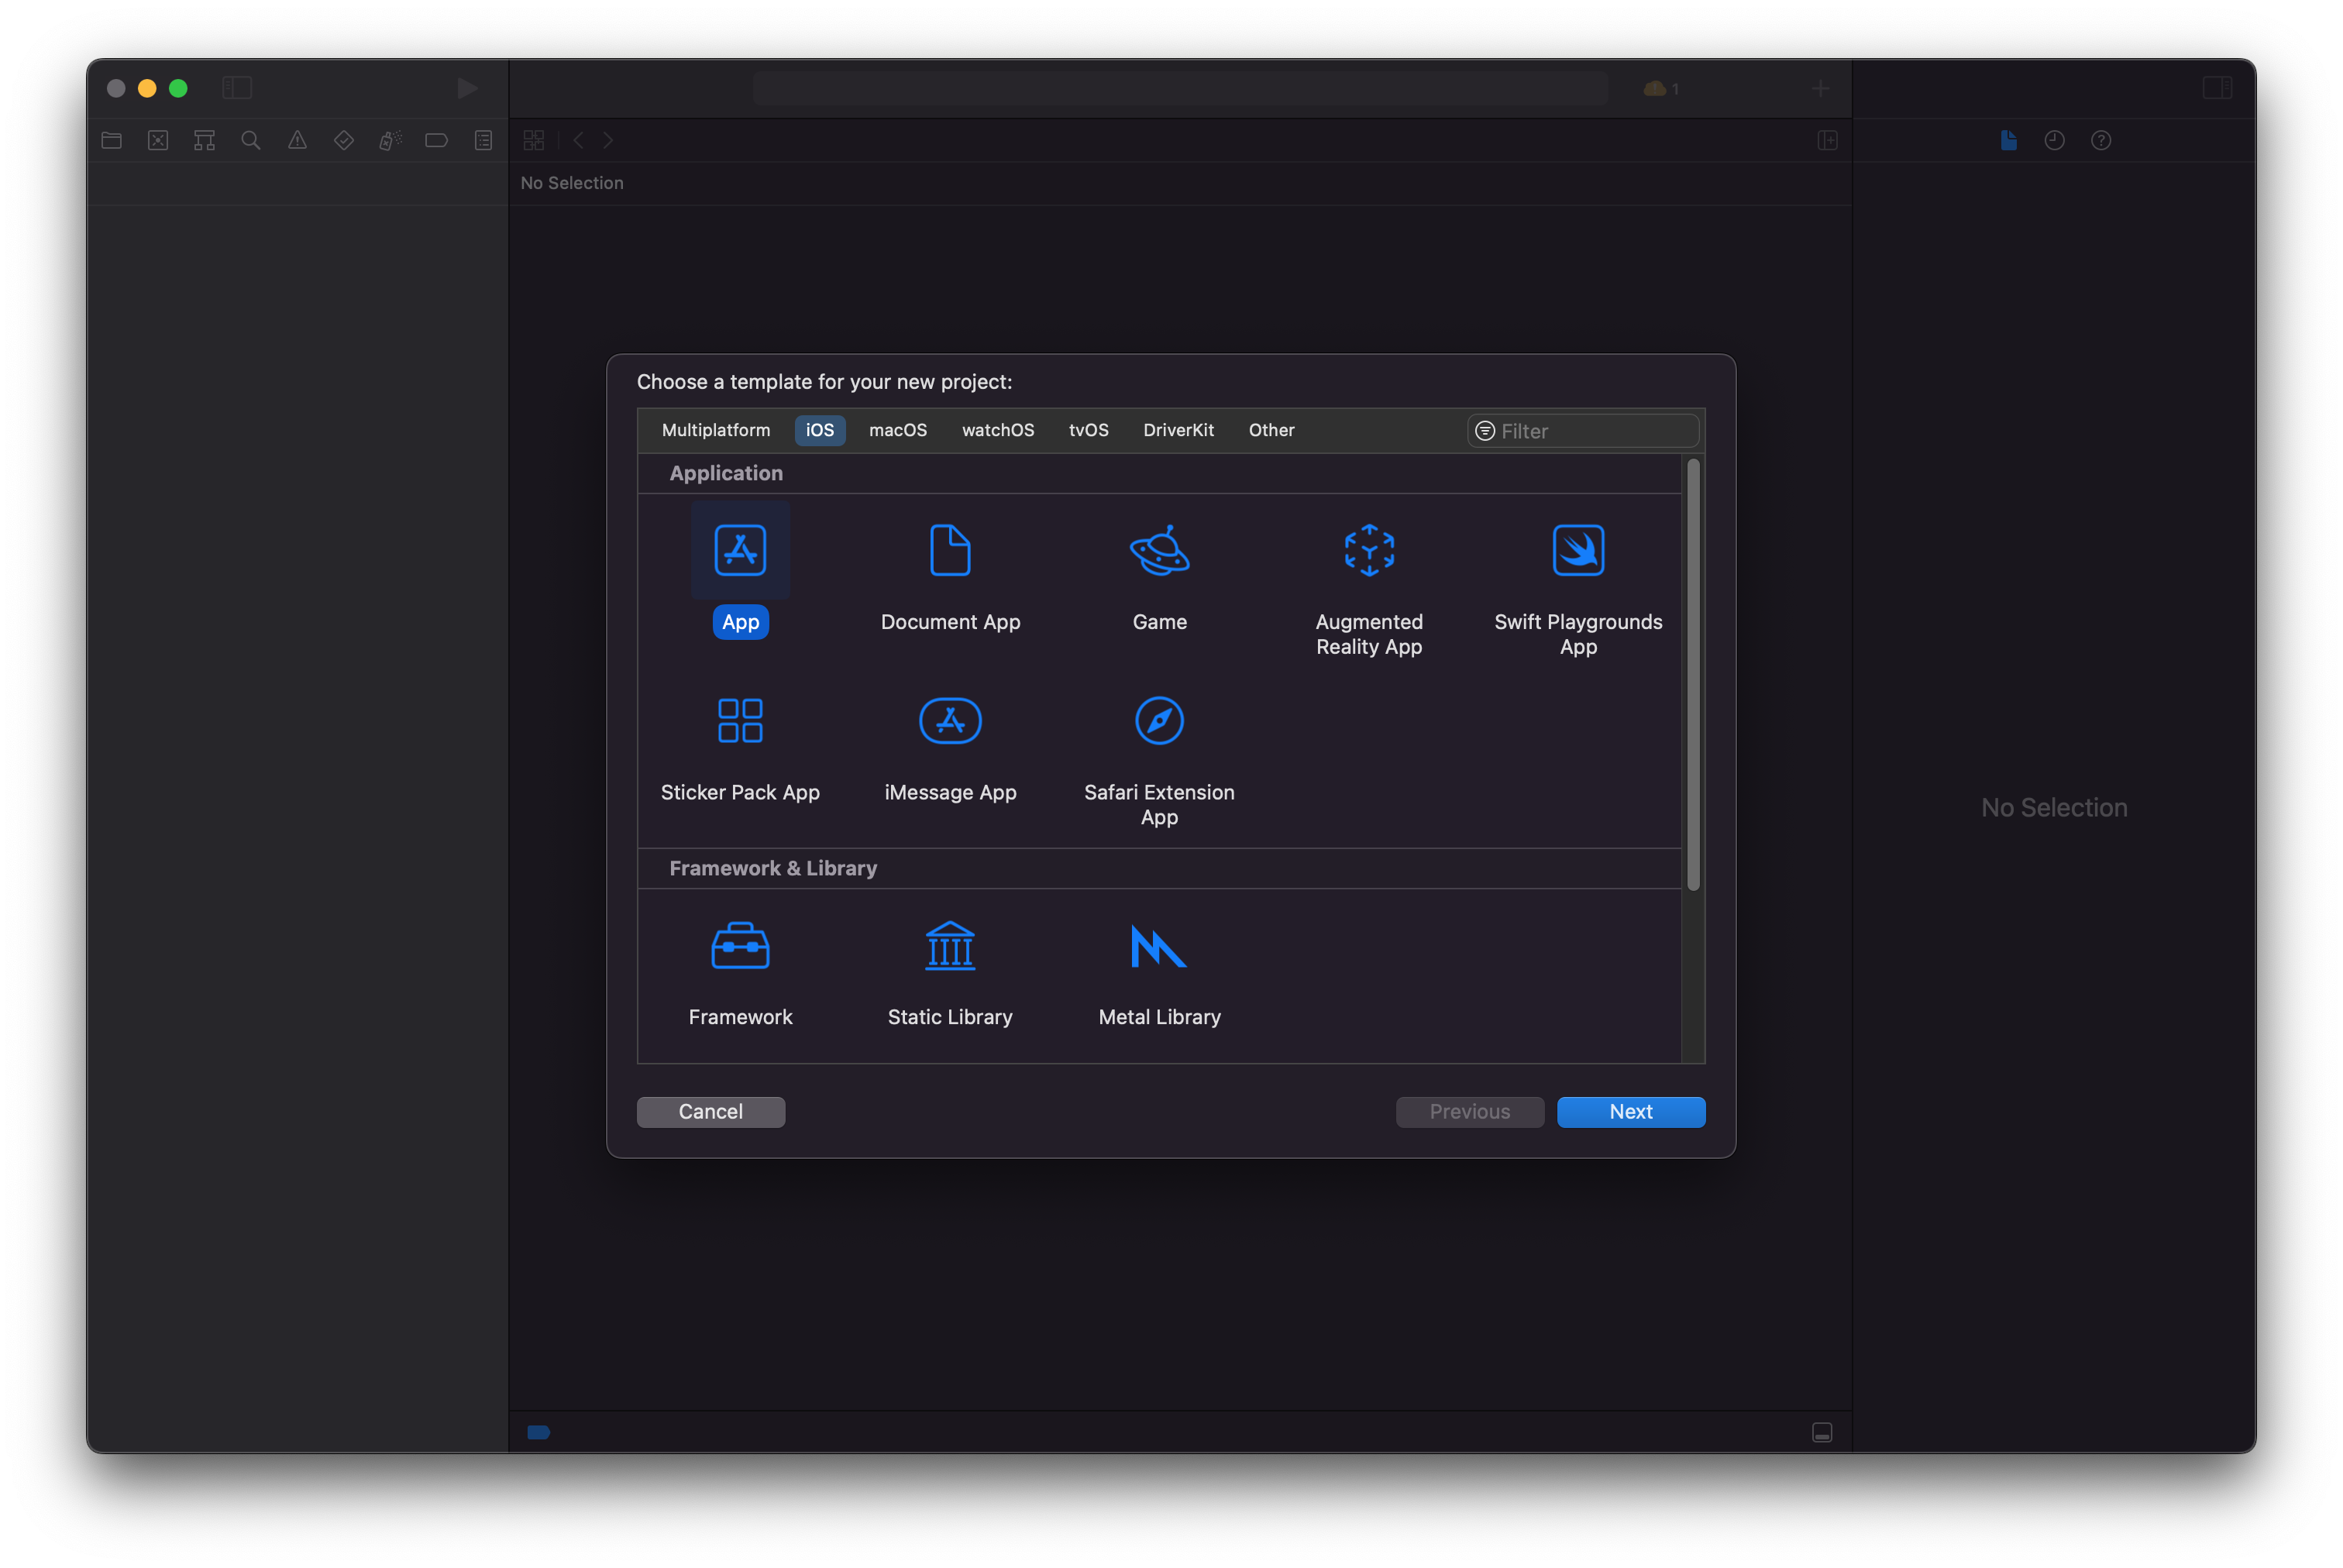
– Choose App from the coming screen and Click Next button
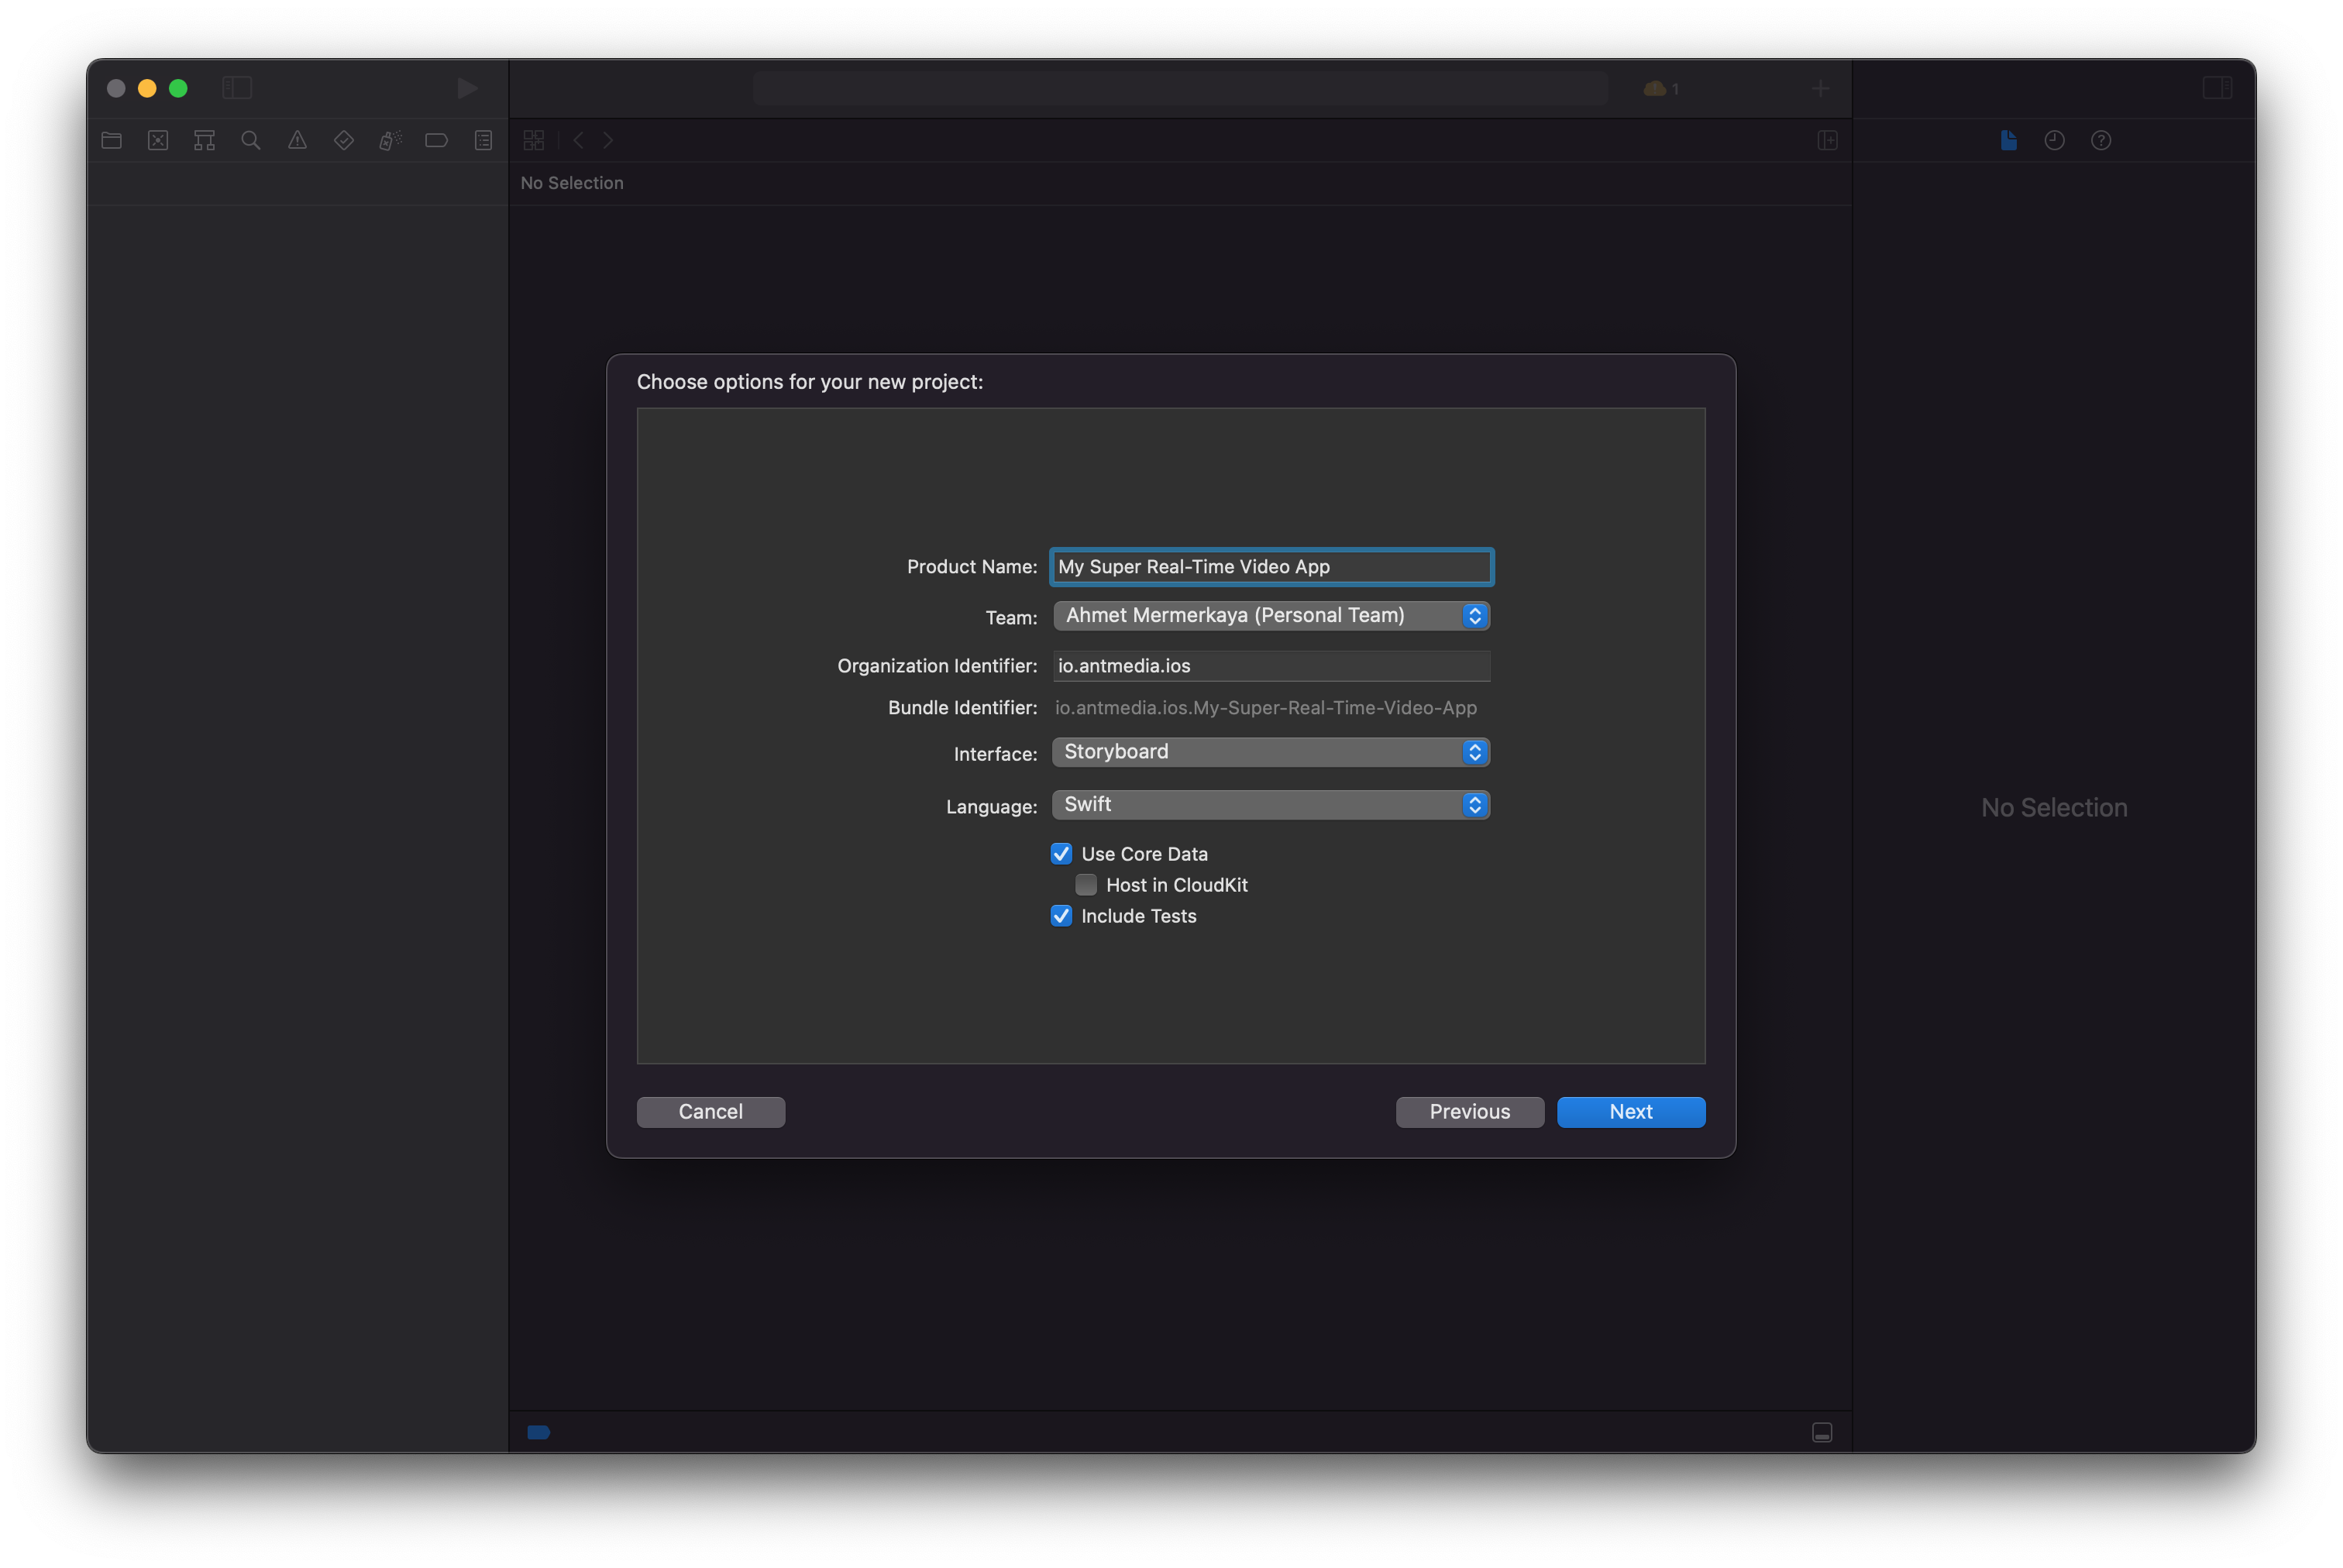
– Name your application on the next screen and Click the Next button
– That’s it! Congratulations on successfully creating your amazing WebRTC iOS application project.
Step 2: Add WebRTC-iOS-SDK Dependency
– Right-click your application and Click the Add Package in the context menu
– Enter the Github repository(https://github.com/ant-media/WebRTC-iOS-SDK) into the Package URL box. Click the Add Package button
– Click the Add Package button on the incoming screen
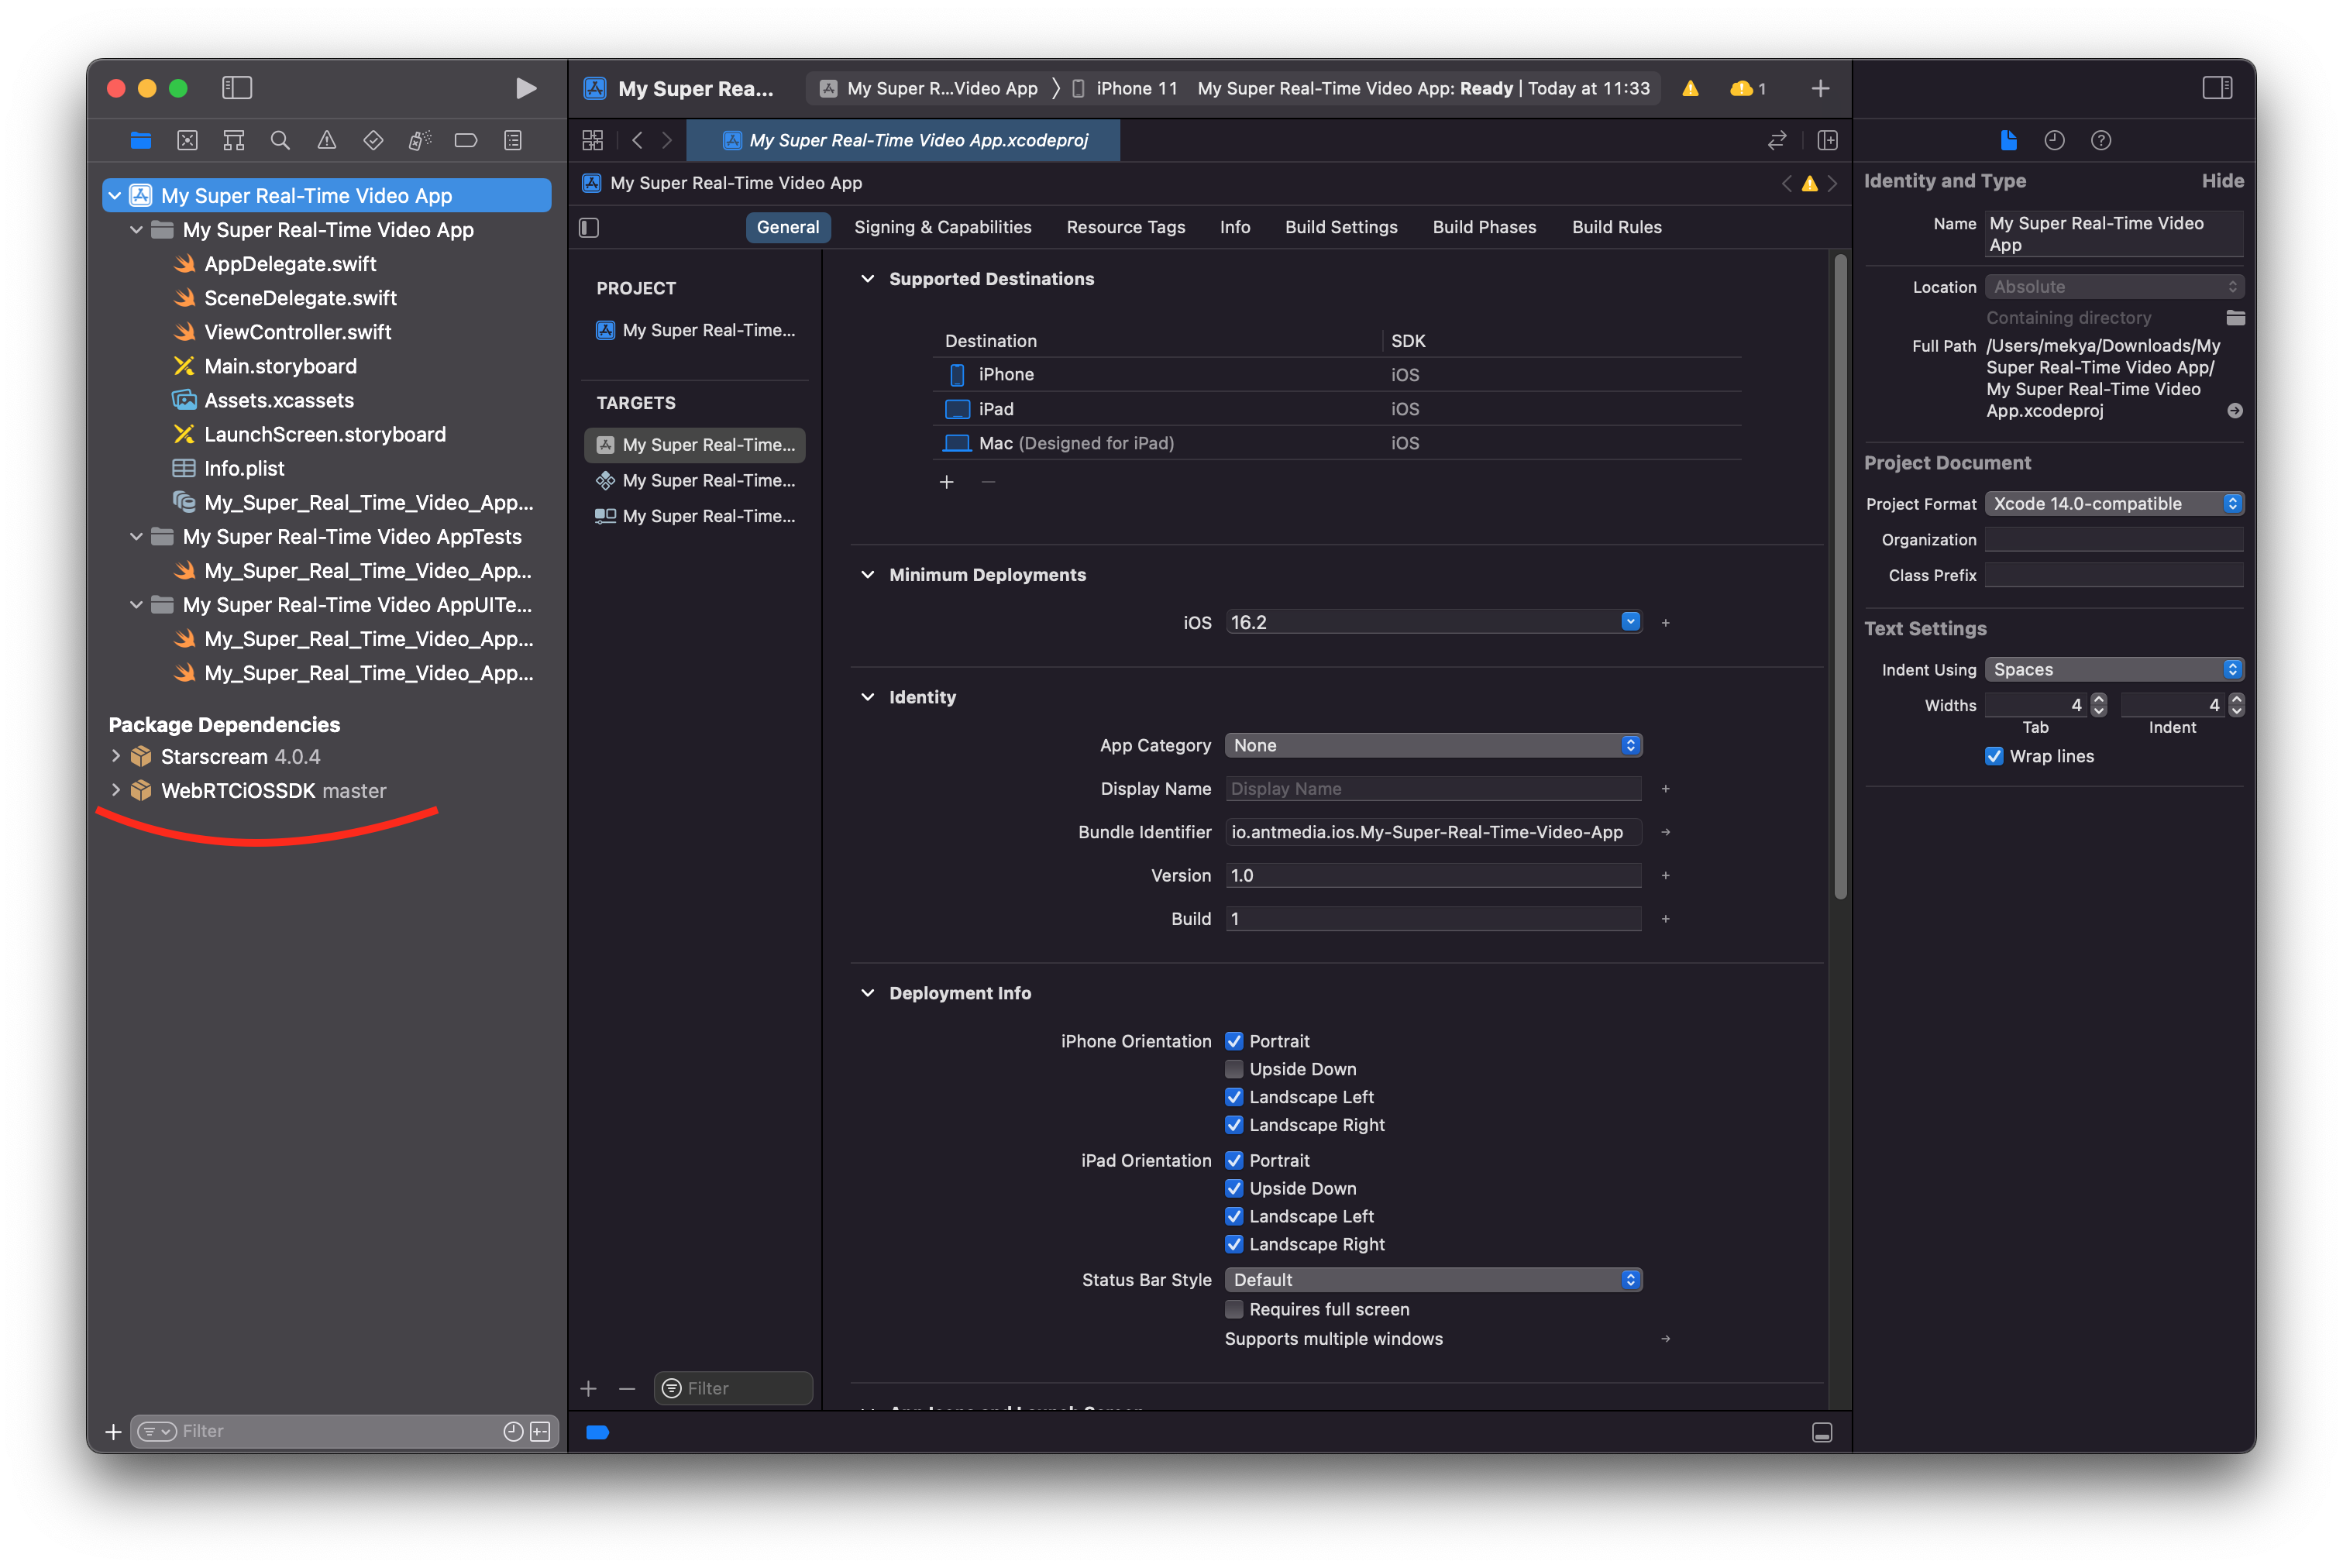
– Congratulations! You’ve completed step 2 successfully. The Package Dependencies are listed as shown in the image below.
Step 3: Publish a WebRTC Live Stream in iOS
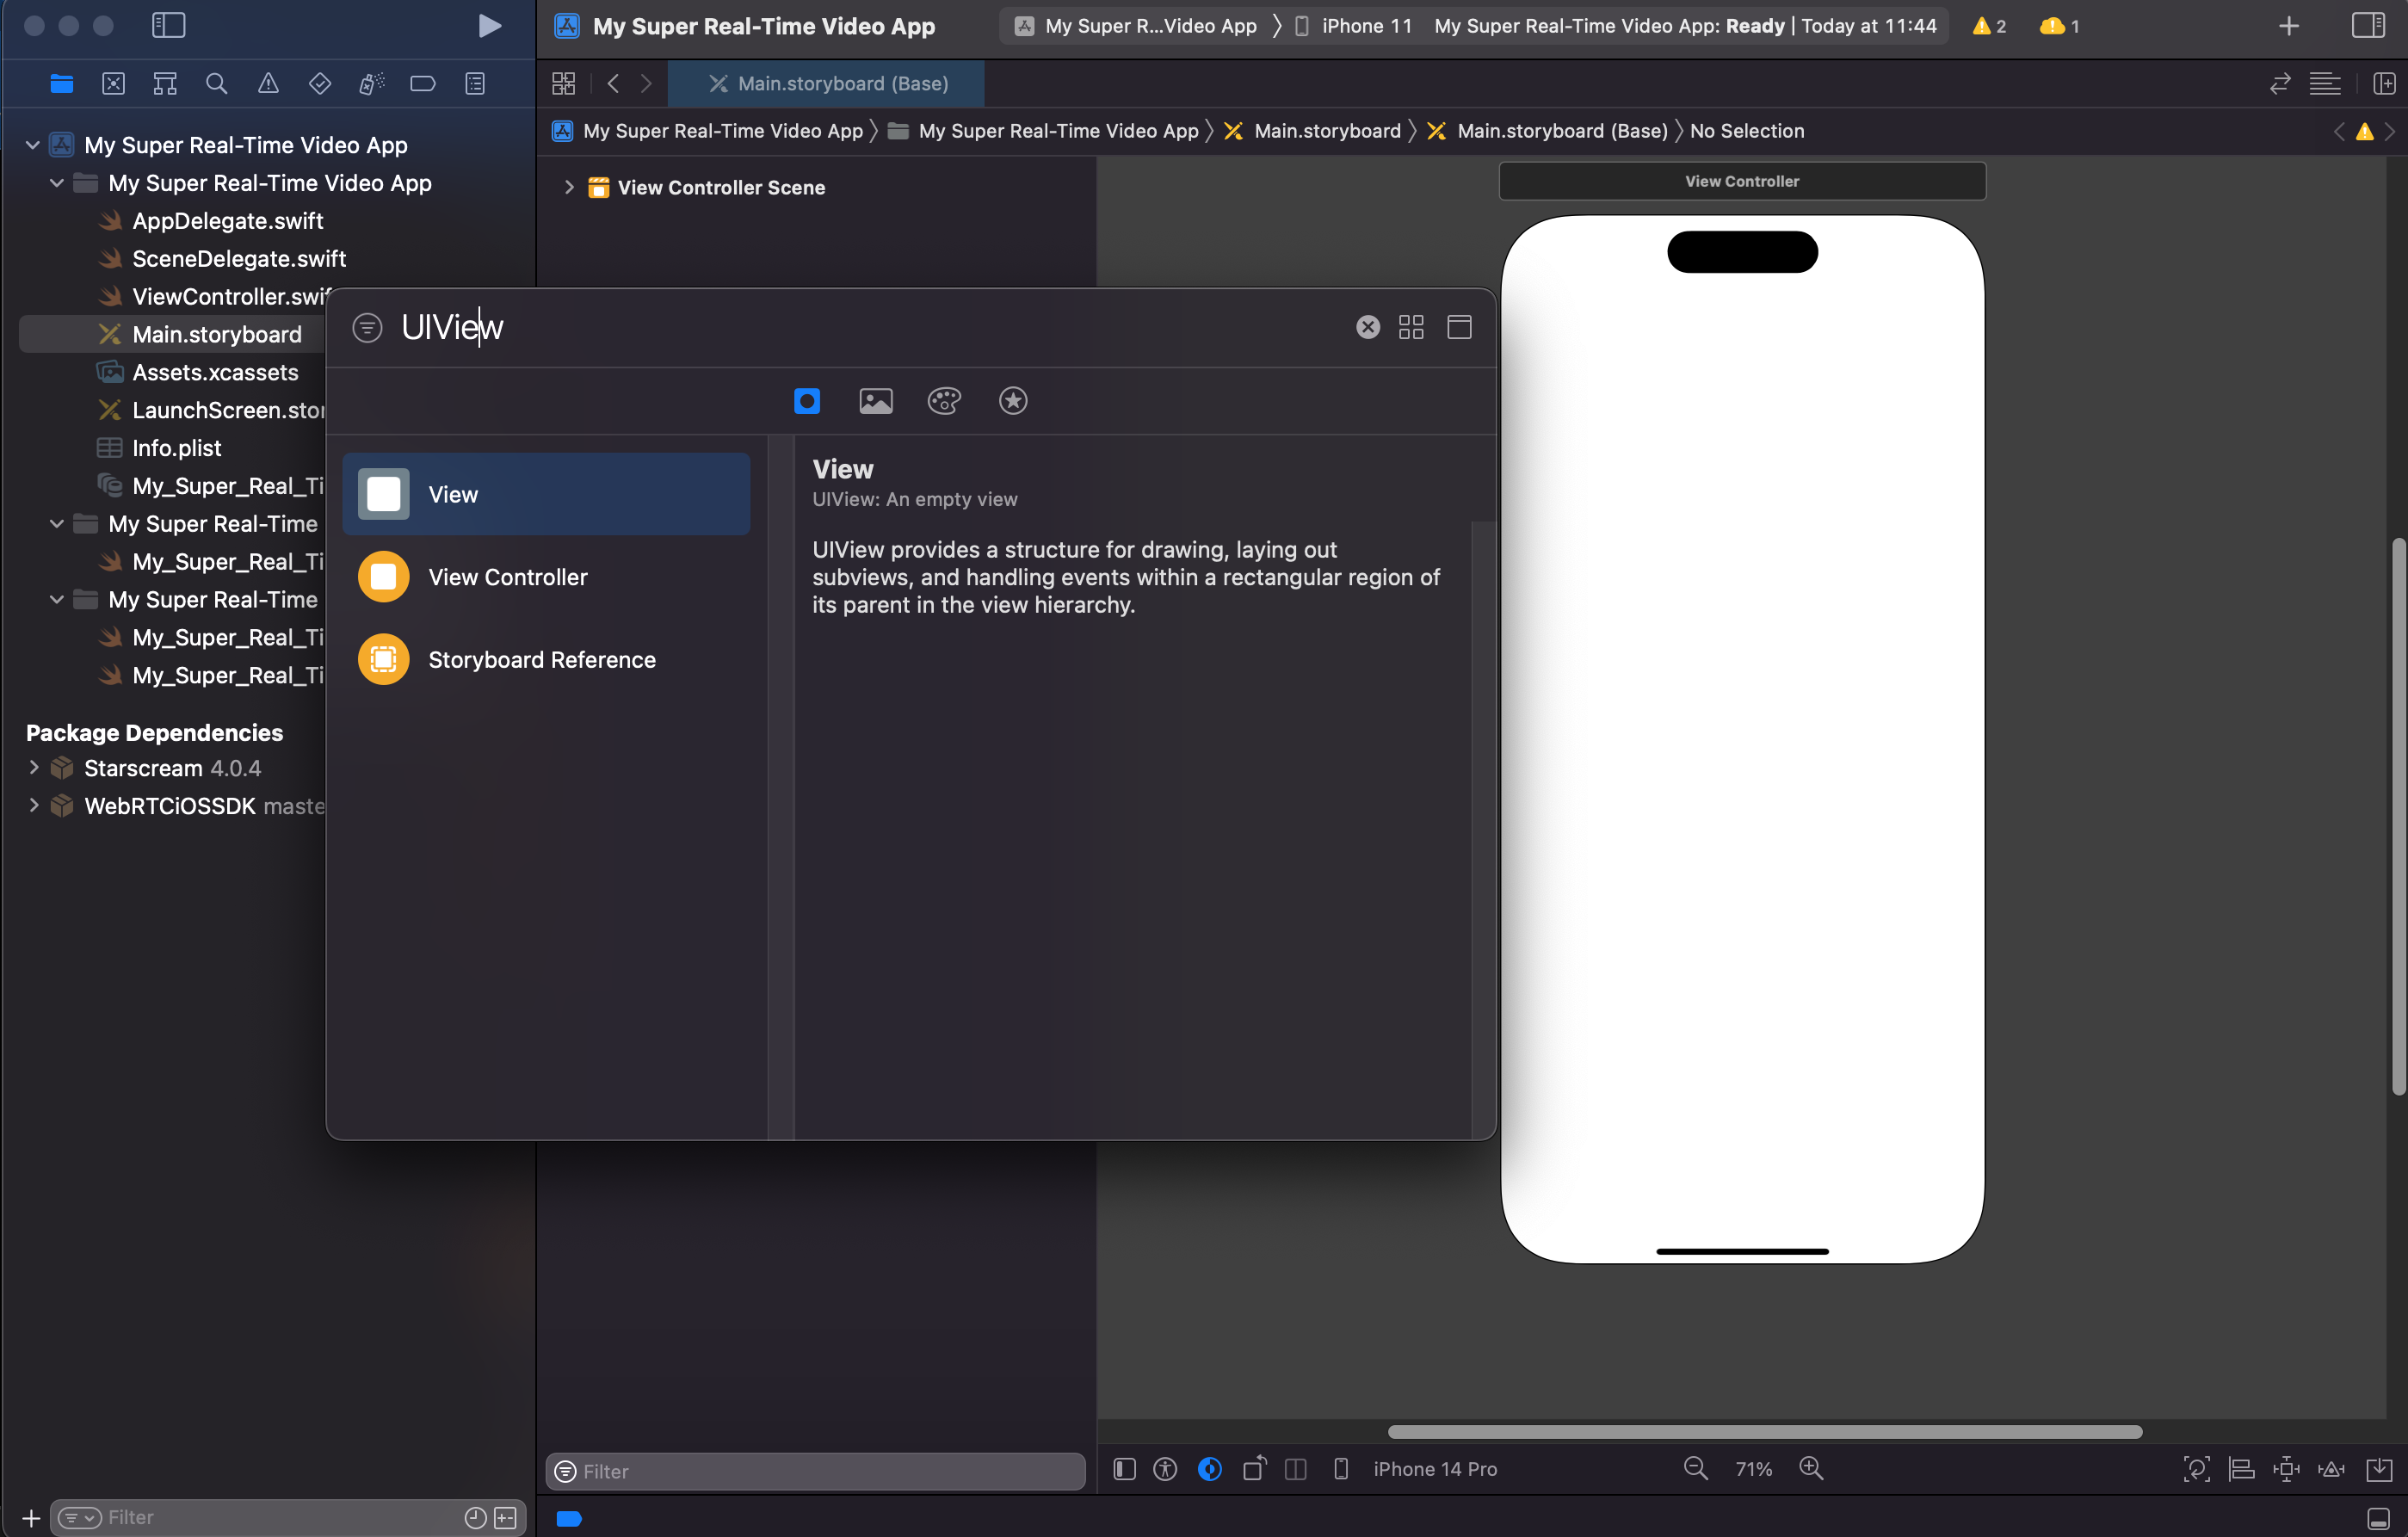
– Click the Main.storyboard on the left menu. Open the Library from the menu View > Show Library and write UIView in the search box as in the image below
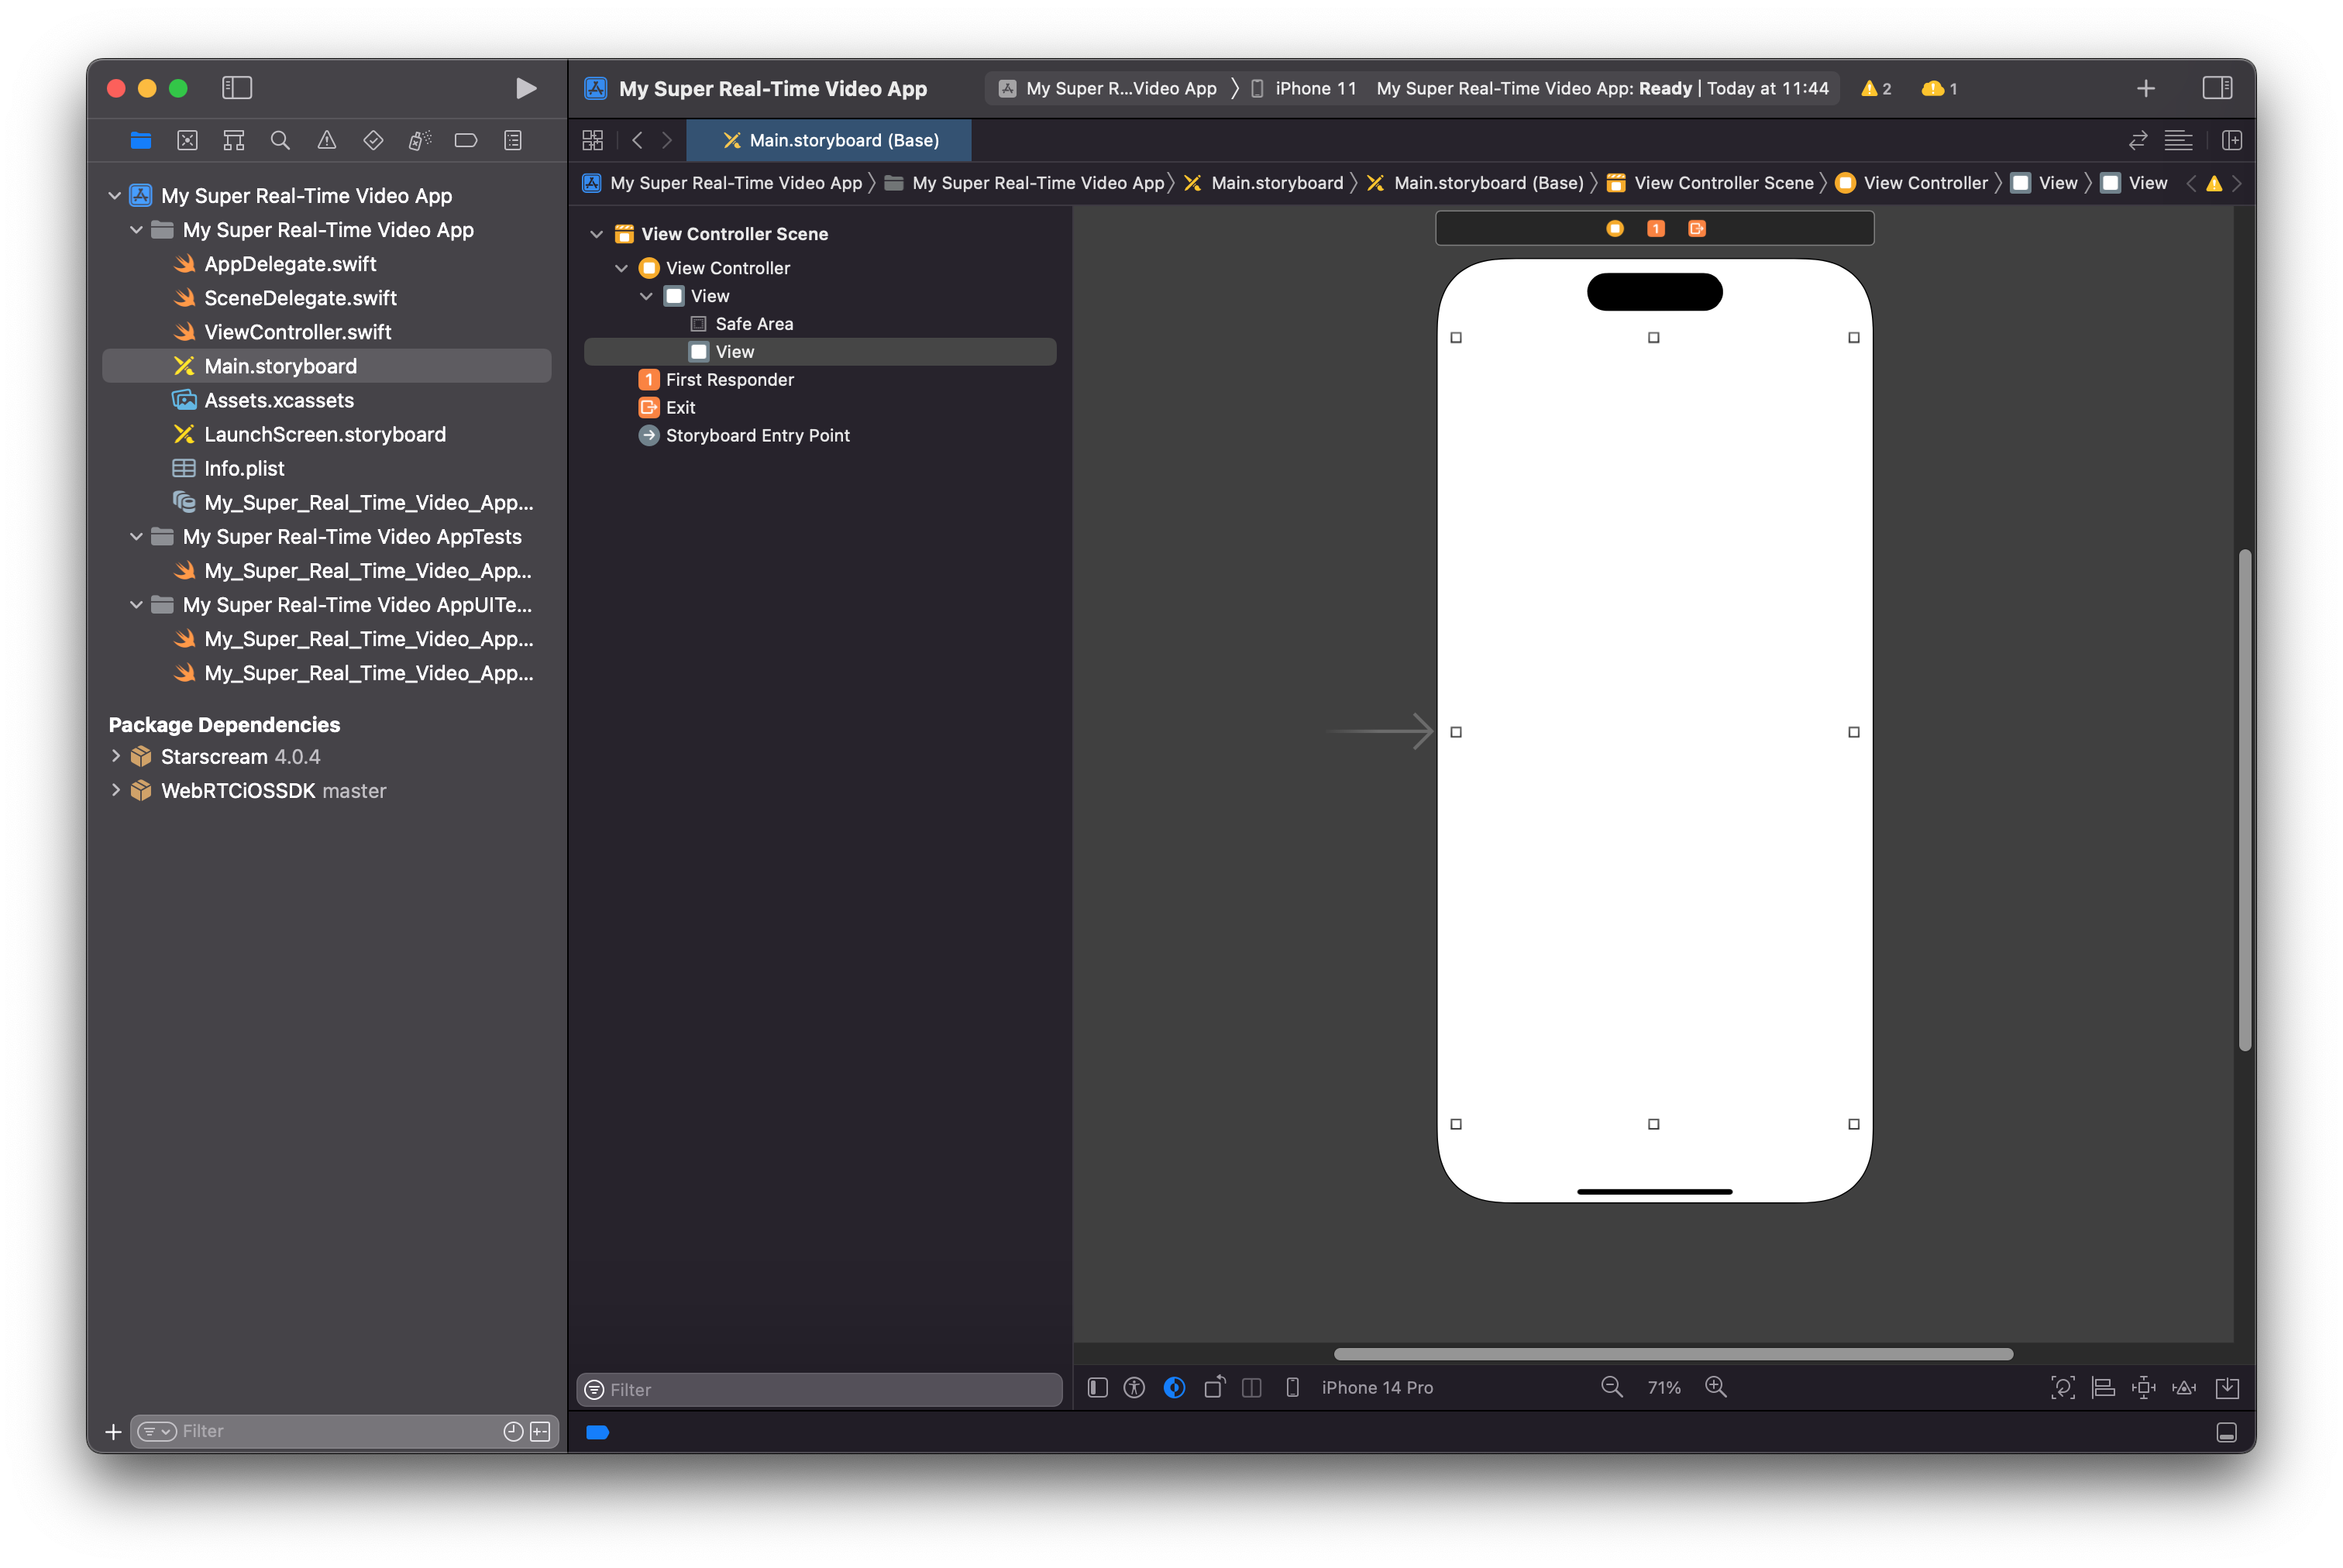
– Drag the View on the Library and Drop it to the Main.storyboard and then arrange the size of the UIView as in the image below
– Connect the UIView to the ViewController. Even if you likely know how to do that, let me give some quick instructions even for complete beginners.
- Create two editors one for the Main.storyboard and the other one for the ViewController.swift
- Right click the UIView in the Main.storyboard and drag over the next editor and release the right click. Then the popup will appear as below and name your Outlet as in the image below
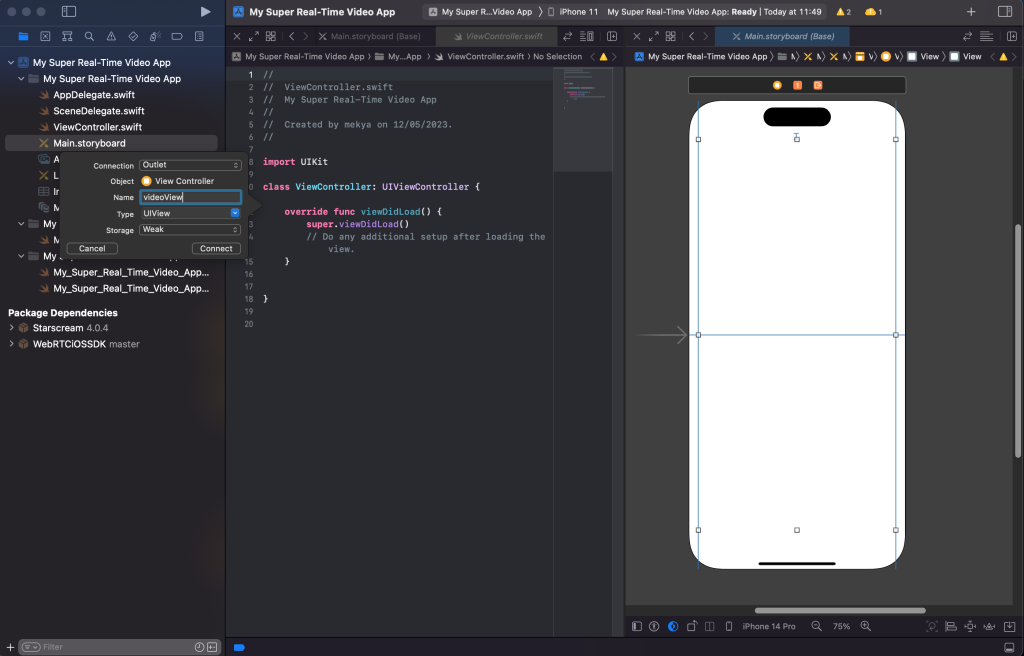
– Then it should look like below
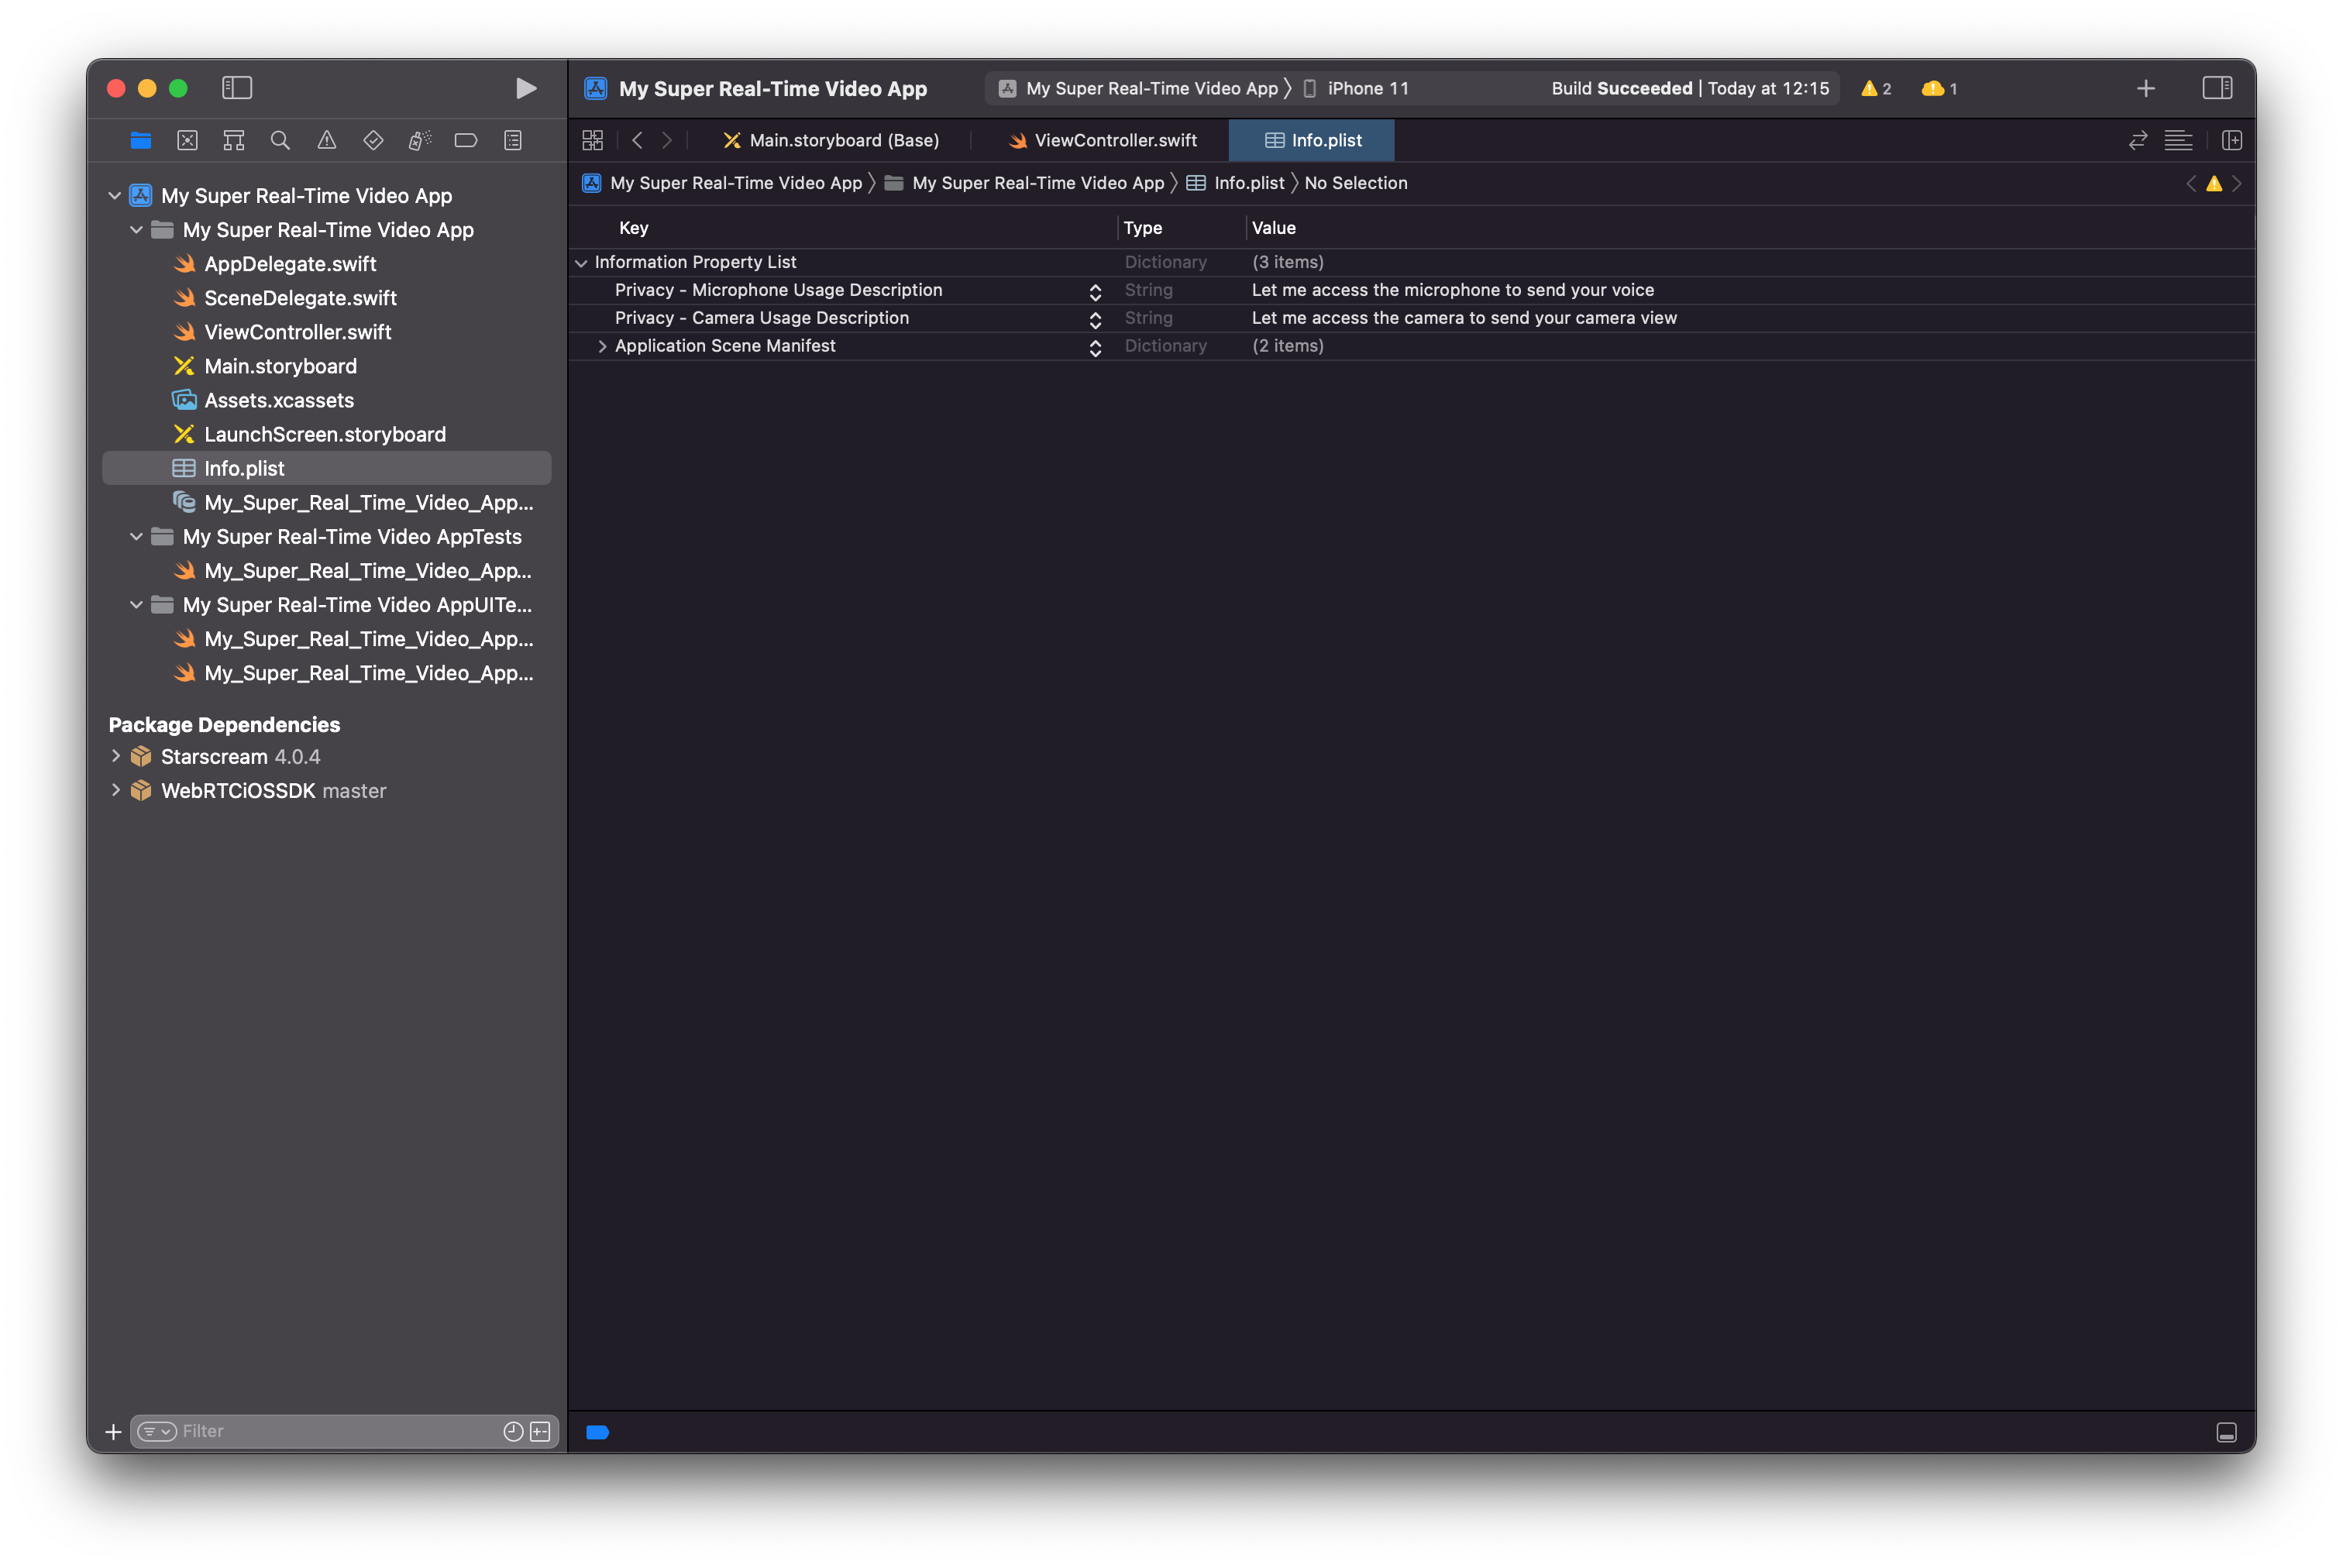
– Let’s add Privacy descriptions to Info.plist. Right click Info.plist and add Camerage Usage and Microphone Usage descriptions as below.
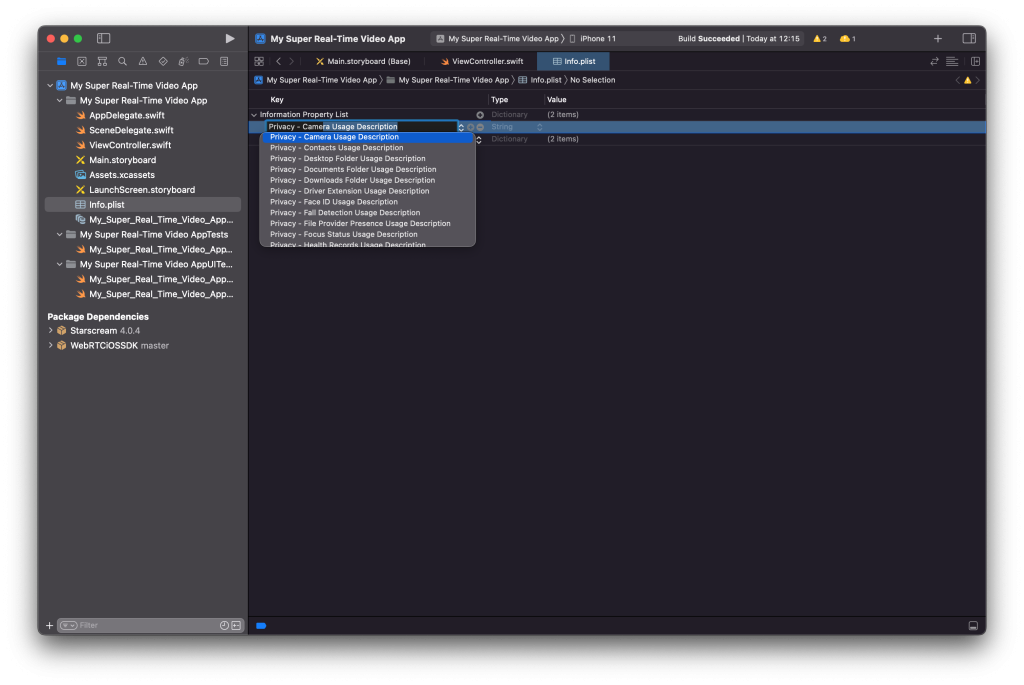
– Finally, Info.plist looks like below
– Let’s do the magic. Edit the ViewController.swift and make it look like below. As you can see, we just initialize the AntMediaClient and set the WebSocket URL as Ant Media’s Test URL(or just use your own Ant Media Server URL) and call the publish with streamId parameter.
streamId is unique and it’s recommend to use your random stream id if you use Ant Media’s Test URL.
import UIKit
import WebRTCiOSSDK
class ViewController: UIViewController {
@IBOutlet weak var videoView: UIView!
var client:AntMediaClient = AntMediaClient.init();
override func viewDidLoad() {
super.viewDidLoad()
client.setLocalView(container: videoView);
client.setWebSocketServerUrl(url: "wss://test.antmedia.io:5443/WebRTCAppEE/websocket");
client.publish(streamId: "stream123456")
}
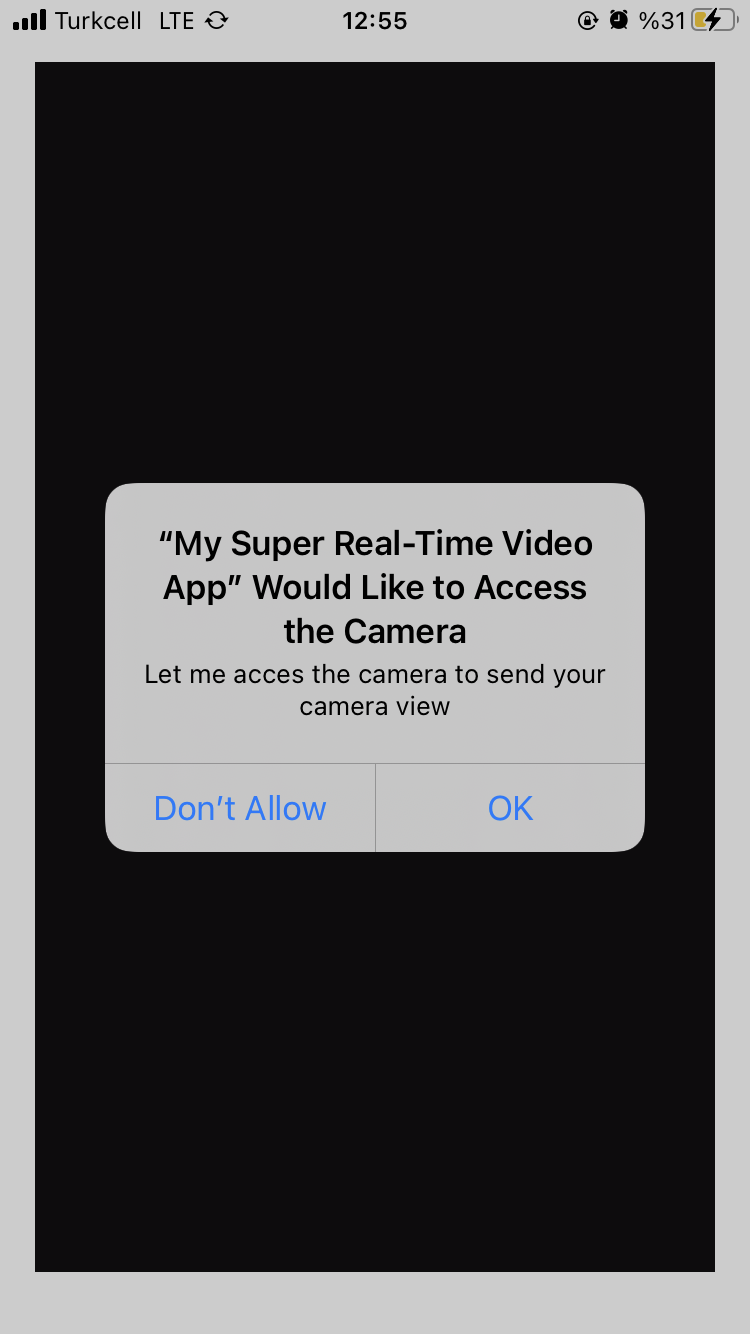
}– Run your application on your device and accept the Camera and Microphone Usage
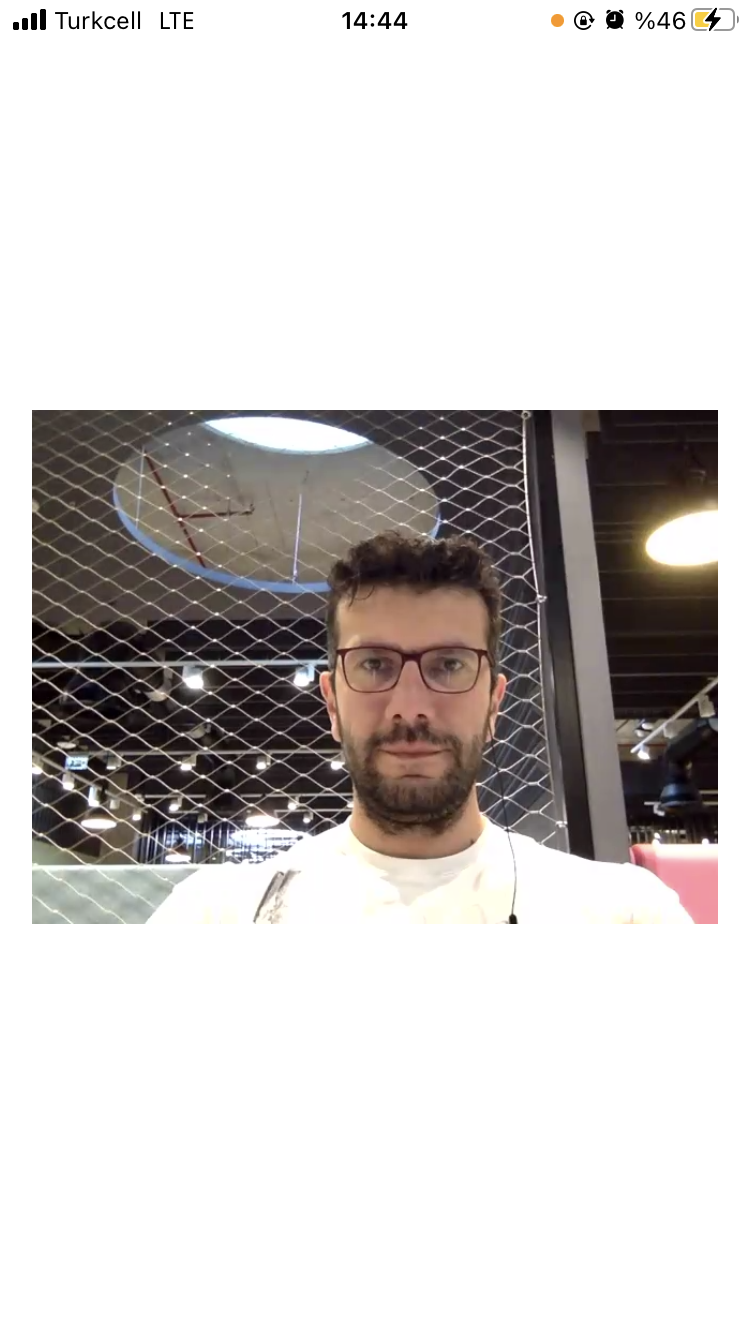
– Tadaaaa, you’re publishing your live stream.

– To play the stream, visit Ant Media’s Test WebRTC Player, write the stream123456 to the box and Click Start Playing button.
Congratulations. You’ve just published and played a WebRTC Live Stream with your iOS application. You completed Step 3: Publish WebRTC Live Stream in iOS successfully.
Step 4: Play WebRTC Live Stream in iOS
Playing a WebRTC Live Stream in an iOS application is also easier because you’ve already created your project and Published WebRTC Live in your iOS application. Just make the ViewController.swift look like the below.
import UIKit
import WebRTCiOSSDK

class ViewController: UIViewController {

    @IBOutlet weak var videoView: UIView!
    var client:AntMediaClient =  AntMediaClient.init();

    override func viewDidLoad() {
        super.viewDidLoad()
        client.setRemoteView(remoteContainer: videoView)
        client.setWebSocketServerUrl(url: "wss://test.antmedia.io:5443/WebRTCAppEE/websocket");
        client.play(streamId: "stream123456")
    }
}
Visit the WebRTC Publish page and write “stream123456” in the box and click Start Publishing because we need to make the stream with “stream123456” available in Ant Media’s Test Environment.
– Run your WebRTC iOS application to play the stream.
Congratulations! You’ve completed Playing a WebRTC Live Stream in iOS.
To sum up, right now you can publish and play WebRTC Live Streams on your iOS application. You’re a great iOS developer that resolves all complex real-time streaming problems with a few lines of code. I think you should ask for promotion 🙂
Additionally, You may guess there are plenty of the features in the SDK to control the streaming, security, resolution, etc.
This blog post is just helping you to easily get started. For more samples, please visit the WebRTC-iOS-SDK repository(https://github.com/ant-media/WebRTC-iOS-SDK) and run the sample WebRTC iOS Application.
In the next blog post, we’re going to show you how to share screens in iOS and how to make a conferencing application in iOS.
May Love Be with You
Ahmet Oguz Mermerkaya


