AMS Cloudflare Integration
You can seamlessly broadcast and play WebRTC, HLS, and DASH using Ant Media Server in conjunction with CloudFlare. Let's walk through the step-by-step process of achieving this:

Step 1: CloudFlare Configuration
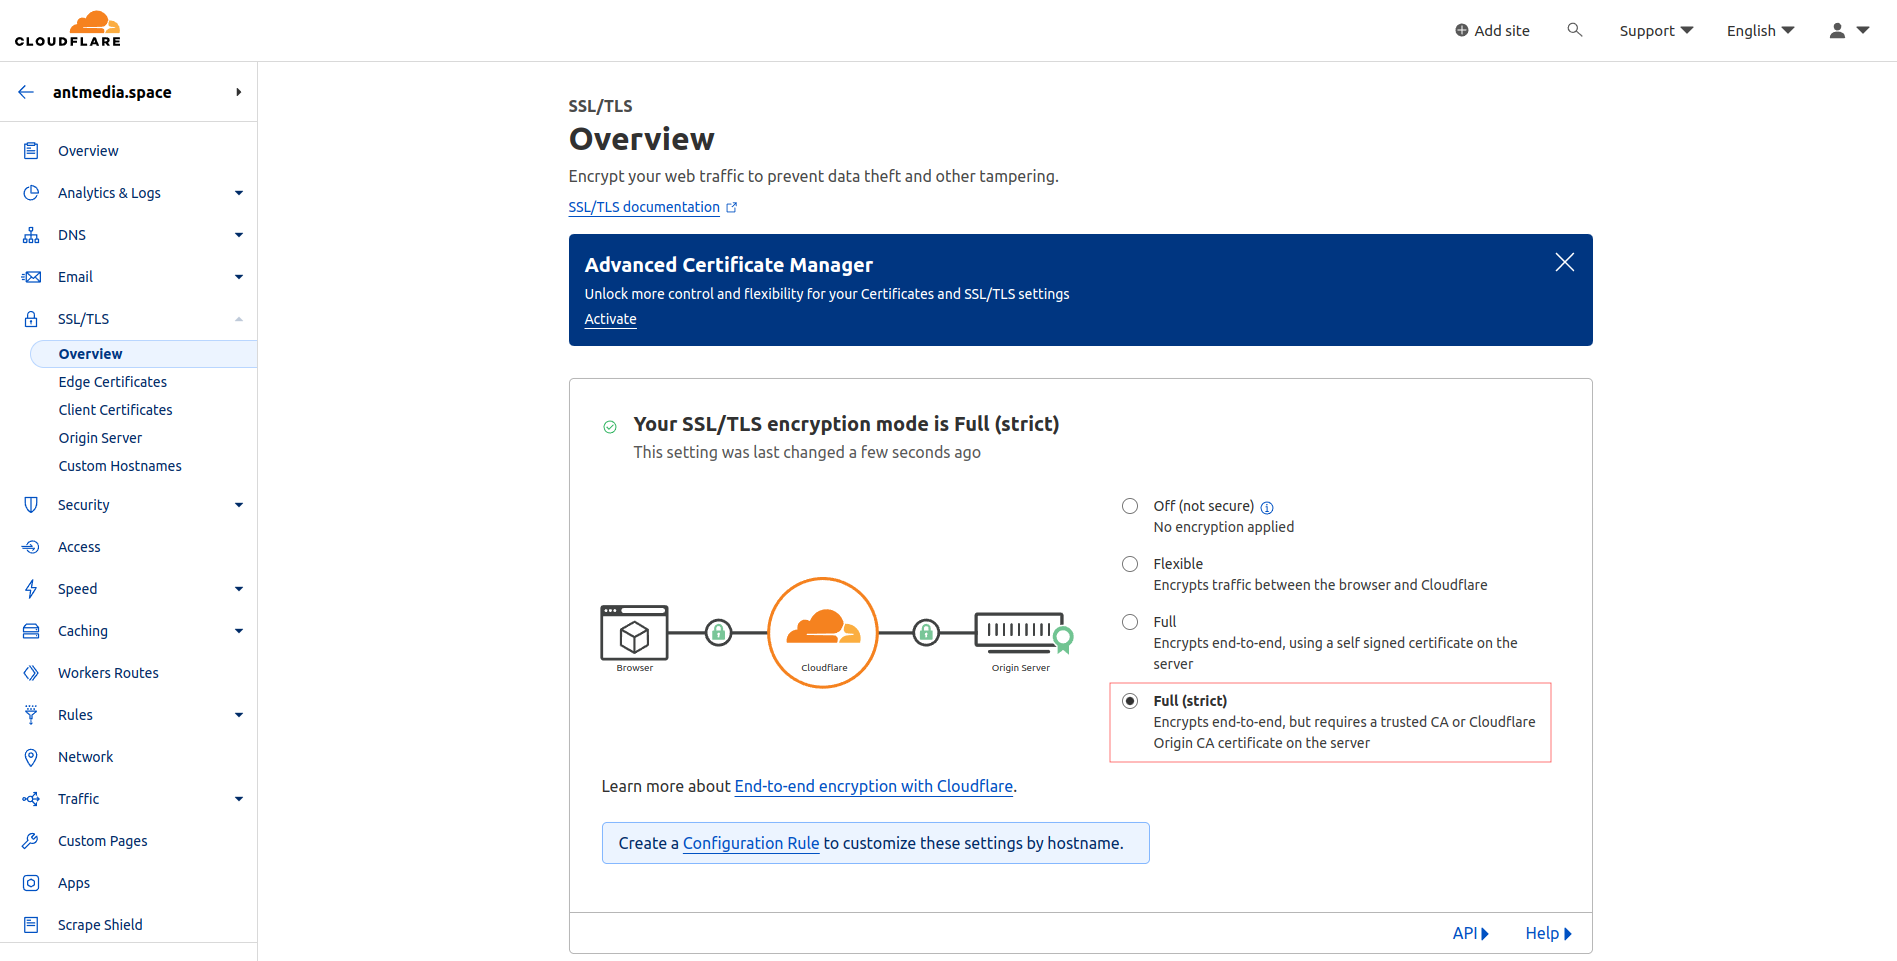
- After logging into Cloudflare, navigate to SSL > TLS > Overview, and set the SSL/TLS encryption mode to "Full (strict)."
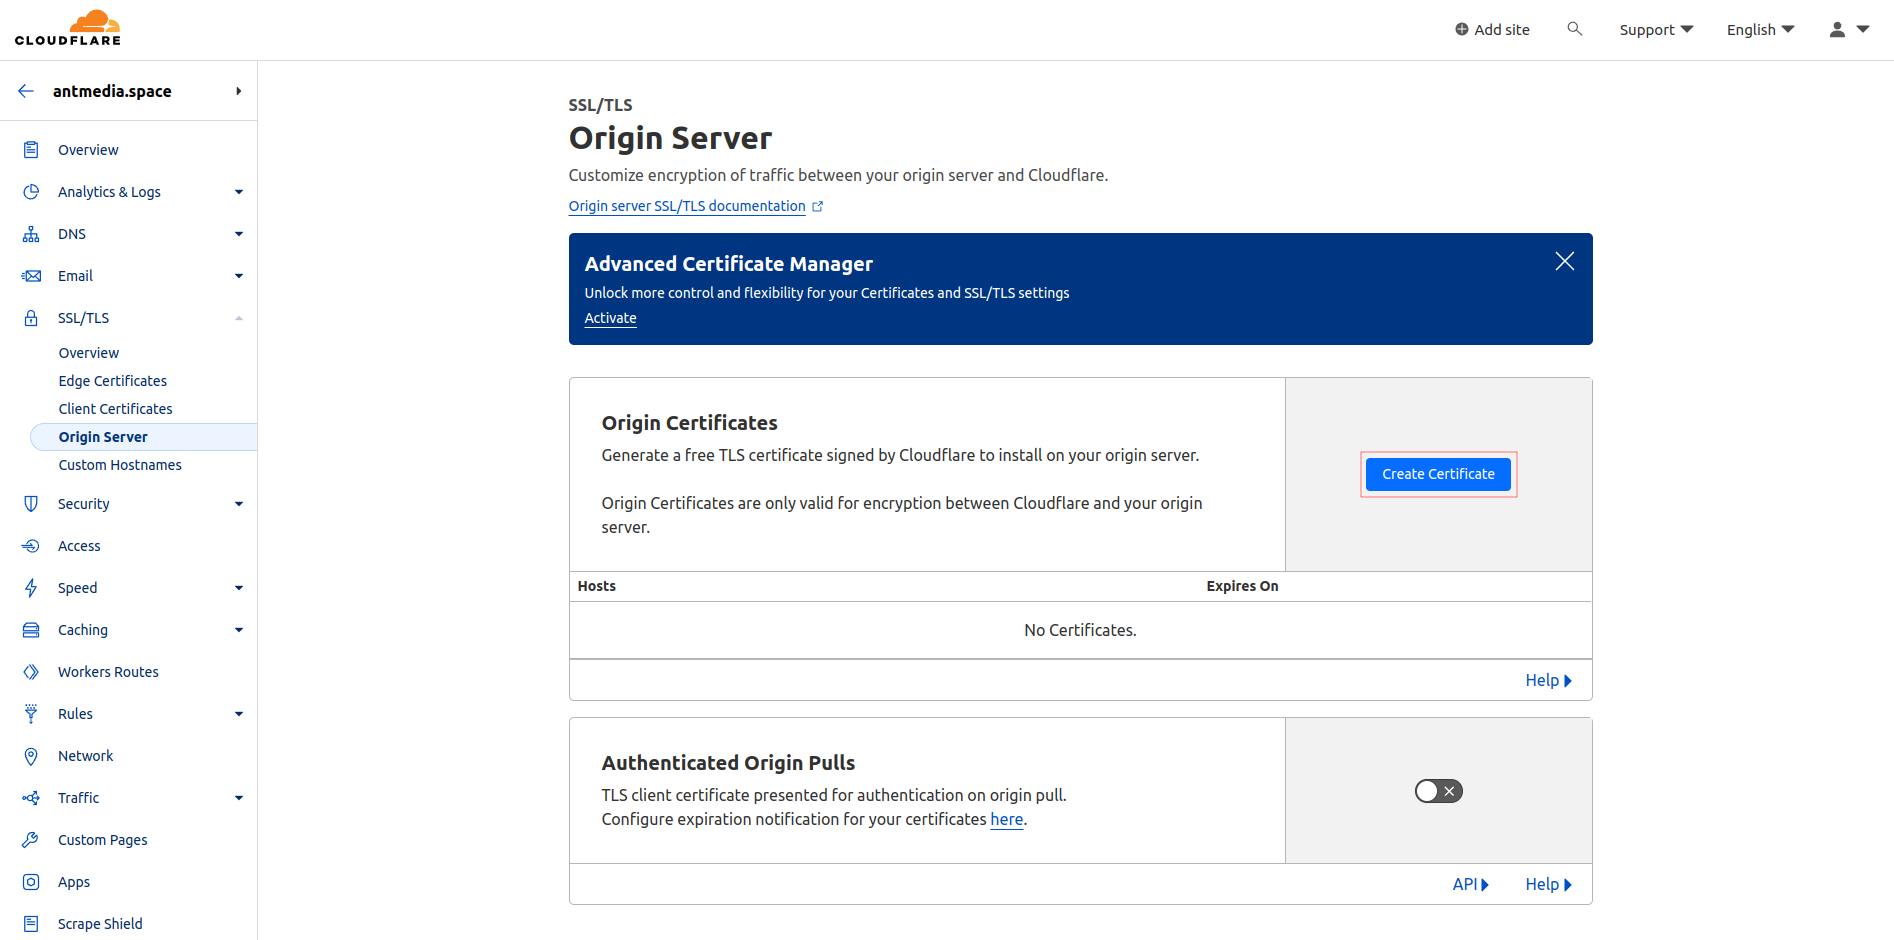
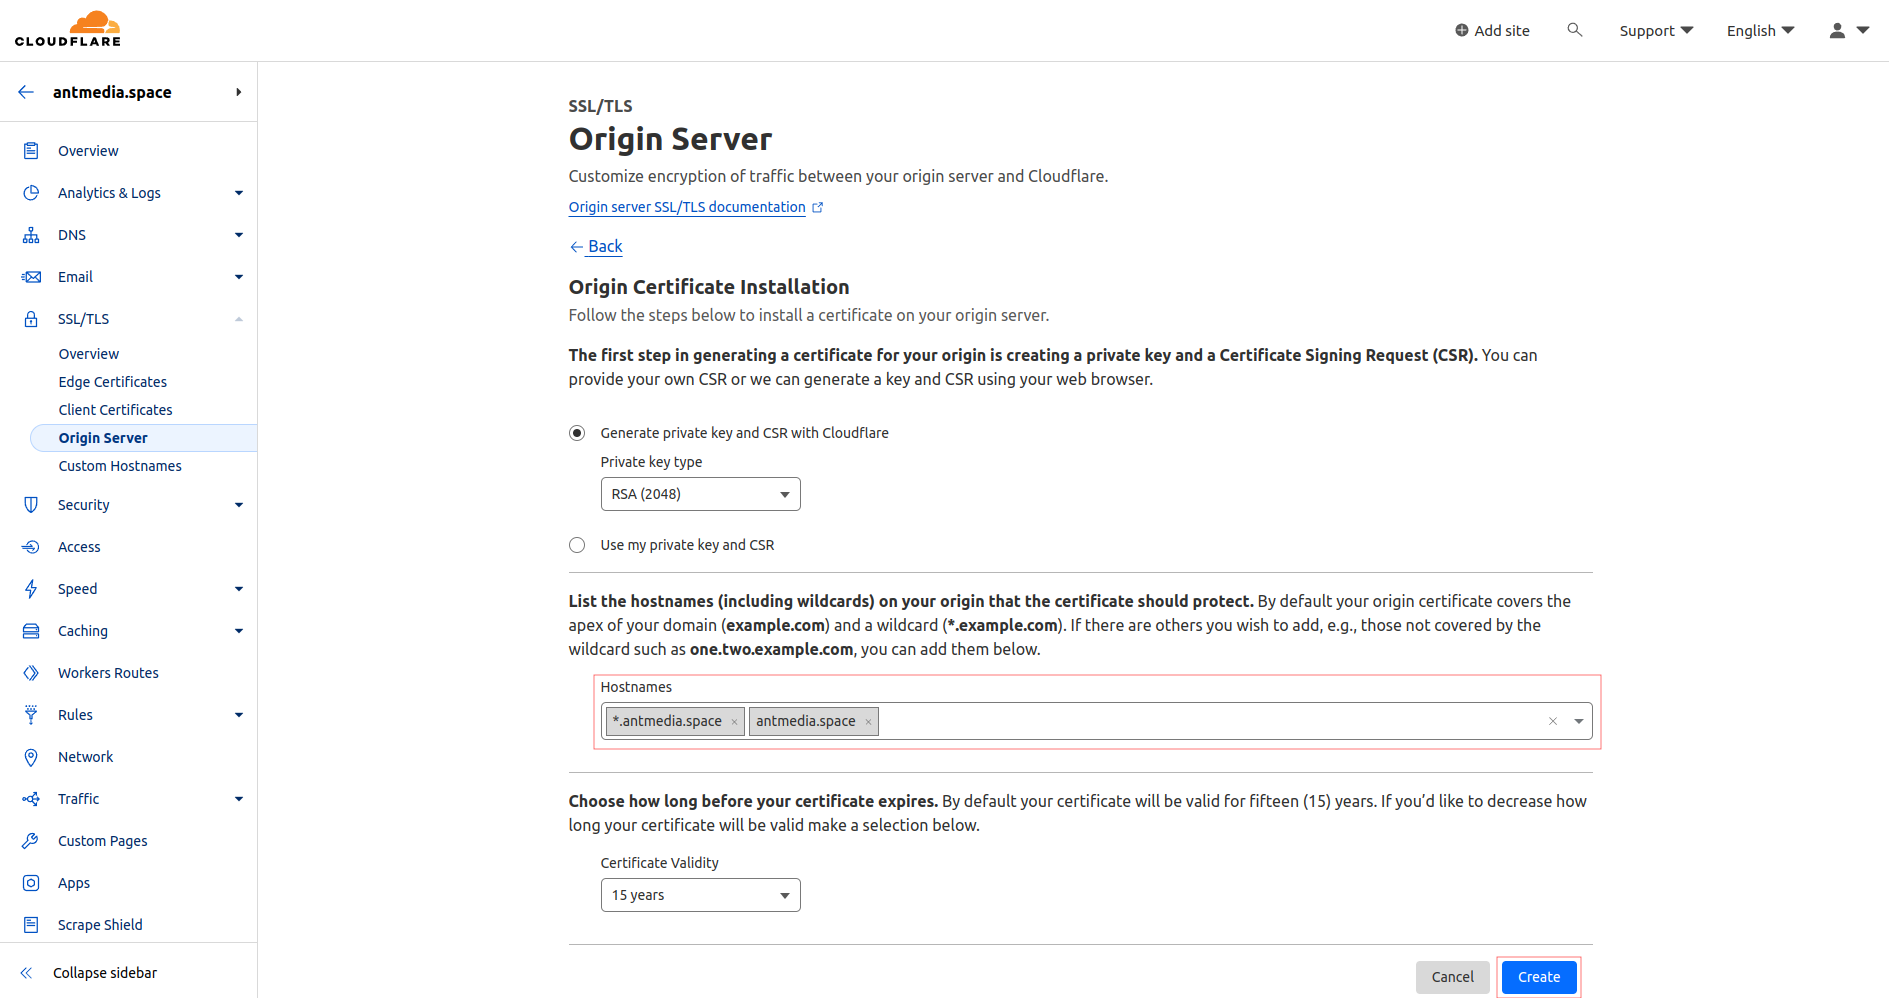
- Click on Origin Server in the same menu, go to "Create Certificate," and after configuring the domain settings, click on "Create."
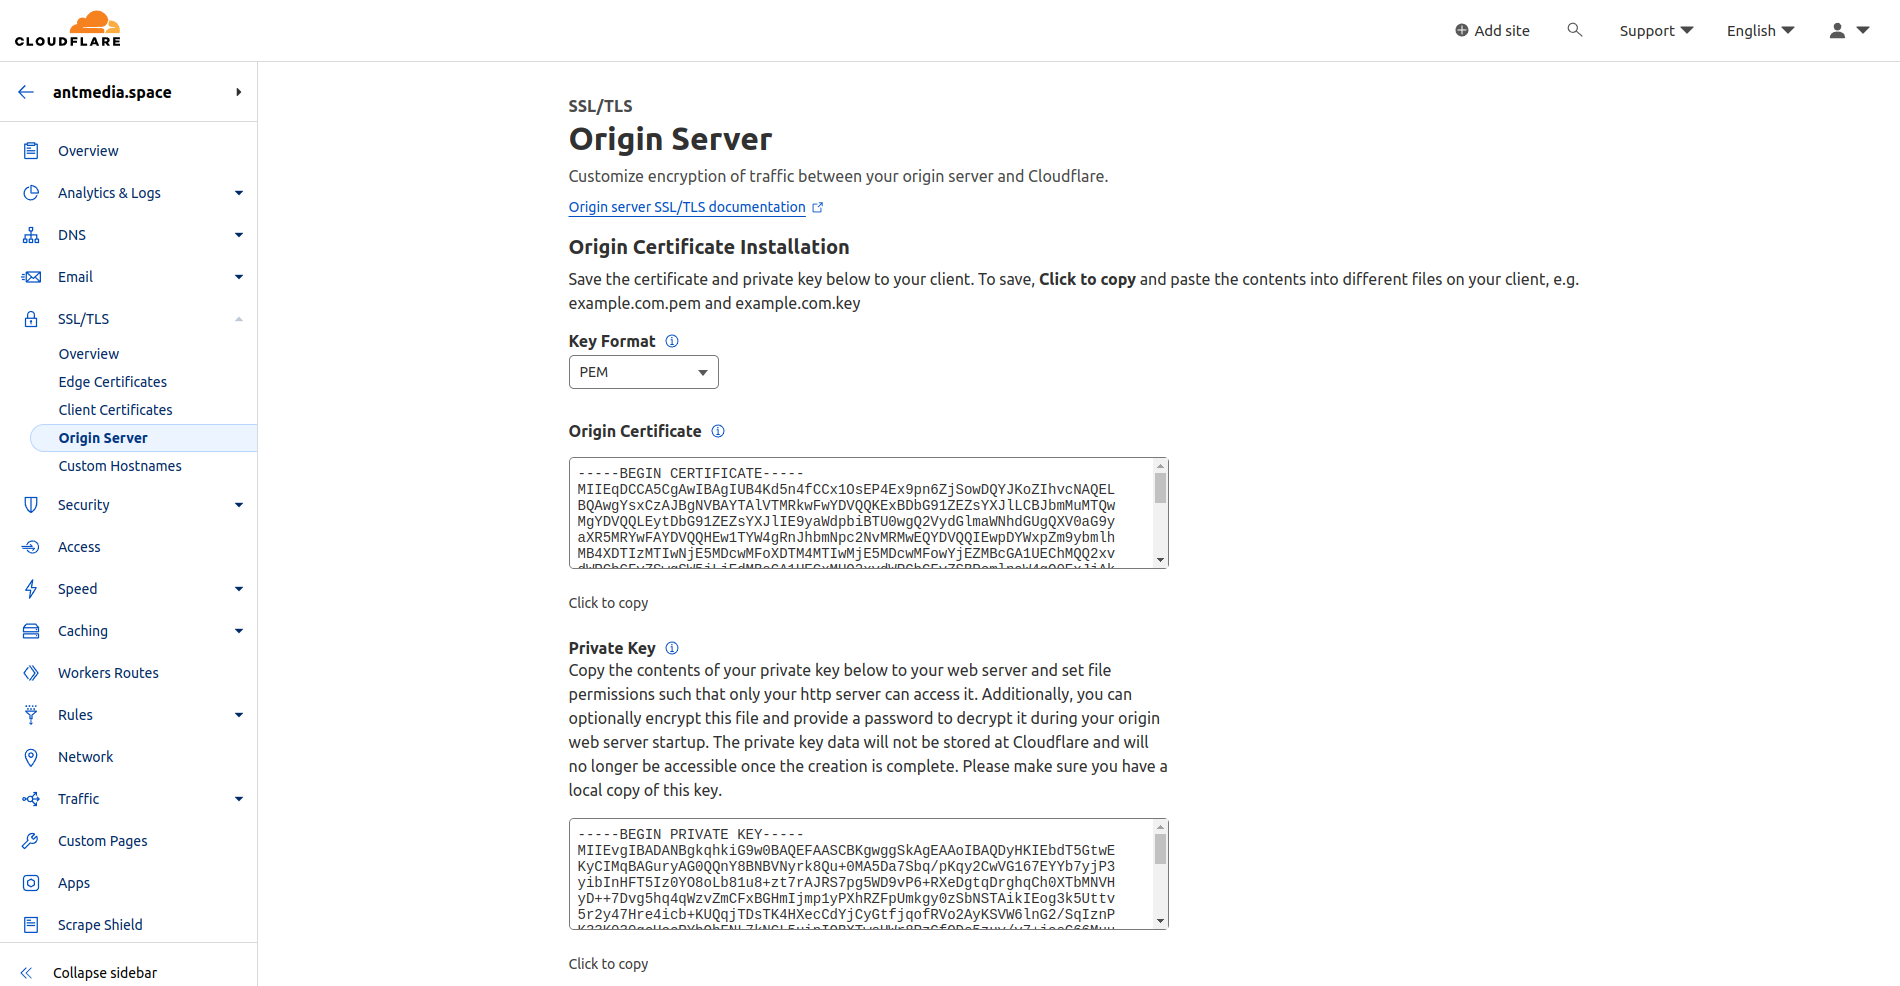
- Origin Certificate and Private Key will be generated; copy these two files to the server where you run Nginx.
- Ensure that the A record in DNS settings is set to "Proxied" (enabled).
Step 2: Nginx Configuration
-
Complete the installation of Nginx by following the instructions provided in this link.
-
Copy your certificate and private key to the
/etc/nginx/ssl/directory:
mkdir /etc/nginx/ssl
cp -p origin.pem privkey.pem /etc/nginx/ssl/
- Create a vhost configuration file:
vim /etc/nginx/conf.d/antmedia.conf
Edit and save the file with the following lines, customizing them with your information:
server {
    listen 443 ssl;
    ssl_certificate /etc/nginx/ssl/origin.pem;
    ssl_certificate_key /etc/nginx/ssl/privkey.pem;
    server_name antmedia.space;

    location / {
        proxy_pass http://127.0.0.1:5080;
        proxy_http_version 1.1;
        proxy_connect_timeout 7d;
        proxy_send_timeout 7d;
        proxy_read_timeout 7d;
        proxy_set_header X-Forwarded-For $proxy_add_x_forwarded_for;
        proxy_set_header Host $host;
        proxy_set_header Upgrade $http_upgrade;
        proxy_set_header Connection "Upgrade";
    }
}
- Verify the correctness of the configuration:
nginx -t
- Restart the Nginx service:
systemctl restart nginx
Finally, access the control panel.
That's it! If you have any questions, feel free to ask.