
Geographical Load Balancing is distribution of requests to the different servers according to the location of the requester. Such a load balancing let you connect a client to the nearest server. In live media streaming, geographical distance between the server and the client is important in terms of latency. If you have clients from different geolocations, geographical load balancing enhances you live streaming performance.
In this blog post we will tell AWS Route53 service and setting it for geographical load balancing. Also you can read Ant Media Server Global Cluster on AWS as an application of this post.
Prerequisites:
Before the setting up Route53 we assume that you have an AWS account. Also you need a domain name to register into the Route53.
Step 1: Create a hosted zone on Route53 service
Go to host zones on AWS and click Create Hosted Zone button. Write your domain name into the following form and click Create button.
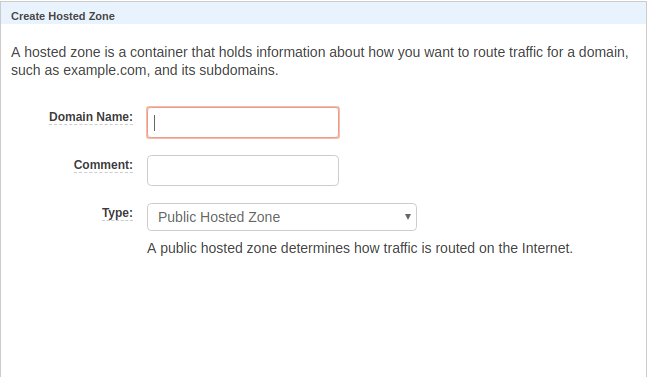
Route53 Hosted Zone Creation
Step 2: Add AWS name servers to your domain
Click the hosted zone you have just created from the hosted zone list. You will see such a page.

Hosted Zone
As you can see AWS provide 4 name servers for your domain. You must add these name servers to your domain. You can do this from the web panel of the company from which you get the domain name.
Step 3: Create Record sets
Click Go to Record Sets button. You will see 2 record sets in the list as the following picture. One of them is type NS and other is SOA. Don’t touch them.
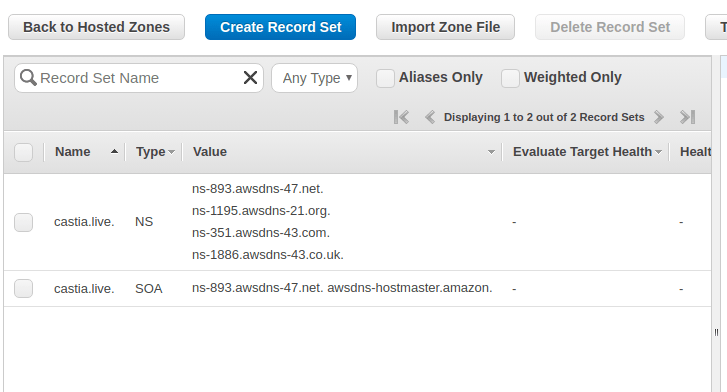
Predefined Record Sets
Now we will create new record set to direct requests from a geolocation to a server we have.Click Create Record Set. You will see the record set creation form. Select Geolocation as Routing Policy. You will this form.
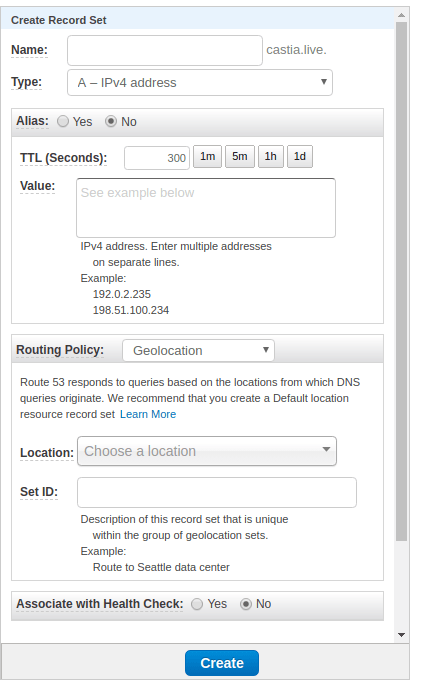
Record Set Creation
If you want to route your domain name leave blank Name text box. If you want to route a subdomain write the subdomai into Name text box.
Keep Type as A – IPv4 address.
Write IP address of your server to which you want to route the requests into Value text box.
Select the Location from where you route the request.
Write a description into Set ID text box.
Lastly click the Create button.
Example: I want to route the requests of demo.castia.live from Europe to my server with IP 192.58.1.10. My settings will be as follows:
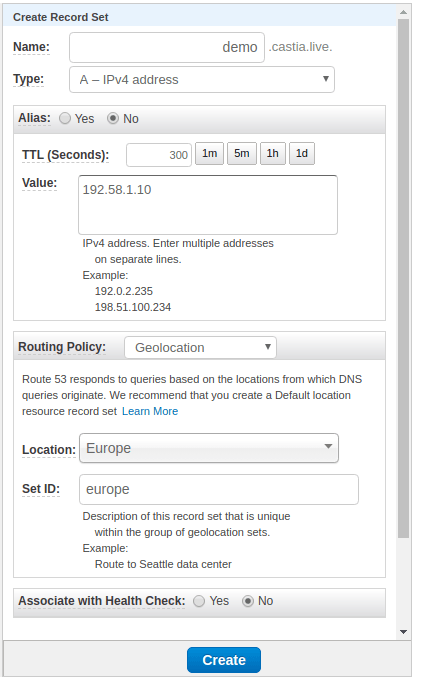
Record Set Example
Step 4: Test
To verify your Route53 setup, you can use this web site. You will see the routed IP address for different geolocations.
In this post, we told how you can use AWS Route53 service for Geographical Load Balancing. You can read more about Route53 from AWS documentation.


