
Today, I’m going to show you How to record streams to S3 compatible systems (OVH, GCS, Digital Ocean, Wasabi). Using S3 services is more cost-effective than storing files on your own server. It’s also easy to manage. Furthermore, S3 services have a lot of API capabilities. For example, you can add CORS policies, rules, and triggers to your system.
Table of Contents
- How to record streams on OVH Object Storage
- How to record streams on Google Cloud Storage
- How to record streams on Digital Ocean Spaces
- How to record streams on Wasabi Storage
How to record streams on OVH Object Storage
OVH is a cost-effective cloud provider and it is preferred by many people. If you installed Ant Media Server on an OVH cloud instance, you may want to upload your stream recordings to S3 storage. You could do that with a few steps. Let start!
Firstly, you need to generate Secret Key and Access Key with your OpenStack username/password. You can learn more about it in OVH’s docs.
After generating Secret Key and Access, you just need to create an Object Storage as an image.

record streams on OVH
You will see the Dashboard below after clicking the Create the Container.

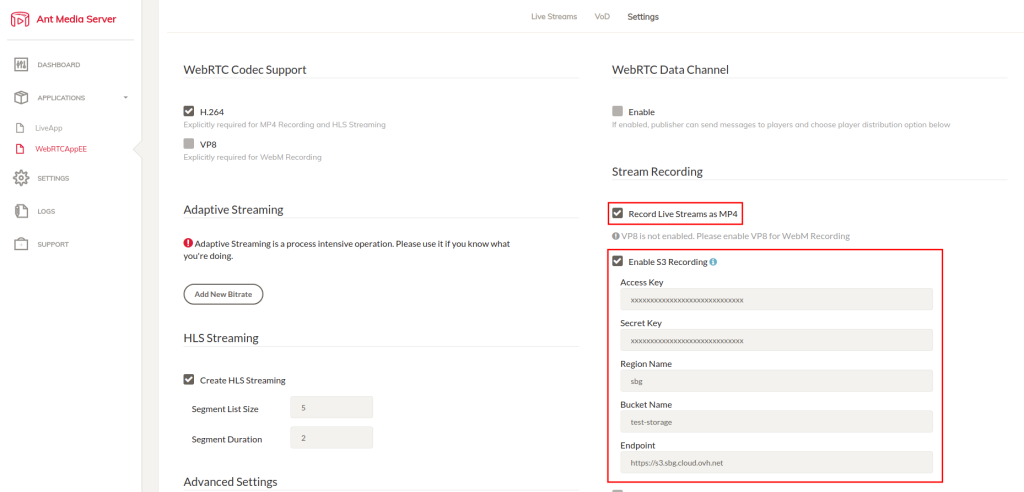
Then, log in the http://your_ams_server:5080, enable the Record Live Streams as MP4 and Enable S3 Recording, enter the S3 credentials you have created and save the settings.
On the Terminal
You need to add a new bean to red5-web.xml of your app as seen below. red5-web.xml file is under WEB-INF folder of your app. For example: webapps / LiveApp / WEB-INF / red5-web.xml
Here you see the sample S3 credentials. You need to set to yours:
Save the file and restart the server.
sudo service antmedia restart
Your MP4 files and Preview files will be uploaded to your OVH Object Storage automatically.
How to record streams on GCS Object Storage
Google Cloud is another cloud provider that is preferred by many Ant Media Server users. You could integrate your Google Cloud cloud instance easily with S3 cloud storage. Let’s see how it can be done with a few steps!
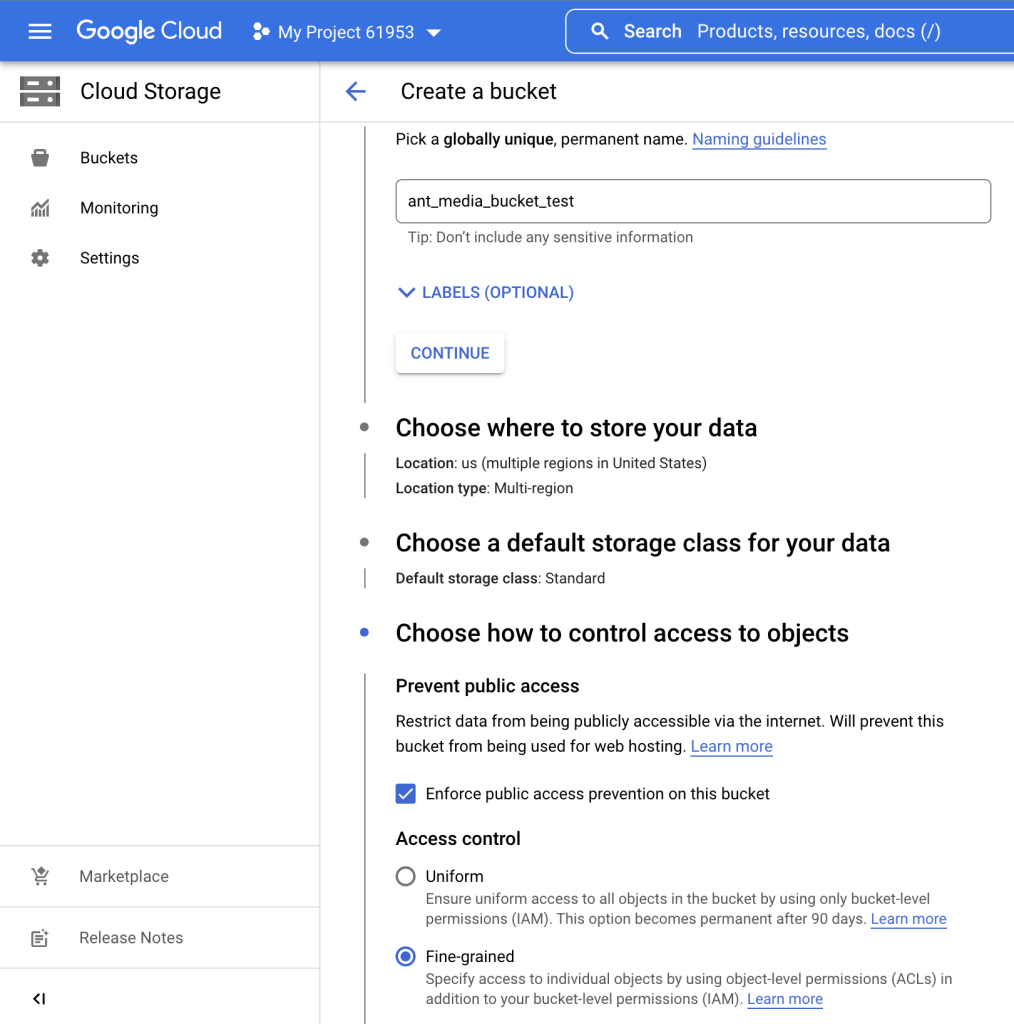
Firstly, you need to create a Bucket. Just click the Create button and fill in the blanks. You should choose the access level to Fine-grained.
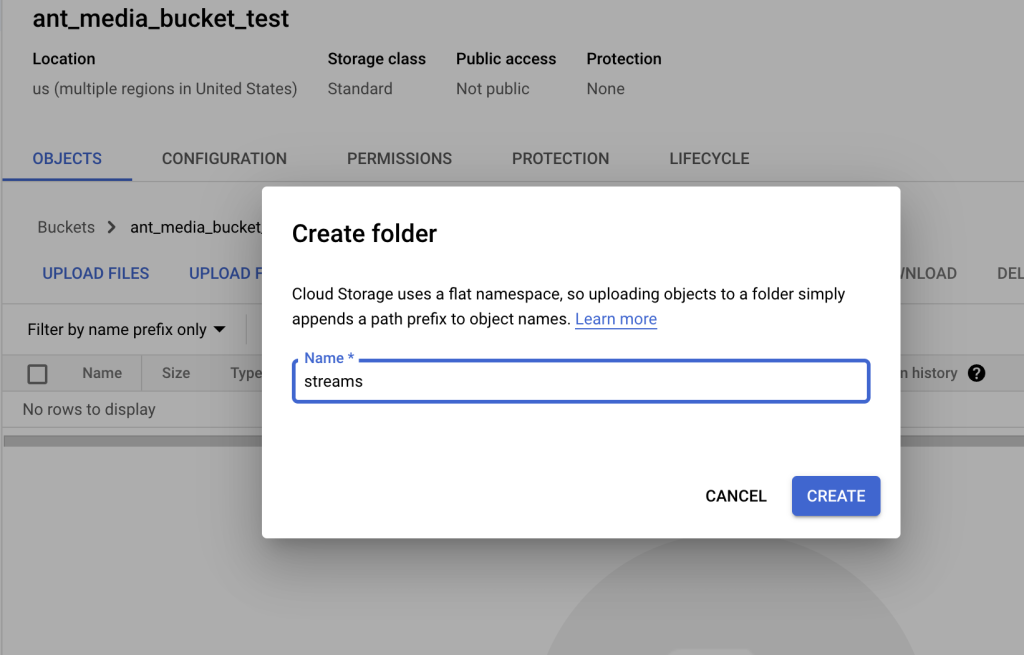
After creating the Bucket, go to the bucket and create a folder named streams.
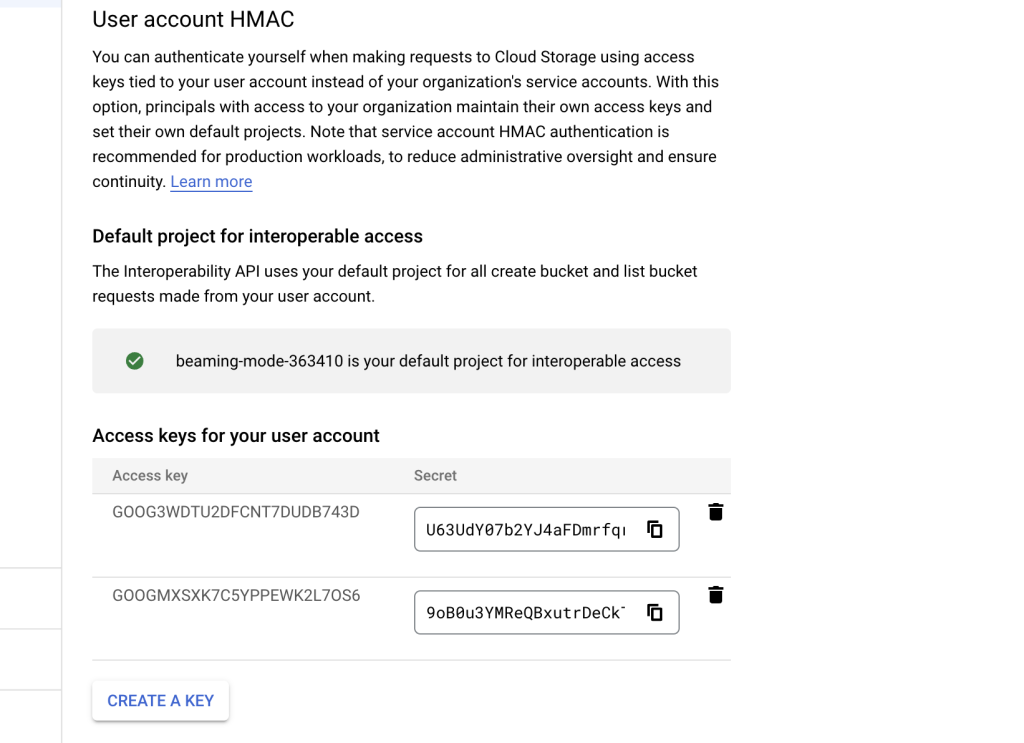
After creating the streams folder, go to settings and interoperability tab. On the User account HMAC section and choose the default project for interoperability access.
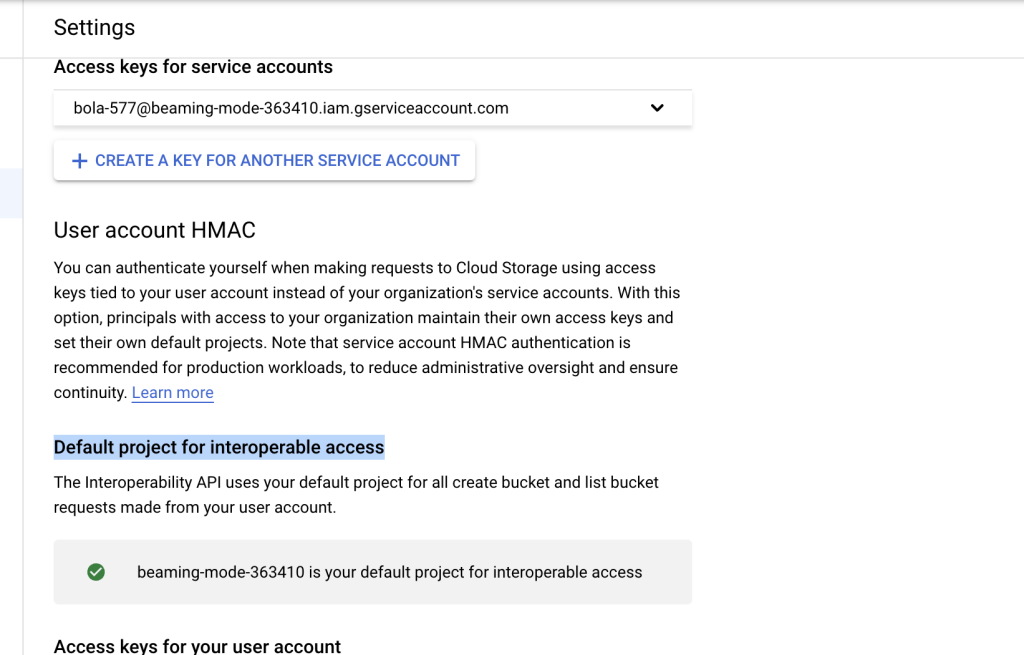
After choosing the default project, create an access key for the user account.
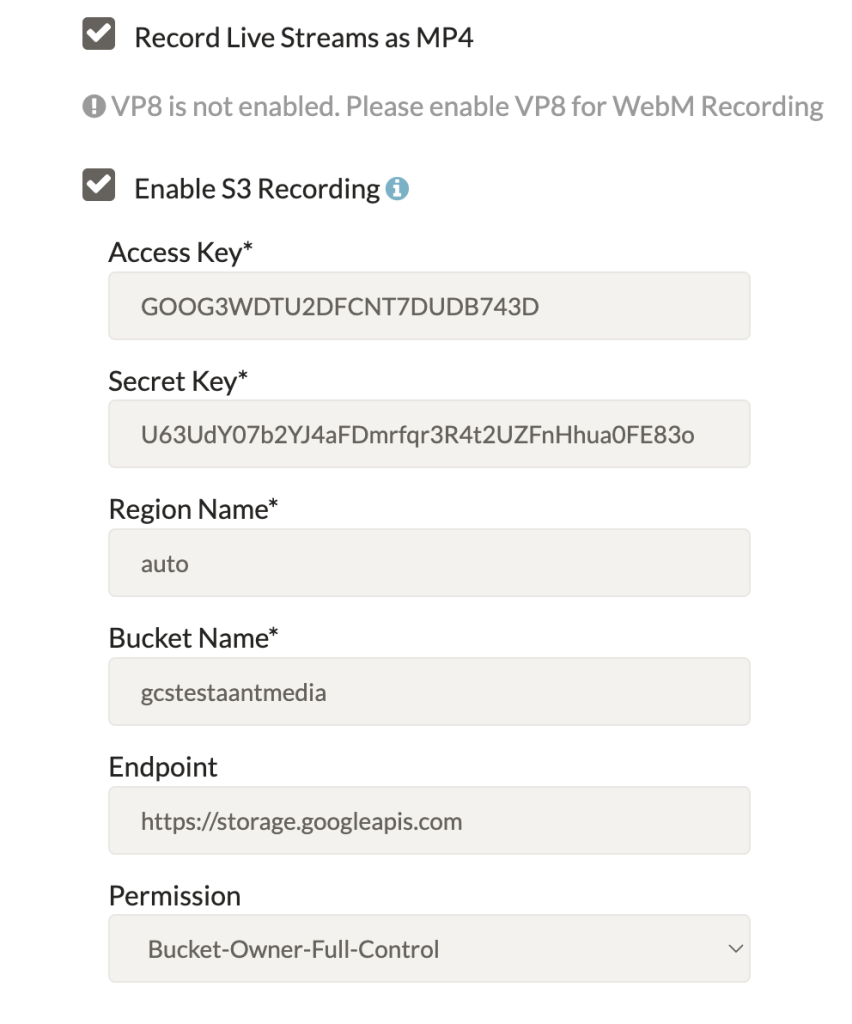
On the Dashboard:
Log in the http://your_ams_server:5080, enable the Record Live Streams as MP4 and Enable S3 Recording, enter the S3 credentials you have created and save the settings. You should enter “auto” to Region Name and enter “https://storage.googleapis.com” into Endpoint.
Your MP4 files and Preview files will be uploaded to your Google Cloud Storage Bucket automatically.
How to record streams on Digital Ocean
DigitalOcean is another cloud provider that is preferred by many Ant Media Server users. You could integrate your DigitalOcean cloud instance easily with S3 cloud storage. Let’s see how it can be done with a few steps!
Firstly, you need to create Spaces. Just click the Space button and fill in the blanks.

After creating Spaces you need to create API keys for Access and Secret keys. Just click the API button on the left side and then click Generate New Key.

Just type the Name parameter and click the create button.

After generating Access keys and Secret keys, there is only one step left.

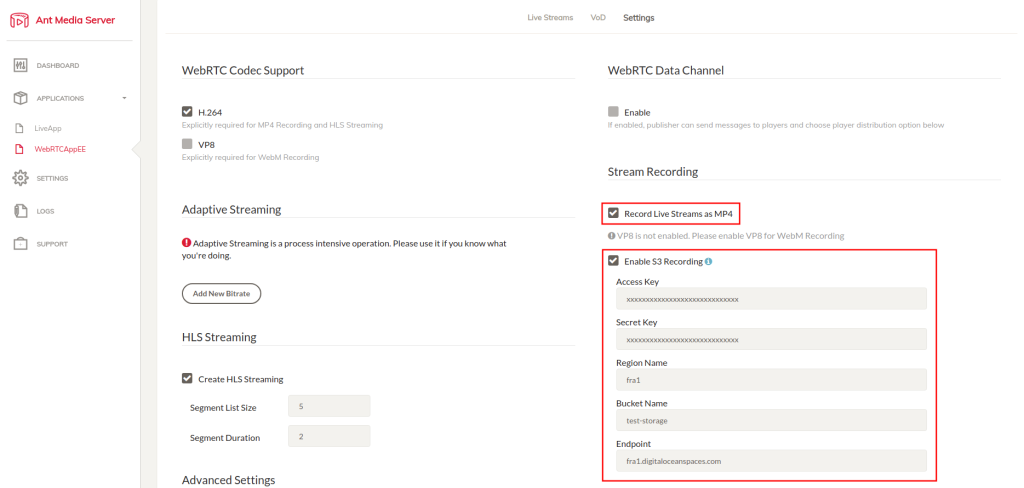
On the Dashboard:
Log in the http://your_ams_server:5080, enable the Record Live Streams as MP4 and Enable S3 Recording, enter the S3 credentials you have created and save the settings.
On the Terminal:
You need to add a new bean to red5-web.xml of your app as seen below. red5-web.xml file is under WEB-INF folder of your app. For example: webapps / LiveApp / WEB-INF / red5-web.xml
Save the file and restart the server.
sudo service antmedia restart
Your MP4 files and Preview files will be uploaded to your Digital Ocean Spaces automatically.
How to record streams on Wasabi Storage
Wasabi is another cloud provider that is preferred by many Ant Media Server users. You could integrate your Wasabi storage. Let’s see how it can be done with a few steps!
Firstly, you need to create a new access key in your Wasabi account.

After generating Access keys and Secret keys, you need to create a bucket. Just click the Create Bucket on the right side.

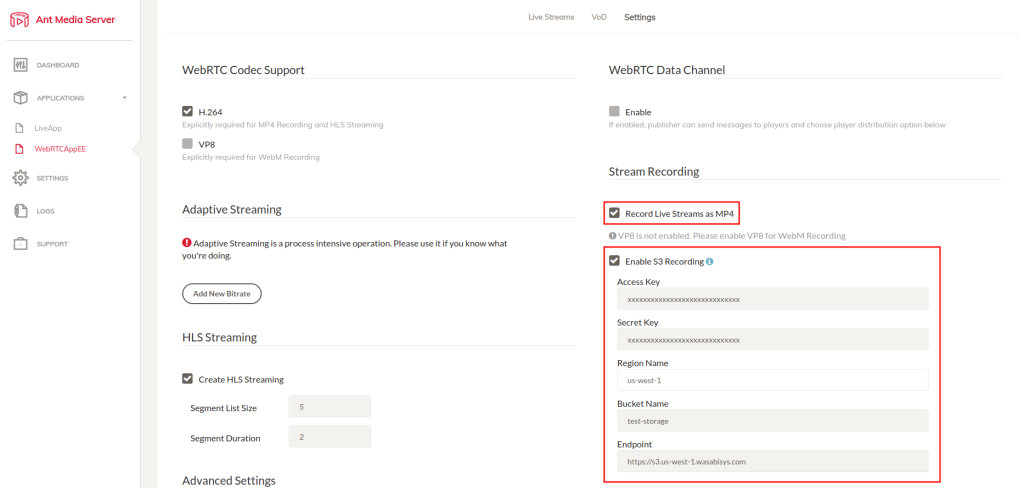
On the Dashboard:
Then, log in the http://your_ams_server:5080, enable the Record Live Streams as MP4 and Enable S3 Recording, enter the S3 credentials you have created and save the settings.
On the Terminal:
You need to add a new bean to red5-web.xml of your app as seen below. red5-web.xml file is under WEB-INF folder of your app. For example: webapps / LiveApp / WEB-INF / red5-web.xml
Save the file and restart the server.
sudo service antmedia restart
Your MP4 files and Preview files will be uploaded to your Wasabi storage automatically.
Conclusion
In this blog post, you learned how easy to integrate Ant Media Server with S3 storage. By following this blog post, you could start uploading MP4, WebM, and preview records to your storage automatically.
References
- How To Create a DigitalOcean Space and API Key
- Amazon (AWS) S3 Integration
- OVHcloud Object Storage clusters support S3 API
- Learn how to scale Ant Media Server to 70K viewers,
- Learn how to enable SSL with just 1 command.


