
Why Use a Virtual Background?
The COVID-19 pandemic affected the work behavior of many companies, educational institutions and communities around the world.
Remote work and long distance education have increased the need for video conferencing tools.
With online conferencing, individuals often encounter new challenges when they lack an appropriate background or find themselves in a situation where they prefer not to share their surroundings with others.
At this point, a virtual background becomes an essential feature. A virtual background combines image processing and artificial intelligence technologies, enabling users to change their background in real time.
In this article, you will discover how you can configure a virtual background using Ant Media Server’s JavaScript SDK.
How Does the Virtual Background Work?
To implement a virtual background on your live stream, this typically requires two main stages. The first stage is to segment the video feed to separate the subject from the background. Then to replace the background with an image.
Ant Media Server utilizes Google’s MediaPipe library for the segmentation stage and has developed the logic for the actual background replacement.
How to use Virtual Backgrounds with Ant Media Server’s JavaScript SDK?
Using a virtual background with Ant Media Server’s JavaScript SDK is very easy! Just follow these simple steps to apply a virtual background on your publishing page.
The two main WebRTCAdaptor methods that are used to apply the background replacement are:
- Set the background image:
webRTCAdaptor.setBackgroundImage() - Apply the background image:
webRTCAdaptor.enableEffect()
There are only a few basic changes needed to apply the logic to add the feature.
Here is a very basic publish page that has two buttons, one for publishing and one for unpublishing and as you can see, a very boring background.
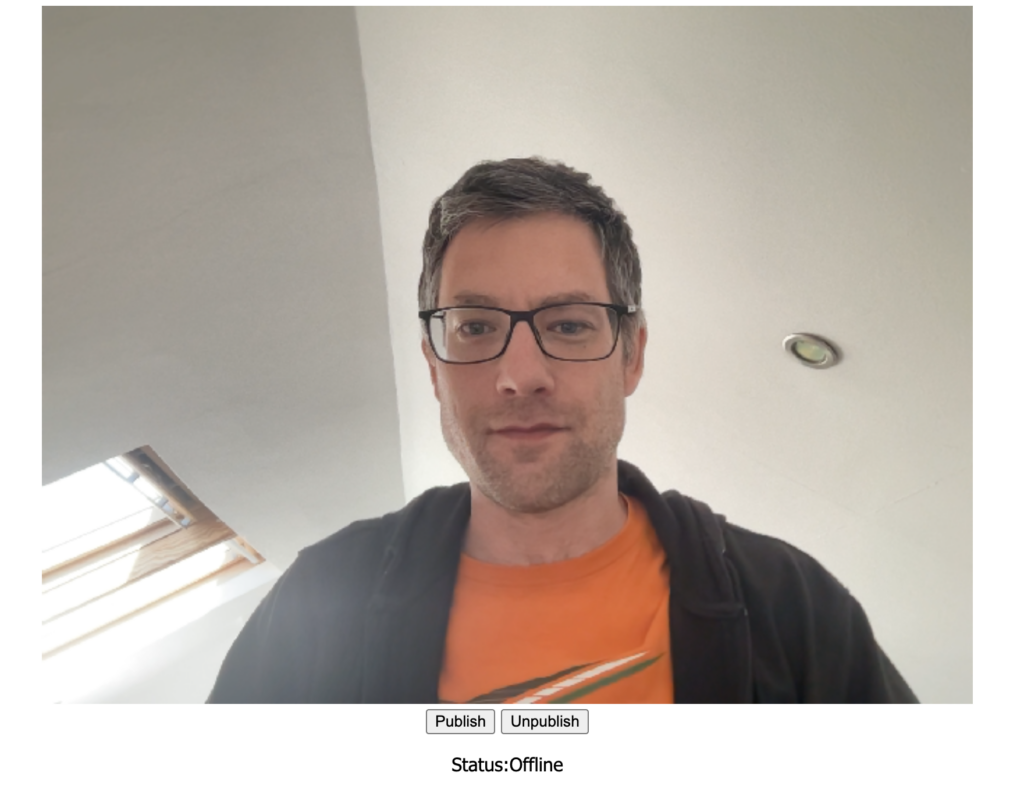
and here is the code inside the <body> tag:
<div class="container">

    <video id="localVideo" autoplay muted controls playsinline width="800px"> </video>

    <div class="d-block">
      <button id="start_publish">Publish</button>
      <button id="stop_publish">Unpublish</button>
      <p id="status">Status:Offline</p>
    </div>

   </div>

   <script type="module">

   import {WebRTCAdaptor, VideoEffect} from "./node_modules/@antmedia/webrtc_adaptor/dist/es/index.js";

    const webRTCAdaptor = new WebRTCAdaptor({
      websocket_url: "wss://ant-media-server:5443/LiveApp/websocket",
      localVideoElement: document.getElementById("localVideo"),
      mediaConstraints: {
        video: true,
        audio:true
      },
      callback: (info, obj) => {
        console.log("callback info: " + info);
        if (info == "publish_started") {
            console.log("publish started");
            statusInfo.innerHTML = "Status:Broadcasting"
        }
        else if (info == "publish_finished") {
            console.log("publish finished")
            statusInfo.innerHTML = "Status:Offline"
        }
        else if( info == "available_devices"){
          console.log(obj)
        }
      },
      callbackError: function (error, message) {
        //some of the possible errors, NotFoundError, SecurityError,PermissionDeniedError
        console.log("error callback: " + JSON.stringify(error));
      }

    });

    //get random streamId
    const streamId = "stream" + parseInt(Math.random()*999999);
    const startPublishButton = document.getElementById("start_publish")
    const stopPublishButton = document.getElementById("stop_publish")
    const statusInfo = document.getElementById("status");

    startPublishButton.addEventListener("click", () => {
      console.log("start publish is clicked " + streamId);
      webRTCAdaptor.publish(streamId);
    });

    stopPublishButton.addEventListener("click", () => {
      console.log("stop publish is clicked");
      webRTCAdaptor.stop(streamId);
    });

</script>
As you can see, its a very basic WebRTC publish page implementation using the WebRTC Adaptor. To use this publish page, remember to update the websocket_url URL with your own Ant Media Server instance.
It’s pulling the WebRTC Adaptor from NPM and importing the WebRTCAdaptor and VideoEffect classes which is what we’ll need to publish WebRTC.
Then apply an event handler to the two buttons to publish and unpublish the live stream which call the SDK methods webRTCAdaptor.publish(streamId) and webRTCAdaptor.stop(streamId).
Now lets add the virtual background feature.
Step 1: Make Virtual Background Images Available
The images that you want to have available as virtual images, need to be added into a directory accessible by your publish page.
In this example, all the images are located in the images directory. Lets create the HTML that will display all the images under the video player so we can select the desired background.
Add the following HTML under the buttons.
   <div class="col-sm-12 text-center" id="virtualBackgrounds">
      <h3>Select a virtual background Image</h3>
      <div class="d-flex" id="virtualbackgroundimages">

        <img src="./images/noeffect-background.png"  id="noeffect" class="backgroundImages selected" />
        <img src="./images/blur-background.png" id="blur" class="backgroundImages " />
        <img src="./images/virtual-background.png" id="antMediaBackground" class="backgroundImages "/>
        <img src="./images/cloud-background.png" class="backgroundImages"/>

        <img src="./images/unsplash.jpg" class="backgroundImages"/>
        <img src="./images/huy.jpg" class="backgroundImages"/>
        <img src="./images/mokry.jpg" class="backgroundImages"/>
        <img src="./images/mitchell.jpg" class="backgroundImages"/>
      </div>

      <div class="d-block">
      <h3>Upload a Virtual Background Image</h3>
      <input type="file" class="custom-file-input" id="customFile" style="height:100%;" accept=".jpg, .png, .jpeg">
      </div>
    </div>
Make sure to update this code with the names of the images you have in your directory. You’ll also notice there is also a section to upload a background image. We’ll get to that later.
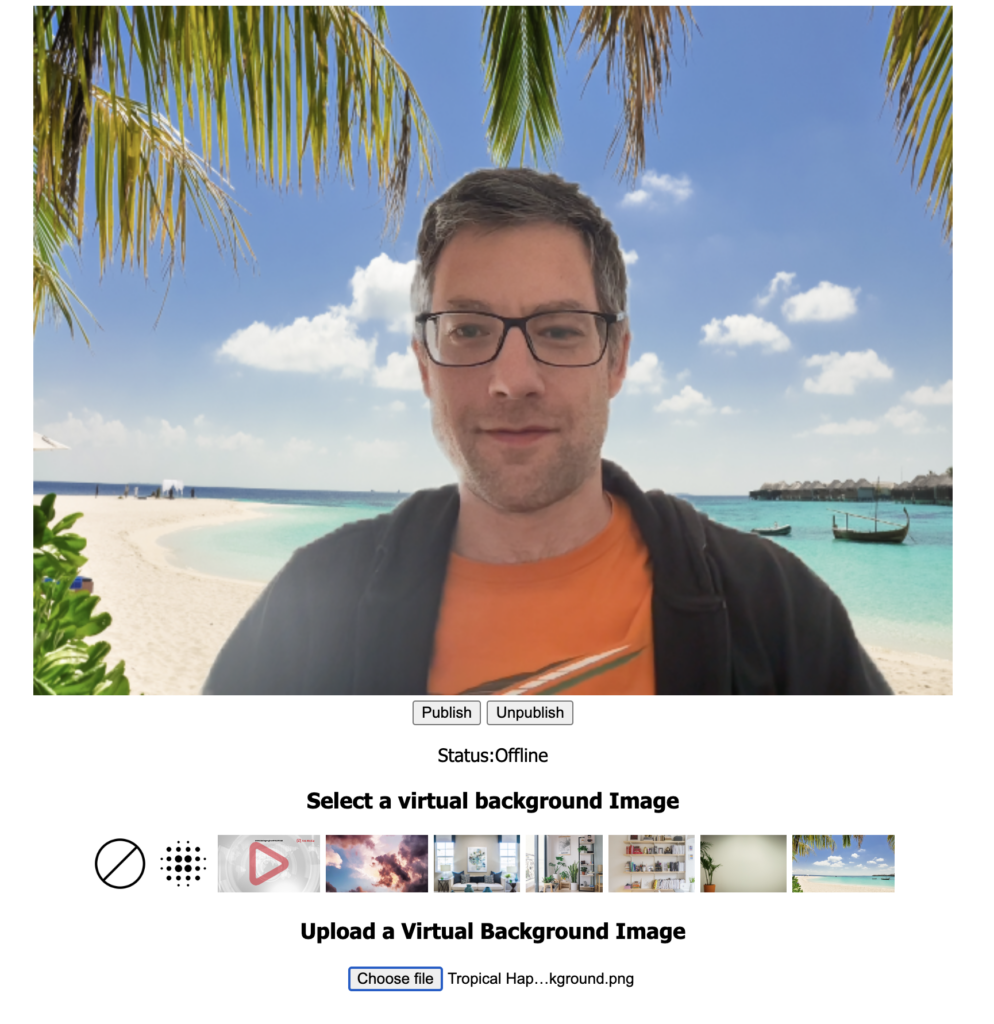
It now looks like this:
Notice that we also have two images that do not look like backgrounds on the far left. These will function to either remove the virtual background or blur the background.
Right now, clicking these images do nothing! So its time to use the SDK to help us add the virtual background functionality.
Step 2: Add a Click Handler to the Images
To make things easy and quick, we’ll use the JavaScript library jQuery to apply event handlers, for example, when you click on the desired background image, a Javascript method is called to apply the virtual background.
Lets start by adding that click handler.
All the images have a class name of backgroundImages. So lets use that class and register a click handler.
$(".backgroundImages").click(enableVirtualBackground);
function enableVirtualBackground(){
 // add the magic here
}
As you can see, we are registering a click handler to each image and calling a method enableVirtualBackground thats directly underneath.
This is where all the magic will happen.
Add this bit of JavaScript right under the import statement that imports the WebRTCAdaptor
Lets also not forget about uploading custom backgrounds.
There is also a upload section, so we’ll need to hook this up with an event handler to capture the image thats uploaded.
Here is the code sample that does that:
   $('input[type="file"]').change(function(e) {
        const url = URL.createObjectURL(e.target.files[0]);
        const newBackgroundImg = $("<img src=\"" + url + "\" class=\"backgroundImages\"/>");
        $("#virtualbackgroundimages").append(newBackgroundImg);
        $(".backgroundImages").click(enableVirtualBackground);
        newBackgroundImg.click();
    });
What this is doing is listening for when a file is selected. Once thats been done, its using URL.createObjectURL JavaScript function to create a special object URL (Uniform Resource Locator) that represents the uploaded image.
Then a new image is created and appended to the list of current background images in the HTML.
Once it has been appended, apply the click handler as before to all the images and simulate a click on the newly uploaded image to apply the virtual background.
Step 3: Enable Virtual Backgrounds
Now its time to get our virtual backgrounds working!
You might have noticed that the two images that either blur the background or remove the virtual background have an id of blur or noeffect respectively.
We’ll be using VideoEffect to configure the background image and webRTCAdaptor to apply the virtual background.
Here is the full working code sample for enableVirtualBackground method:
   function enableVirtualBackground() {
        var effectName;
        if ($(this).attr("id") == "blur") {
            effectName = VideoEffect.BLUR_BACKGROUND;
        }
        else if ($(this).attr("id") == "noeffect") {
            effectName = VideoEffect.NO_EFFECT;
        }
        else {
            effectName = VideoEffect.VIRTUAL_BACKGROUND;
            webRTCAdaptor.setBackgroundImage(this);
        }
        webRTCAdaptor.enableEffect(effectName).then(() => {
            console.log("Effect: "+ effectName+" is enabled");
        }).catch(err => {
            console.error("Effect: "+ effectName+" is not enabled. Error is " + err);
            $.notify(err.name, {
                autoHideDelay:5000,
                className:'error',
                position:'top center'
            });
        });
        $(this).addClass("selected");
    }
The first part is detecting whether or not we want to remove the virtual background or blur the background and assigning the necessary VideoEffect property (VideoEffect.NO_EFFECT or VideoEffect.BLUR_BACKGROUND) based on the ID of the image that has been clicked.
Otherwise, we want to apply the image as a virtual background, so assigning VideoEffect.VIRTUAL_BACKGROUND is necessary followed by calling the webRTCAdaptor.setBackgroundImage to set the image as the virtual background image.
Once thats been done, all thats left is to call the webRTCAdaptor.enableEffect to enable the virtual background.
Step 4: Test the Virtual Background
Now its time to test that this works.
You should now be able to apply a virtual background from one of the images available or upload your own.
I’ve decided to be on the beach for this example.
Now try live streaming and changing your background on the fly. You should see it change almost immediately.
Full Code Sample:
Here is the full source code of the page. Remember to update the websocket_url of your server.
<!DOCTYPE html>
<html lang="en">
<head>
  <meta charset="UTF-8">
  <meta http-equiv="X-UA-Compatible" content="IE=edge">
  <meta name="viewport" content="width=device-width, initial-scale=1.0">
  <title>Document</title>
  <script src="https://code.jquery.com/jquery-3.6.0.min.js"></script>

  <style>
    body{
      font-family: Tahoma;
    }
    #virtualBackgrounds img{
      height: 50px;
    }
    .container{
      margin:auto;
      width: 800px;
      text-align:center;
    }
  </style>

</head>
<body>

  <div class="container">

    <video id="localVideo" autoplay muted controls playsinline width="800px"> </video>

    <div class="d-block">
      <button id="start_publish">Publish</button>
      <button id="stop_publish">Unpublish</button>
      <p id="status">Status:Offline</p>
    </div>


   <div class="col-sm-12 text-center" id="virtualBackgrounds">
      <h3>Select a virtual background Image</h3>
      <div class="d-flex" id="virtualbackgroundimages">

        <img src="./images/noeffect-background.png"  id="noeffect" class="backgroundImages selected" />
        <img src="./images/blur-background.png" id="blur" class="backgroundImages " />
        <img src="./images/virtual-background.png" id="antMediaBackground" class="backgroundImages "/>
        <img src="./images/cloud-background.png" class="backgroundImages"/>

        <img src="./images/unsplash.jpg" class="backgroundImages"/>
        <img src="./images/huy.jpg" class="backgroundImages"/>
        <img src="./images/mokry.jpg" class="backgroundImages"/>
        <img src="./images/mitchell.jpg" class="backgroundImages"/>
      </div>

      <div class="d-block">
      <h3>Upload a Virtual Background Image</h3>
      <input type="file" class="custom-file-input" id="customFile" style="height:100%;" accept=".jpg, .png, .jpeg">
      </div>
    </div>

   </div>

   <script type="module">

   import {WebRTCAdaptor, VideoEffect} from "./node_modules/@antmedia/webrtc_adaptor/dist/es/index.js";

   $(".backgroundImages").click(enableVirtualBackground);

   $('input[type="file"]').change(function(e) {
        const url = URL.createObjectURL(e.target.files[0]);
        const newBackgroundImg = $("<img src=\"" + url + "\" class=\"backgroundImages\"/>");
        $("#virtualbackgroundimages").append(newBackgroundImg);
        $(".backgroundImages").click(enableVirtualBackground);
        newBackgroundImg.click();
    });

   function enableVirtualBackground() {
        var effectName;
        if ($(this).attr("id") == "blur") {
            effectName = VideoEffect.BLUR_BACKGROUND;
        }
        else if ($(this).attr("id") == "noeffect") {
            effectName = VideoEffect.NO_EFFECT;
        }
        else {
            effectName = VideoEffect.VIRTUAL_BACKGROUND;
            webRTCAdaptor.setBackgroundImage(this);
        }
        webRTCAdaptor.enableEffect(effectName).then(() => {
            console.log("Effect: "+ effectName+" is enabled");
        }).catch(err => {
            console.error("Effect: "+ effectName+" is not enabled. Error is " + err);
            $.notify(err.name, {
                autoHideDelay:5000,
                className:'error',
                position:'top center'
            });
        });
        $(this).addClass("selected");
    }

    const webRTCAdaptor = new WebRTCAdaptor({
      websocket_url: "wss://ant-media-server:5443/LiveApp/websocket",
      localVideoElement: document.getElementById("localVideo"),
      mediaConstraints: {
        video: true,
        audio:true
      },
      callback: (info, obj) => {
        console.log("callback info: " + info);
        if (info == "publish_started") {
            console.log("publish started");
            statusInfo.innerHTML = "Status:Broadcasting"
        }
        else if (info == "publish_finished") {
            console.log("publish finished")
            statusInfo.innerHTML = "Status:Offline"
        }
        else if( info == "available_devices"){
          console.log(obj)
        }
      },
      callbackError: function (error, message) {
        //some of the possible errors, NotFoundError, SecurityError,PermissionDeniedError
        console.log("error callback: " + JSON.stringify(error));
      }

    });

    //get random streamId
    const streamId = "stream" + parseInt(Math.random()*999999);
    const startPublishButton = document.getElementById("start_publish")
    const stopPublishButton = document.getElementById("stop_publish")
    const statusInfo = document.getElementById("status");

    startPublishButton.addEventListener("click", () => {
      console.log("start publish is clicked " + streamId);
      webRTCAdaptor.publish(streamId);
    });

    stopPublishButton.addEventListener("click", () => {
      console.log("stop publish is clicked");
      webRTCAdaptor.stop(streamId);
    });

</script>
</body>
</html>
There is also a sample page in the default applications located at the following URL https://ant-media-server:5443/{application}/publish_webrtc_virtual_background.html.
That sample page is also available on Github and you can see a live demo on our samples page
What Next?
Explore the JavaScript SDK reference guide and other popular SDKs, the documentation or join the community discussions to learn more about the Ant Media Server.
Demos of Ant Media Server are available on the website and you can check out some of the popular SDKs in Github to integrate Ant Media Server into your mobile application.
Deployment options include other 1-click apps, cloud marketplaces, Docker/Kubernetes/Scripts on various cloud providers such as AWS, Microsoft Azure, Digital Ocean, Linode, Google, and Alibaba.
A free trial is available to try out the Enterprise Edition of the product and support packages are available for both editions if you need some extra help getting started.


