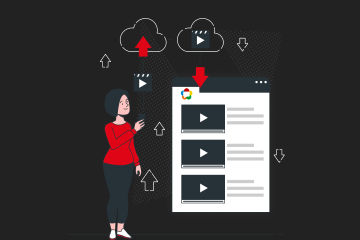
The Web Player, developed by Ant Media, is a powerful live stream player specially designed to simplify the playback of server-hosted live streams. It supports various streaming protocols such as WebRTC, HLS, CMAF Dash, and VR 360, offering many customization options. This open-source player is available on GitHub, welcoming community contributions and exploration.
Web Player is embedded into all sample play pages of Ant Media Server, including the play.html. Therefore, if you’ve ever utilized the play samples, you’ve already utilized the Web Player behind the scenes.
Why Use Ant Media Web Player?
- Easy Integration: Quickly add the player to your website or project.
- Versatile Playback: Supports multiple streaming protocols and formats.
- Customization: Extensive options to tailor the player to your needs.
- Open Source: Accessible on GitHub for community collaboration.
Technology
The Web Player combines Ant Media’s custom plugin for WebRTC playback with the widely acclaimed video player library, video.js.
This integration allows the Web Player to handle various types of streams, including WebRTC, HLS, Dash, VOD, and VR 360 content. Ant Media team has put a significant development effort into ensuring a seamless and user-friendly playback experience.
Key Features of the Web Player
- Supports Multiple Protocols: WebRTC, HLS, DASH, and VR 360.
- Configurable: Adjust settings via URL parameters or in-code.
- Secure: Token-based stream access.
- Autoplay and Mute Options: For seamless viewing.
- Customizable Play Order: Set your preferred playback sequence.
- Adjustable Latency: Fine-tune for DASH streams.
- 360-Degree Video: Supports immersive video experiences.
- Easy Installation: Integrate with any JS project using npm.
- Open Source: Fully customizable and community-driven.
How to Add Ant Media Web Player to Your Project?
Step 1: Install via npm
First, navigate to your project directory and install the Web Player using npm:
npm i @antmedia/web_playerStep 2: Import and Initialize the Player
Next, import the Web Player into your project and initialize it with your preferred configuration.
import { WebPlayer } from "@antmedia/web_player";

var player = new WebPlayer({
    streamId: "yourStreamId",
    httpBaseURL: "http://example.antmedia.io:5080/WebRTCAppEE",
    token: "yourToken",
    playOrder: ["webrtc", "hls", "dash"],
    videoHTMLContent: '<video id="video-player" class="video-js vjs-default-skin vjs-big-play-centered" controls playsinline style="width:100%;height:100%"></video>',
}, document.getElementById("video_container"), null);

player.initialize().then(() => {
    player.play();
}).catch((error) => {
    console.error("Error initializing player: " + error);
});
URL-Based Initialization:
Alternatively, you can configure the player to retrieve parameters from the URL:
import { WebPlayer } from "@antmedia/web_player";

var player = new WebPlayer(window, document.getElementById("video_container"), document.getElementById("video_info"));

player.initialize().then(() => {
    player.play();
});
If you opt for this approach, the web player will automatically attempt to retrieve all parameters from the URL. For instance, you can pass the streamId as ?id=teststream.
Configuration Parameters
The player supports various configuration parameters, which can be provided either through the URL or directly in the code:
- id (String): The stream ID to be played. This parameter is mandatory.
- token (String): The token for stream access. It is compulsory if token security is enabled on the server side.
- autoplay (Boolean): Automatically start playback if the stream is available. Optional. The default value is true.
- mute (Boolean): Begin playback in mute mode if the stream is available. Optional. The default value is true.
- playOrder (String): The sequence of playback technologies to be used. Optional. The default value is “webrtc, hls”. Possible values include “hls, webrtc”, “webrtc”, “hls”, “vod”, “dash”.
- playType (String): The order of play types for playback. Optional. The default value is “mp4, webm”. Possible values include “webm, mp4”, “mp4”, “webm”, “mov”.
- targetLatency (Number): The target latency for the DASH player. Optional. The default value is 3.
- is360 (Boolean): Enable 360-degree playback mode. Optional. The default value is false.
Adding Web Player to a React Project
Step 1: Install the Player
Navigate to your React project directory and install the Web Player using npm:
npm i @antmedia/web_playerStep 2: Import Web Player to Your Component
import { WebPlayer } from "@antmedia/web_player";
Step 3: Add Video Player Container and Placeholder to HTML
Within your component’s render function, create a video player container and a placeholder. The placeholder remains visible until the stream initiates playback. The Ant Media web player inserts a video element into the videoContainer, adapting to its dimensions. Consequently, you can adjust the player’s size by modifying the dimensions of the videoContainer element.
<div>
    <div style={{ display: 'flex', alignItems: 'center', flexDirection: 'column' }}>
        <span>Ant Media Embedded Player</span>
        <div style={{ display: 'flex', height: '360px', width: '640px' }} id="videoContainer" ref={videoRef}></div>
        <div
            id="placeHolder"
            ref={placeHolderRef}
            className="placeholder"
            style={{
                height: '360px',
                overflow: 'hidden',
                display: 'flex',
                alignItems: 'center',
                justifyContent: 'center'
            }}
        >
            The streaming will begin shortly…
        </div>
    </div>
</div>
Crucial elements in our HTML consist of videoContainer and placeHolder. These components will be passed to the constructor of WebPlayer.
Step 4: Initialize Web Player Inside useEffect
Create a useEffect hook to initialize the web player and start playback on component mount:
useEffect(() => {
    embeddedPlayerRef.current = new WebPlayer({
        streamId: "teststream",
        httpBaseURL: "http://localhost:5080/WebRTCAppEE/",
        videoHTMLContent: '<video id="video-player" class="video-js vjs-default-skin vjs-big-play-centered" controls playsinline style="width:100%;height:100%"></video>',
        playOrder: playOrderLocal
    }, videoRef.current, placeHolderRef.current);

    embeddedPlayerRef.current.initialize().then(() => {
        embeddedPlayerRef.current.play();
    }).catch((error) => {
        console.error("Error while initializing embedded player: " + error);
    });
}, []);
- streamId: Identifies the stream that your player will showcase.
- httpBaseURL: This parameter facilitates the web player in fetching the application name (e.g., WebRTCAppEE in our example) and the server URL where the stream is situated.
- videoHTMLContent: Content that the web player will inject into our videoContainer.
- playOrder: Array specifies the order of playback.
- videoRef.current: Reference to the videoContainer element.
- placeHolder.current: Reference to the placeholder element.
Full React Component:
import { useEffect, useRef } from 'react';
import { WebPlayer } from "@antmedia/web_player";

function App() {
    const videoRef = useRef(null);
    const placeHolderRef = useRef(null);
    const embeddedPlayerRef = useRef(null);
    const playOrderLocal = ["webrtc", "hls", "dash"];

    useEffect(() => {
        embeddedPlayerRef.current = new WebPlayer({
            streamId: "teststream",
            httpBaseURL: "http://localhost:5080/WebRTCAppEE/",
            videoHTMLContent: '<video id="video-player" class="video-js vjs-default-skin vjs-big-play-centered" controls playsinline style="width:100%;height:100%"></video>',
            playOrder: playOrderLocal
        }, videoRef.current, placeHolderRef.current);

        embeddedPlayerRef.current.initialize().then(() => {
            embeddedPlayerRef.current.play();
        }).catch((error) => {
            console.error("Error while initializing embedded player: " + error);
        });
    }, []);

    return (
        <div>
            <div style={{ display: 'flex', alignItems: 'center', flexDirection: 'column' }}>
                <span>Ant Media Embedded Player</span>
                <div style={{ display: 'flex', height: '360px', width: "640px" }} ref={videoRef} id="video_container"></div>
                <div
                    ref={placeHolderRef}
                    className="placeholder"
                    style={{
                        height: '360px',
                        overflow: 'hidden',
                        display: 'flex',
                        alignItems: 'center',
                        justifyContent: 'center'
                    }}
                >
                    The streaming will begin shortly…
                </div>
            </div>
        </div>
    );
}

export default App;
If you want to use the defined token or other parameter, then first you have to define the token or other variable and pass it as a parameter to the player.
const Token = "your-generated-token-value";

useEffect(() => {
    embeddedPlayerRef.current = new WebPlayer({
        streamId: "test",
        httpBaseURL: "https://test.antmedia.io:5443/LiveApp/",
        videoHTMLContent: '<video id="video-player" class="video-js vjs-default-skin vjs-big-play-centered" controls playsinline style="width:100%;height:100%"></video>',
        playOrder: playOrderLocal,
        token: Token
    }, videoRef.current, placeHolderRef.current);
});
Otherwise, you can take the values as a URL parameter, as we use in AMS play.html.
Reading ID3 Metadata With Web Player
You can get ID3 metadata of live stream on the web player. For more information about ID3 metadata, check this blog post. While initializing the web player, pass a callback function to the id3Listener field. Whenever new data is detected, this function will be invoked with the ID3 text data.
function id3Listener(data) {
    console.log("id3 data received: " + data);
}

var player = new WebPlayer({
    streamId: "streamId",
    httpBaseURL: "http://example.antmedia.io:5080/WebRTCAppEE",
    token: "tokenId",
    playOrder: ["webrtc", "hls", "dash"],
    videoHTMLContent: '<video id="video-player" class="video-js vjs-default-skin vjs-big-play-centered" controls playsinline style="width:100%;height:100%"></video>',
    id3Listener: id3Listener
}, document.getElementById("video_container"), null);
You’ll notice that the id3Listener function gets triggered with the ID3 metadata whenever the video player plays a segment of the HLS stream that has ID3 embedded.
Conclusion
The Ant Media Web Player is a versatile and easy-to-integrate tool for playing live streams. With support for multiple protocols, customizable options, and an open-source nature, it is a great choice for developers looking to enhance their live streaming experience.
If you have questions or need any support, contact us via a form or schedule a meeting to have a coffee and chat, or write directly to contact@antmedia.io so that we can democratize live streaming together.
Happy streaming!