Unlock the full potential of your streaming platform with our in-depth guide on how to scale Ant Media Server on Google Cloud Platform (GCP).
Scaling real-time video streaming infrastructure to handle thousands — or even millions — of concurrent viewers requires more than just powerful servers; it requires cloud-native automation, scalable architecture, and reliable orchestration. Google Cloud Platform (GCP) provides a suite of managed services that make this possible. With tools like Compute Engine, Load Balancing, auto-scaling groups, and Deployment Manager, you can build an Ant Media Server cluster that grows with your audience and keeps your streams smooth under load.
In this guide, we walk through how to scale Ant Media Server on GCP using proven practices like deploying a MongoDB backend, creating autoscaling instance groups, setting up load balancers, and configuring firewall rules — all aimed at delivering resilient, high-performance live streams. Whether you’re launching a new global live event or expanding an existing streaming platform, this step-by-step guide demystifies complex GCP services and makes scalable streaming achievable.
Scale Ant Media Server with Google Cloud Platform
After logging into Google Cloud Platform, create a project for yourself. We created antmedia-test for testing purposes.
Step 1: Install MongoDB Server
To create an instance in Google Cloud Platform:
Click on VM Instances > CREATE INSTANCE, and from the opened window, choose Ubuntu 22.04 as the boot disk.
Then, go to Advanced Options > Management. Add the following lines to the Automation section:
#!/bin/bash
wget https://raw.githubusercontent.com/ant-media/Scripts/master/install_mongodb.sh && chmod +x install_mongodb.sh
./install_mongodb.sh
Click on Create to complete the process. Once the instance is created, make sure to note down its private IP address.
Step 2: Install Ant Media Server Enterprise Edition
To use Ant Media Server Enterprise Edition as a cluster on Google Cloud Platform Marketplace, you should first deploy Ant Media Server Enterprise Edition through the Marketplace service. Please check out this blog post to launch the AMS through the marketplace.

After the deployment process is complete, stop the instance.
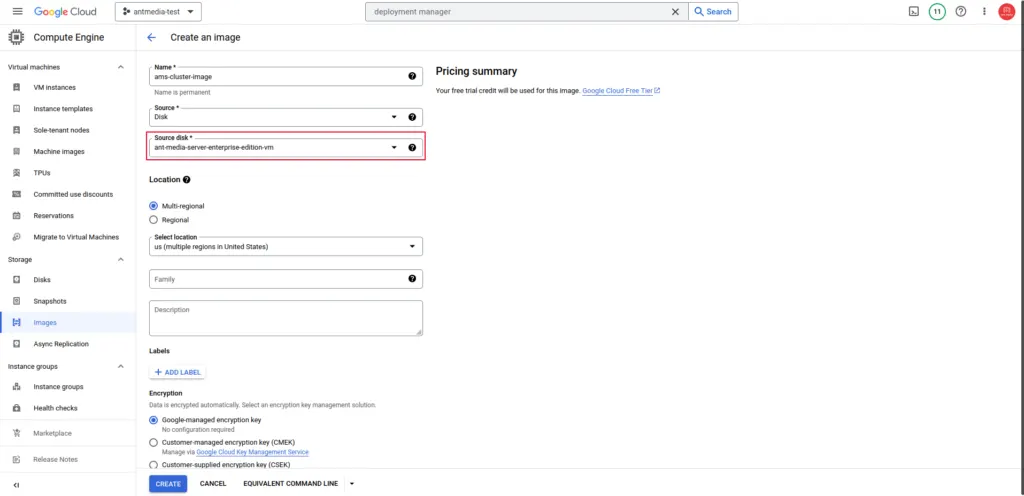
Next, navigate to the Images > CREATE IMAGE tab and choose the instance you have set up as the Source disk.
Step 3: Create an Instance Template
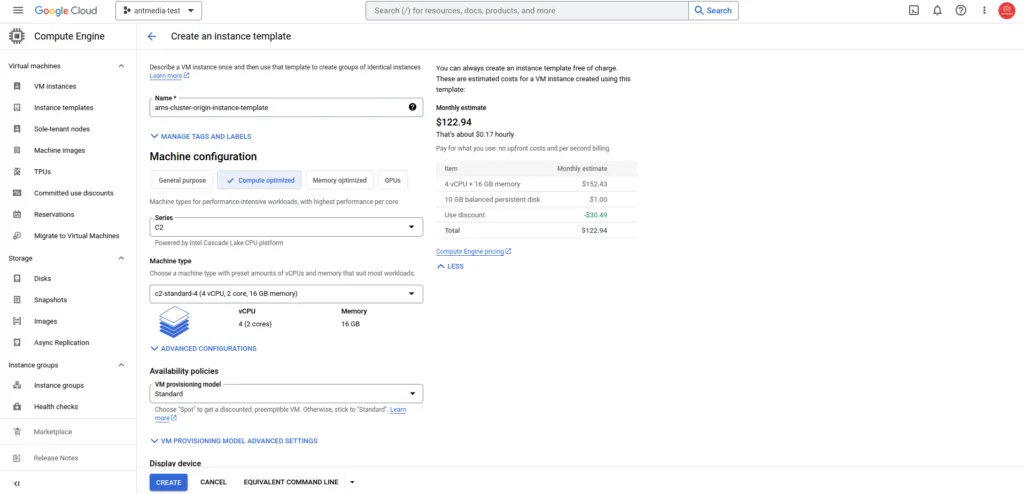
After the image creation process is complete, proceed to the Instance Templates > CREATE INSTANCE TEMPLATE menu.
Select the instance type
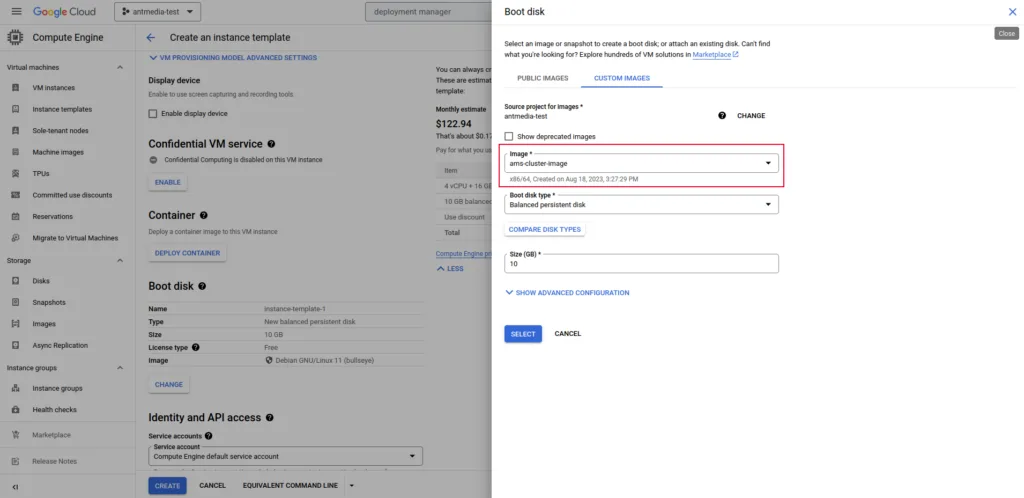
On the same screen, navigate to the Boot Disk section and click on Change > Custom Images. Then, select the image you created in the previous step.
After that, go to Advanced Options > Management Tab and add the following startup script to the Automation section:
#!/bin/bash
rm -rf /usr/local/antmedia/conf/instanceId
rm -rf /usr/local/antmedia/*.db.*
rm -rf /usr/local/antmedia/*.db
cd /usr/local/antmedia
./change_server_mode.sh cluster 10.128.0.5
In the script, please replace the private IP of your MongoDB created in Step 1. Click the Create button to create the template.
Step 4: Create the Instance group
Navigate on Google Cloud to Compute Engine > Instance Groups > CREATE INSTANCE GROUP. Then, select the name and template as shown in the screenshot, and choose Multiple Zones for the Location.
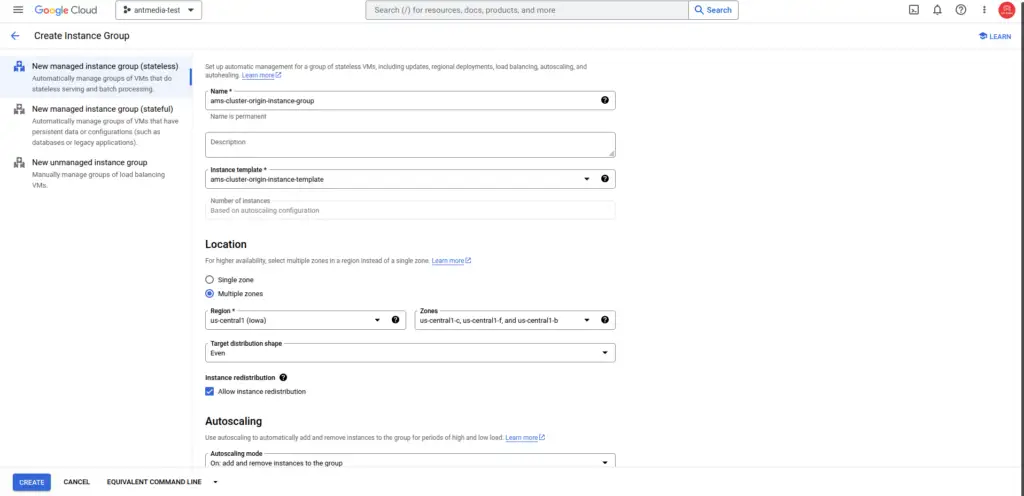
For auto-scaling, specify the minimum and maximum instance counts you want to set up, then configure the CPU Utilization to 60% and click on the Create button.
Then repeat the same process for the Edge group as well.
Step 5: Create a Load Balancer
The autoscaling groups are now created. Let’s move on to configuring the Load Balancer to distribute the load.
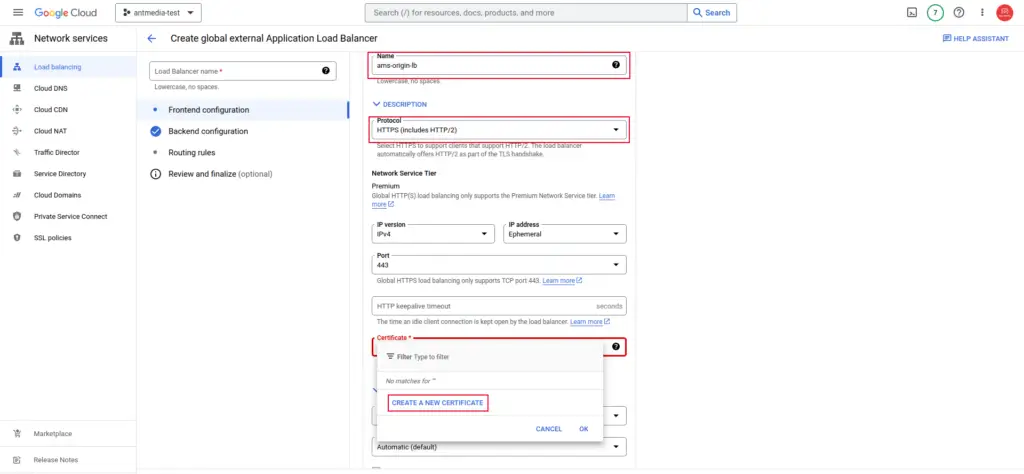
In the search bar, type “Load Balancer” and open the “Load balancing” service, then click on CREATE LOAD BALANCER and select Application Load Balancer.

In the Load Balancer menu, after selecting the Name and Protocol, go to the certificate section and create a new certificate by choosing “CREATE A NEW CERTIFICATE.”
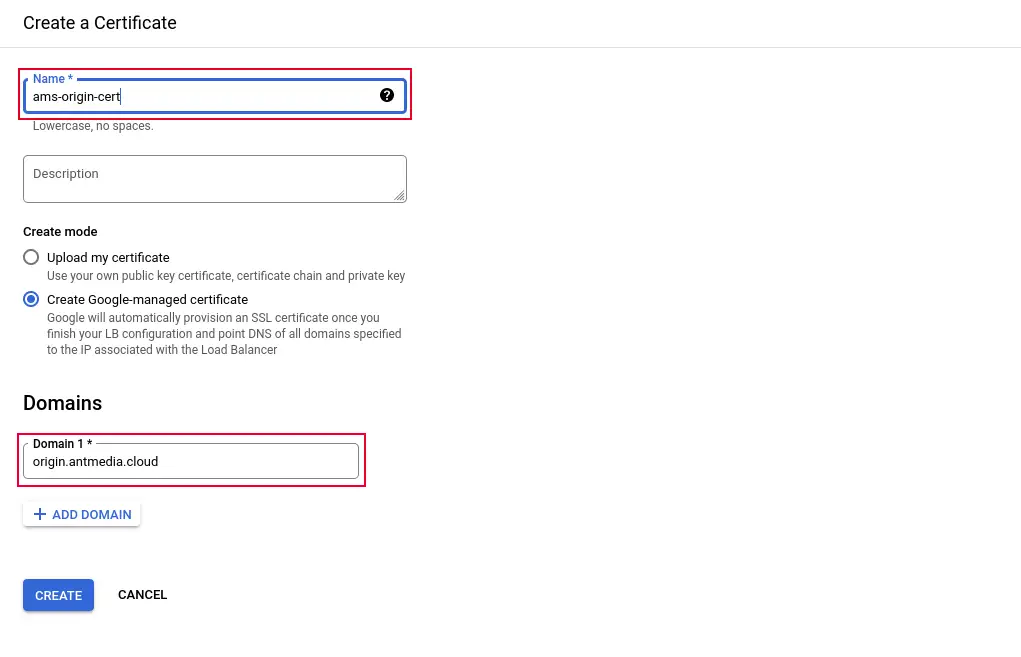
Then, fill in the required fields and create the certificate. You can also use your own SSL certificate by uploading it. After that, click on the “Backend configuration” section.
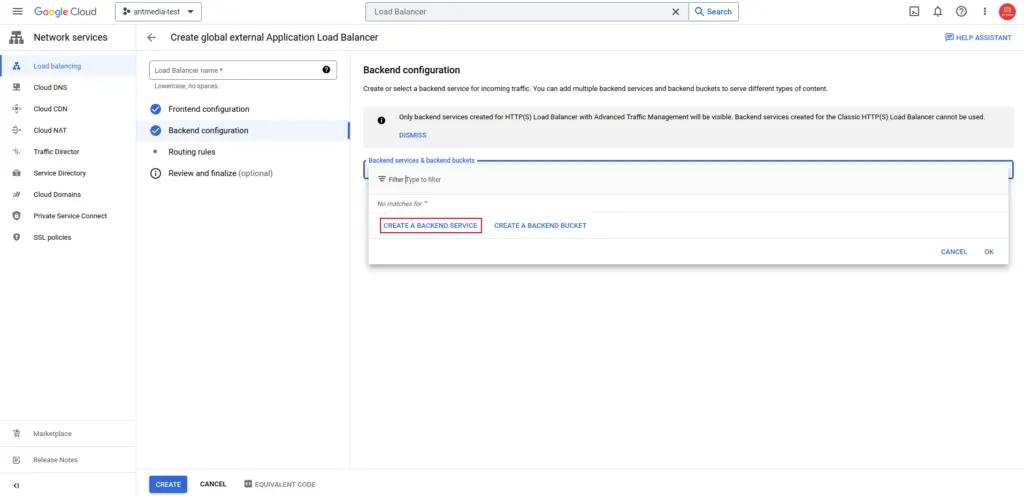
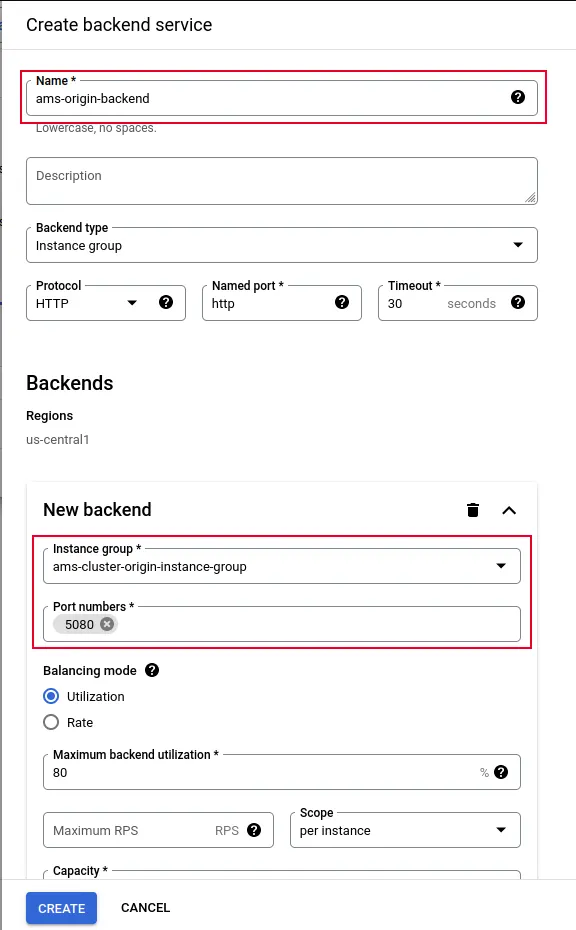
In the upcoming screen, we will create the Backend Pool (both Origin and Edge) and Health Check.
In the same backend configuration, to create the Health Check configuration, click on Health Check > CREATE HEALTH CHECK and add it as shown below:
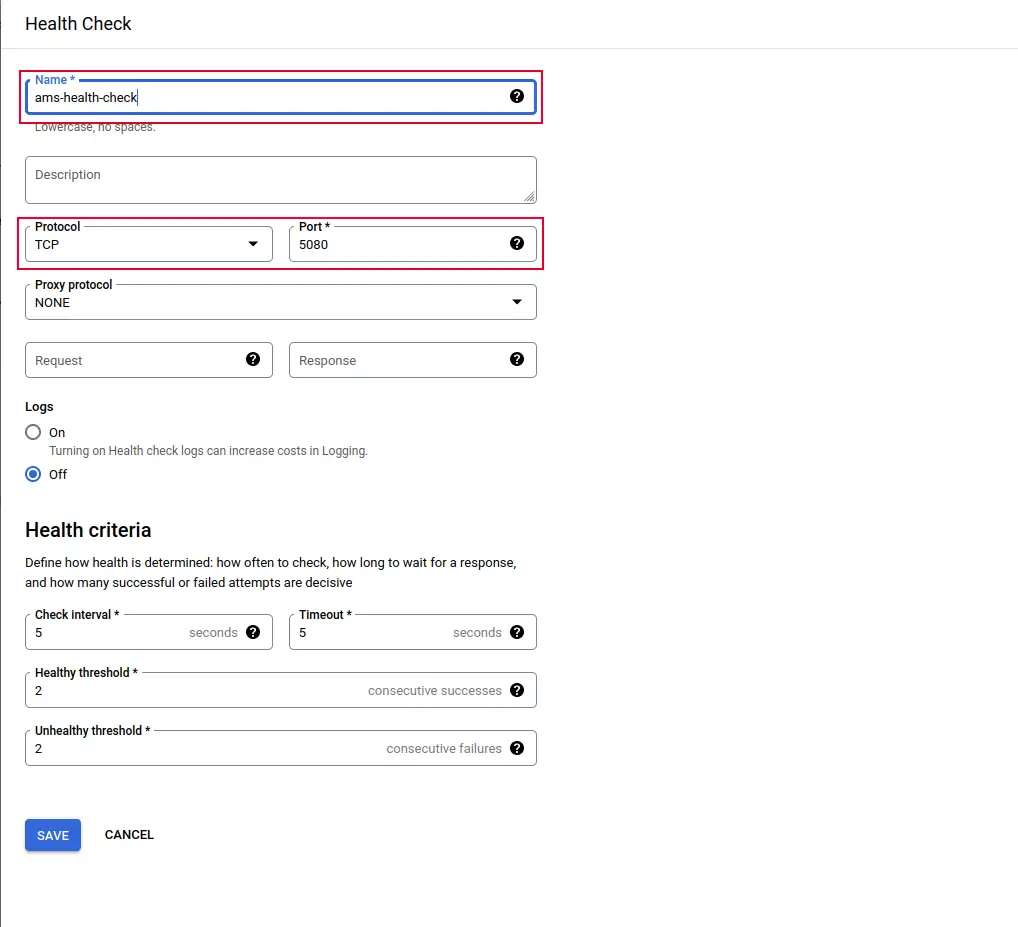
Click on Create to finalize the configuration for both the Backend and the Health check. Then, click Create again to complete the Load Balancer configuration.
Repeat these steps for the Edge side as well.
Note: If the Load Balancers cannot access the Backend servers, you should add a firewall rule as shown below.
Go to VPC Network > Firewall > Create firewall Rule and add the rule as shown below. Now the load balancer should be able to access the Ant Media Server Backend servers.
You can allow all IPs by adding the 0.0.0.0/0 CIDR block if required.

How to set up Firewall policies on Google Cloud?
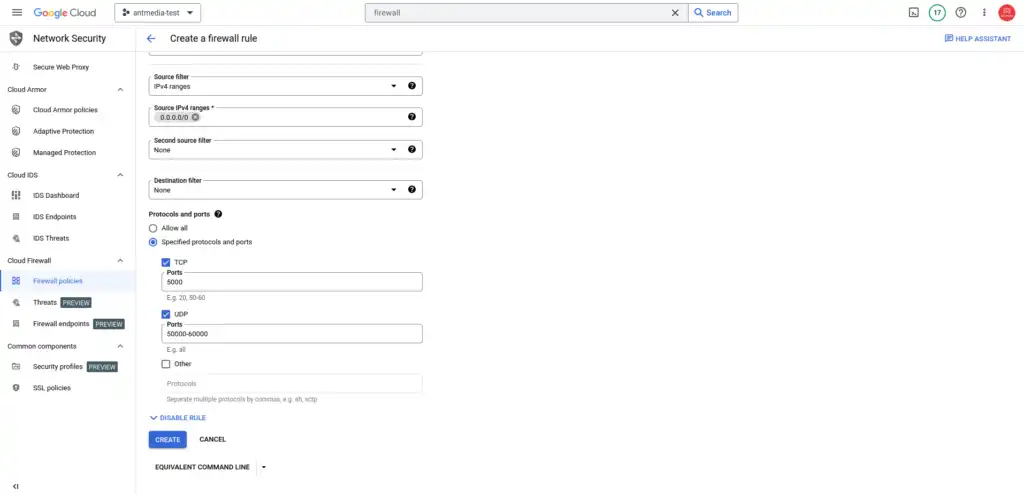
Step 6: Configure Firewall rule for Ant Media Servers
For TCP port 5000 and UDP ports 50000–60000, go to VPC Network > Firewall > Create firewall rule and add the rule as shown in the image below.
Finally, in your DNS management, define the IP addresses of both the origin and edge load balancers.
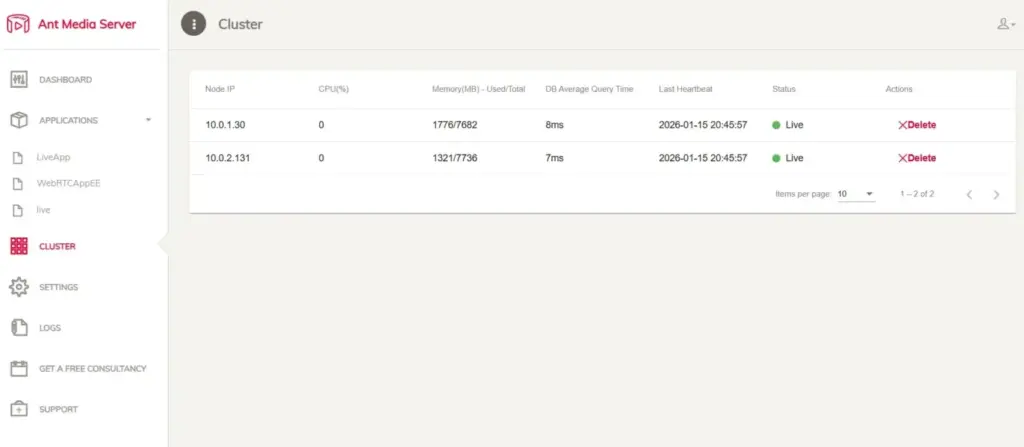
That’s it! You’re all set. You can now access the Ant Media Server to publish and play the streams using either the origin or edge group.
Frequently Asked Questions
Do I need MongoDB to run a scalable Ant Media Server cluster on GCP?
How do autoscaling groups help with streaming performance?
What role does Google Cloud Load Balancing play?
Can I secure my Ant Media Server cluster on GCP with SSL certificates?
Conclusion
Scaling Ant Media Server on Google Cloud Platform gives you a cloud-native, production-ready streaming architecture designed to grow seamlessly with your audience. By combining Ant Media Server’s real-time streaming capabilities with GCP’s managed infrastructure—such as Compute Engine, autoscaling instance groups, and global load balancing—you can deliver reliable, high-performance streams even under heavy traffic.
Whether you’re building a live broadcasting platform, an interactive WebRTC application, or a global HLS delivery pipeline, Ant Media Server on GCP provides a future-proof foundation that keeps latency low, availability high, and scaling predictable as demand increases.
Next Steps
Once your Ant Media Server cluster is running on GCP, you can take things further by exploring:
- Enable CDN-backed delivery:
Integrate Google Cloud CDN to offload HLS traffic and improve playback performance for global audiences. - Move toward Kubernetes-based scaling:
Deploy Ant Media Server on Google Kubernetes Engine (GKE) for containerized deployments, faster rollouts, and simplified cluster management.


