Volumetric Video Capturing And Streaming
Today is a perfect day for Spaceport Volumetric Video Capturing And Streaming. We are proud to announce Spaceport 1.0 with Registration & Capture & Playback improvements. Before we publish this release, a big thank you to the community and to the users that have helped to announce the major version of Spaceport with their commits and feedback.
A quick recap: In the first article of this series, we gave a rough overview of the Spaceport Volumetric Video Capturing and Streaming infrastructure and application process. In the next articles, we highlighted the Volumetric Video Container Structure, Volumetric Video Live Streaming, and major use cases involved in the Volumetric Video evolution. This article is going to explore the fundamentals of volumetric video applications bringing this new video technique to fruition and we are going to learn how we use applications inside of Spaceport to capture volumetric video and then play it.
1 – Initial Configuration
Before moving forward, you have to have already installed ROS and Ubuntu 18.04. ROS Melodic Morenia is supported until April 2023, when Ubuntu 18.04 will reach EOL as well. So, you can install ROS Noetic by then.
If you want to perform a quick installation, you can follow these steps. However, keep in mind that not all details are mentioned in the steps here. For a detailed description visit here.
Step 1: The first step is adding the ROS repository to your ubuntu sources.list
sudo sh -c 'echo "deb http://packages.ros.org/ros/ubuntu $(lsb_release -sc)
main" > /etc/apt/sources.list.d/ros-latest.list'
Step 2: Add Official ROS repo keyring
sudo apt-key adv --keyserver 'hkp://keyserver.ubuntu.com:80' --recv-key C1CF6E31E6BADE8868B172B4F42ED6FBAB17C654
Step 3: And finally, update your packages list
sudo apt update
Step 4: Install ROS Melodic desktop package on Ubuntu 18.04
sudo apt install ros-melodic-desktop-full
Step 5: Let’s configure our environment. This is a very important step, once we have it done, working with ROS will be smooth.
echo "source /opt/ros/melodic/setup.bash" >> ~/.bashrc
source ~/.bashrc
We are almost there!
Step 6: To install this tool and other dependencies for building ROS packages, run:
sudo apt install python-rosdep python-rosinstall python-rosinstall-generator python-wstool build-essential
Step 7: With the following, you can initialize rosdep.
sudo apt install python-rosdep
sudo rosdep init
rosdep update
Now, you have ROS Melodic installed and ready to use!
Step 8:At this point, we must have everything in place. Let’s try some ROS commands to make sure the installation has finished successfully.
roscore
Your terminal must be stuck here, therefore, you can not execute anything else while you have the roscore process there. Roscore is running and ready to serve other ROS processes!
2 – Spaceport Network Setup
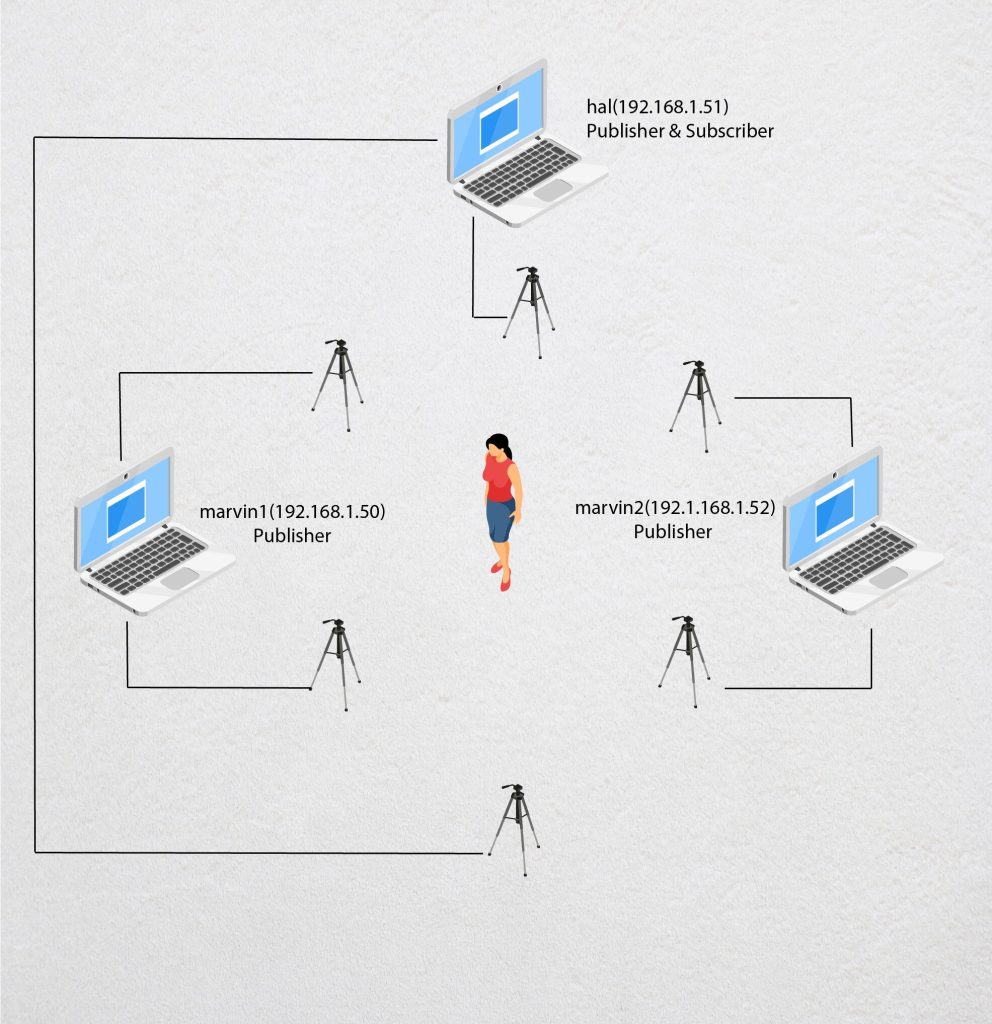
To run Spaceport on multiple machines, all the devices must be on the same local network. While working on multiple machines, you need only one roscore running. Choose one device for it- we will call it master. The next part of the tutorial is explained over 3 computers and 6 camera setup. For convenience, the devices are assigned sequential IP addresses. You can customize the devices and network settings for yourself In this scenario, hal is both master and client. marvin1 and marvin2 are clients.
Network Options for configuration are:
hal    (192.168.1.51)   (master)
marvin1(192.168.1.50)   (client)
marvin2(192.1.168.1.52) (client)
Step 1: We have to tell what the hostname means. To do it edit /etc/hostnames file with sudo privileges for all computers:
sudo gedit /etc/hosts
Add the following lines to the host file:
192.168.1.51 hal
192.168.1.50 marvin1
192.1.168.1.52 marvin2
Step 2: For all devices open the .bashrc file. Add the following line:
gedit ~/.bashrc
export ROS_MASTER_URL=http://hal:11311
Step 3: Basic check – Please Try to ping each machine from itself.
ping hal
In the terminal, you should see similar lines below:
PING hal(192.168.1.50) 56(84) bytes of data.
64 bytes from hal(192.168.1.50): icmp_seq=1 til=64 time=0.309ms
64 bytes from hal (192.168.1.50): icmp_seq=1 til=64 time=0.233ms
64 bytes from hal (192.168.1.50): icmp_seq=1 til=64 time=0.293ms
64 bytes from hal (192.168.1.50): icmp_seq=1 til=64 time=0.296ms
Step 4: Then please try to ping between machines
Now, you are ready. After completing this tutorial you should be able to configure your devices to work together and exchange data with each other.
3 – Getting Transformation Matrixes
To get started you need to:
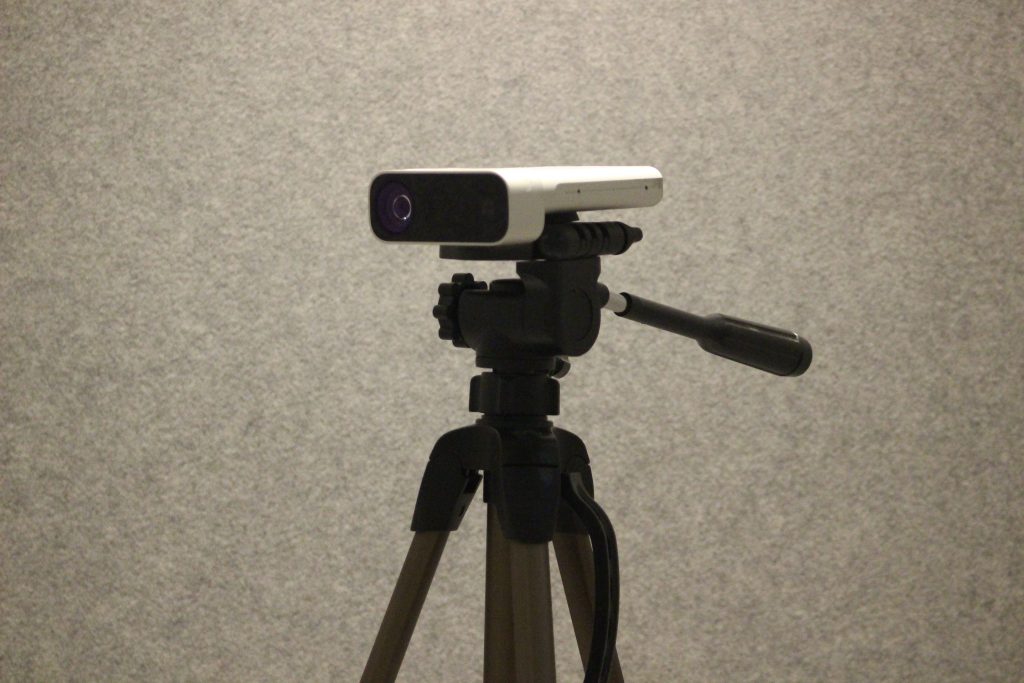
- Plug 6 Azure Kinect Sensor and complete the Initial Configuration Steps on each machine
- All of the computers you will use should be on the same network
- Print the calibration pattern “pattern.jpg” on a piece of paper
Step 1: Choose a computer that will act as a server (this computer may also be a client at the same time), we recommend that it is the most powerful of the available machines.
Our default setup:
hal: Nvidia GTX 1070 – i7 8700K
marvin1: Nvidia GTX 1060 – i5 7400
marvin2: Nvidia GTX 1060 – i5 7400
Step 2: Run the `roscore` on the chosen machine (hal).
Step 3: You can connect to all devices one by one with ssh and then run the publishers. Or use the sendjob script under the script folder. In a nutshell, the sendjob script will connect to your devices and run publishers on each device.
cd VolumetricVideoRegistration/binaries/spaceport-ros/scripts/
bash sendjob.sh
Step 4: In order to run the clients you need the printed calibration pattern. Once printed, attach it to something rigid and place it in a position where it is visible to all sensors.
Step 5: Create a serial.txt. The format should be as follows
null = for reference camera
0 = looking to the same side as the reference camera
1 = looking to the opposite side with the reference camera
Step 6: Then run the startRegistration.sh on the chosen machine.
cd /VolumetricVideoRegistration/src/registraiton
bash startReg.sh
Step 7: Press S to get the image and then Press Q to skip the next step
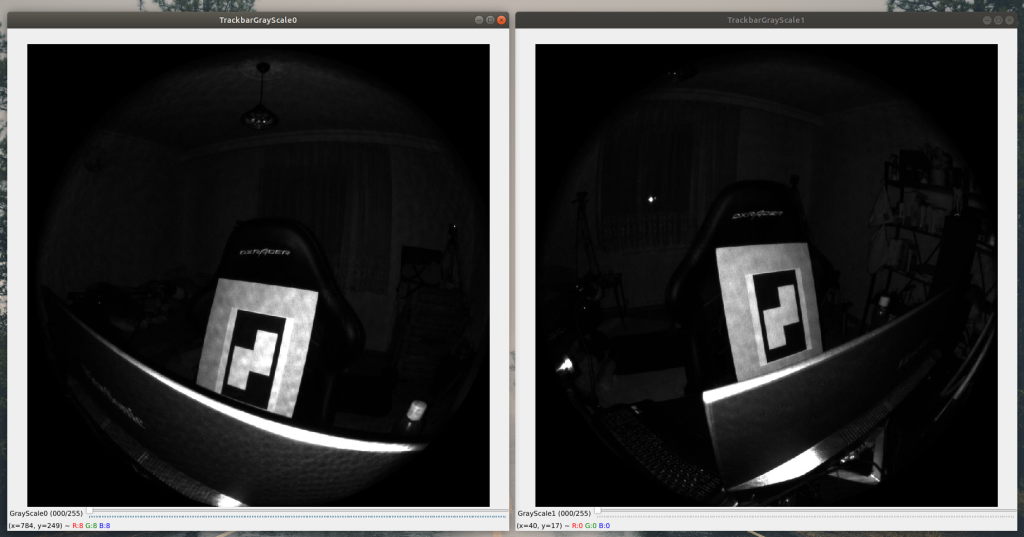
Step 8: Find contours with the trackbar for both image and then press space
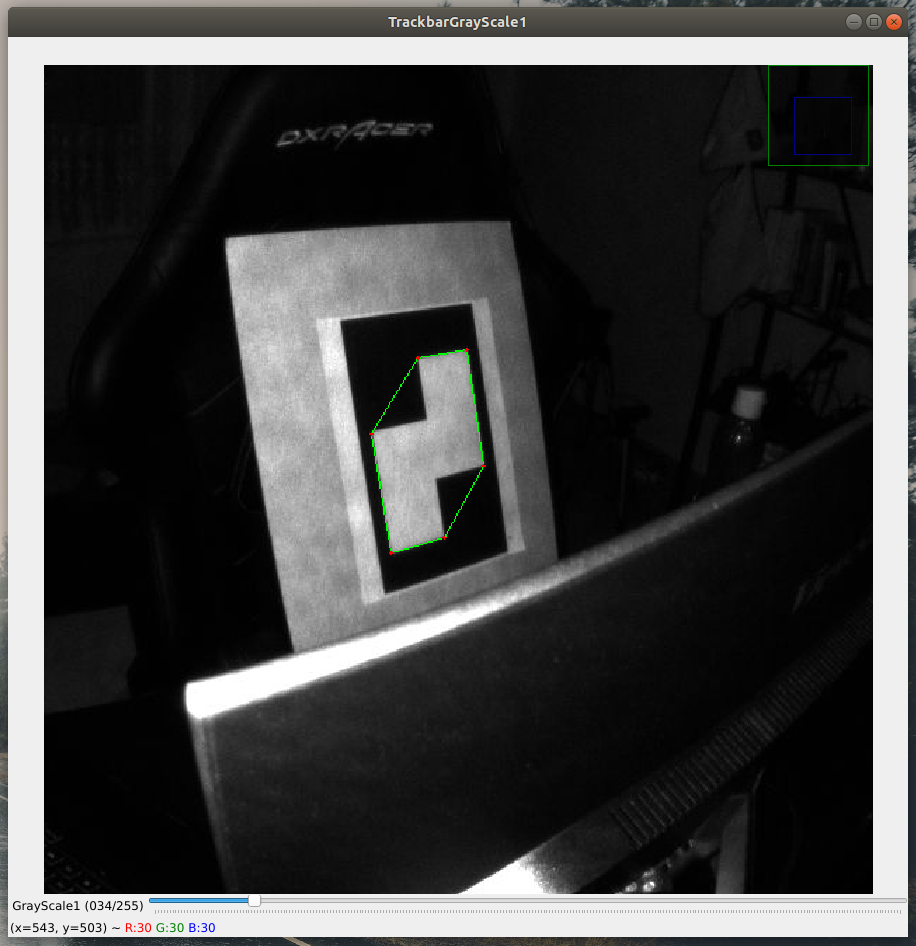
Step 9: Back to Step 7 until all camera pairs are registered
Result: You are going to get the transformation matrices for each camera in a similar way below.
000286592912_to_000009594512.txt
000286592912_to_000018594512.txt
000286592912_to_000023294512.txt
000286592912_to_000274192912.txt
000286592912_to_000288392912.txt
Once the Transformation matrices of all cameras have been calculated, move these values into binaries/spaceport/TransDir.
3 – Capture Volumetric Video
You are ready to capture volumetric video. To start the capture process you can use startCapture script under the binaries/spaceport folder. But before running it; you have to change the serial names with your Azure Kinect Sensor Serials in the script.
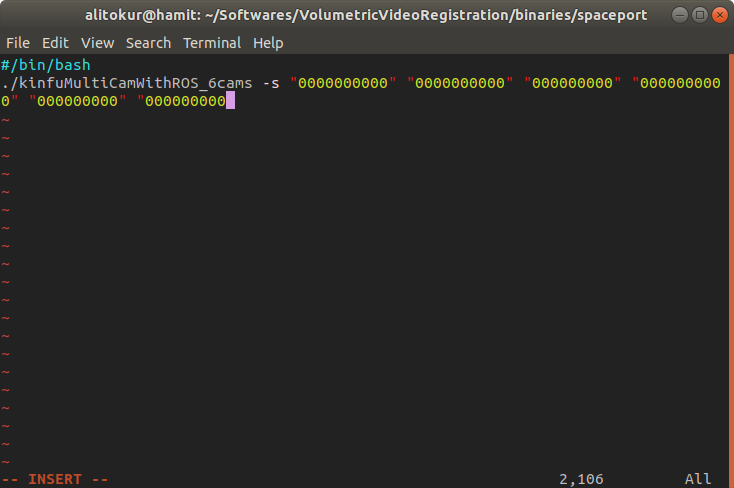
And then:
cd VolumetricVideoRegistration/binaries/spaceport/
bash startKinfu.sh
Seeing the following screen means the capture process has started. Simultaneously, your video will be saved to disk. Use ctrl + s to safely terminate the capture process.
![]()
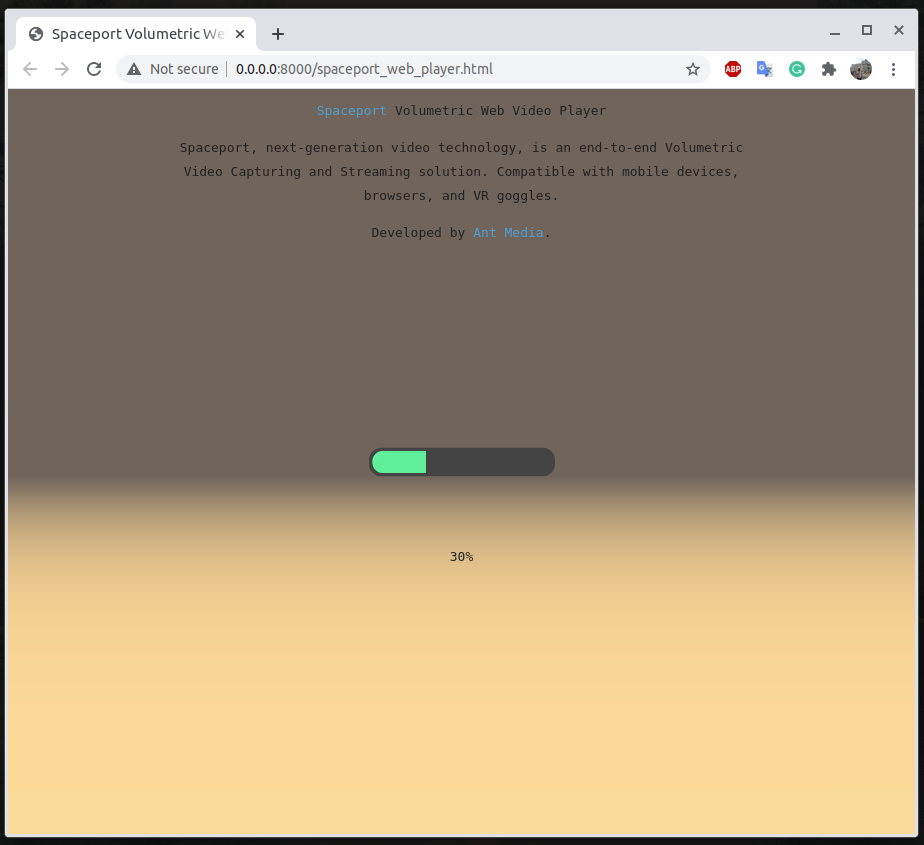
When the consumer process is completed you can use the playVideo script to replay your volumetric video on web browsers.
cd scripts
bash playVideo.sh
Conclusion
Spaceport is ready for simultaneously volumetric capture and multi-viewpoint cloud alignment with several Azure Kinect Cameras. Hope you enjoyed the blog post. Contact us to discuss cooperation opportunities and to try out the demo.


