
What is vMix?
vMix is a software vision mixer available for the Windows operating system and we’ll see how to use vMix for streaming. vMix is developed by StudioCoast PTY LTD. Like most vision mixing software, it allows users to switch inputs, mix audio, record outputs, and live stream cameras, video files, audio, and more, in resolutions of up to 4K. It can stream up to three destinations at one time. You can do RTMP stream with vMix and watch WebRTC from Ant Media Server.
Let’s see how to use vMix for streaming.
How to use vMix?
vMix is available for Windows only because it is using Direct3D which is exclusively available for Windows. Before learning how to use vMix, you need to install vMix on your computer. Click this link to download the trial version. Then go through installation by double-clicking the installation file.
If you want to run it on Mac, you can do that by installing Windows on a separate partition on your system. This is not running on MacOS, but this is what is suggested by the provider of vMix.
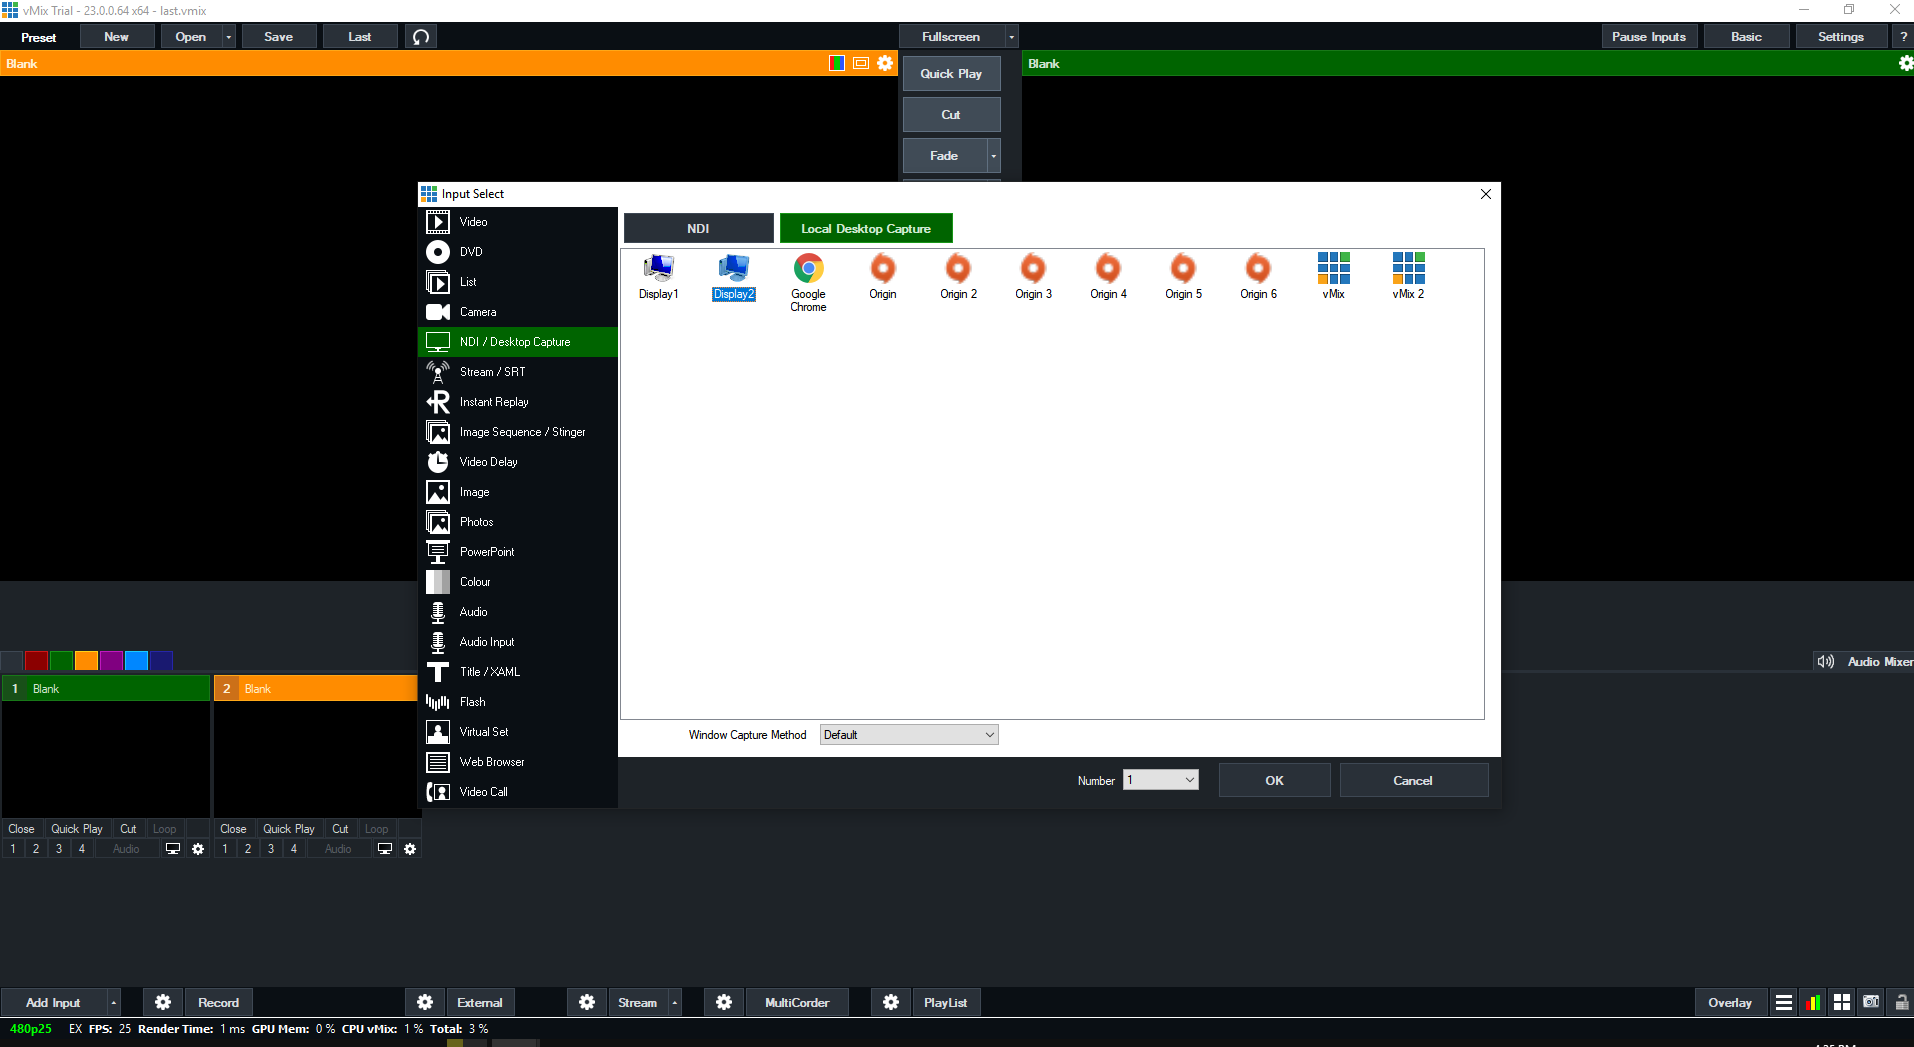
1. Provide Sources
Click the add input button and add some input for the broadcast. As an example, I will be adding a display input.
As you can see my input has been added successfully and its preview can be seen.
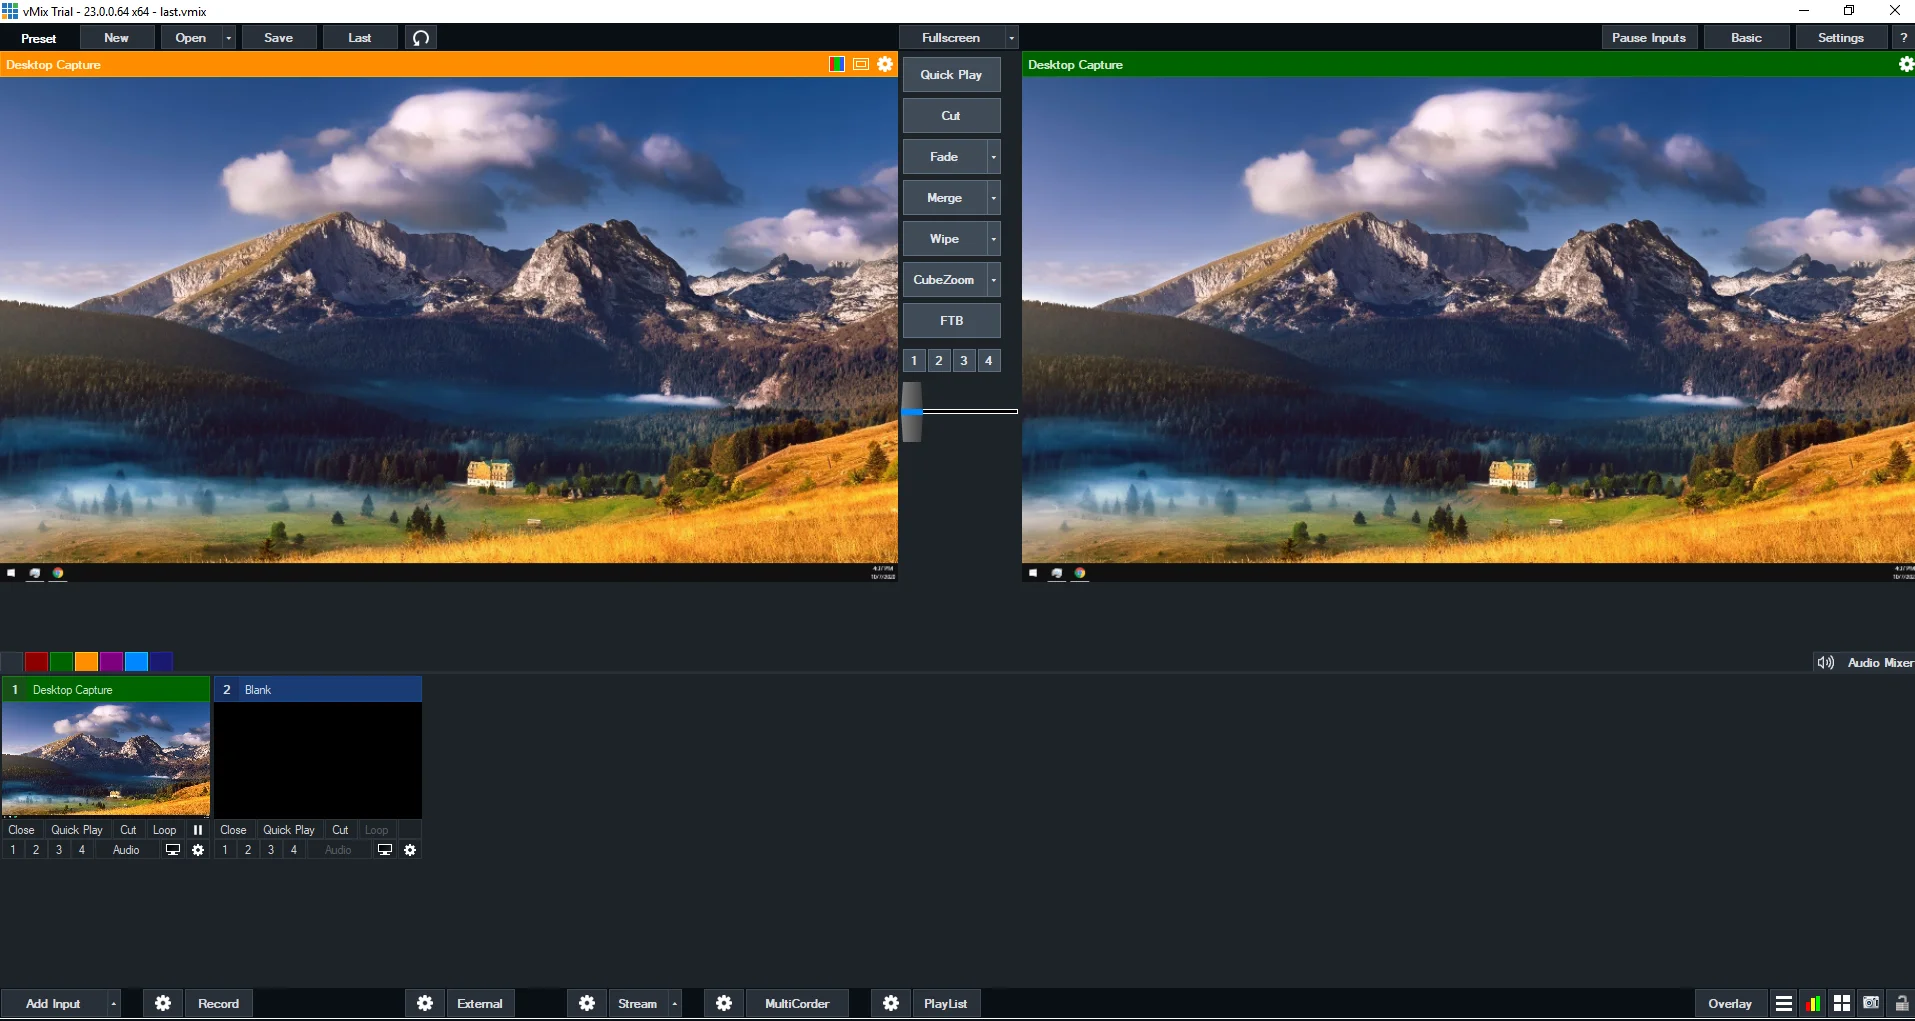
But you can do much more with vMix. If you add more than one input, then you can stream more than one stream at a time. Every input has its own destination, so it makes it easier to stream multiple contents with vMix.
2. Configure vMix
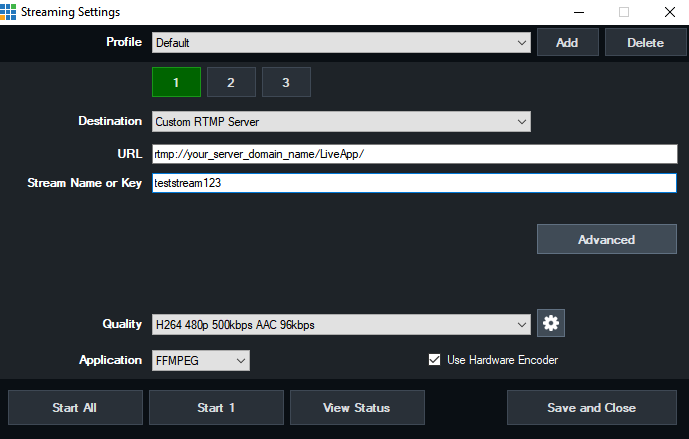
- Click the gear icon near the stream button on the bottom
- Choose
custom RTMP Serverin destination. - In the URL box, type your RTMP URL without stream id. It’s like
rtmp://your_server_domain_name/LiveApp/ - In the Stream key, you can write any stream id because we assume that no security option is enabled.
- If the token is enabled you need to add
?token={yourtokenhere}. So it would be like{streamid}?token={yourtokenhere}
- If the token is enabled you need to add
3. Tuning
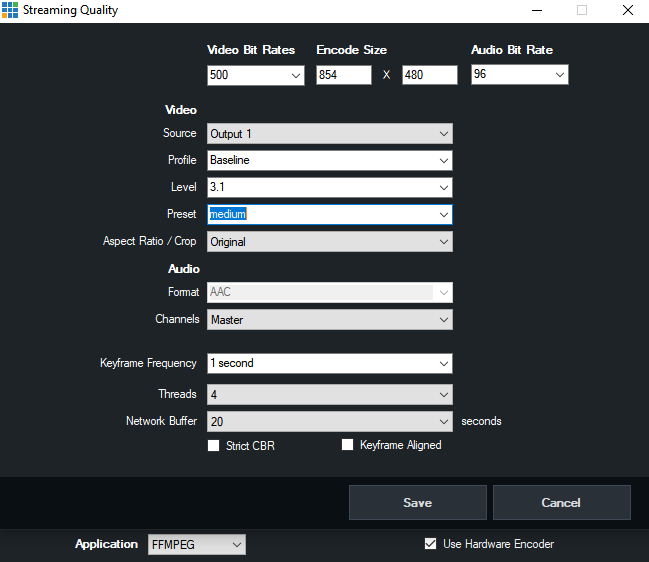
You can use predefined settings but if you click on the gear button next to the quality options, you can tinker with the options.
- Profile should be
baselineandkeyframe latencyshould be1.- You can set
keyframe latencyto 2 according to network. You can experiment with this.
- You can set
- You can set your
leveland yourpresetaccording to your configuration but3.1andmedium presetis good enough for having good quality streams.Presetsthat slower than medium preset puts an immense load on the CPU. So, beware of that. Also, you get diminishing returns from settings slowerpresetthan medium.
- You can enable the
hardware encoderfor using yourGPUin theencoding process.- Medium preset CPU encoding most probably would have better video quality but it depends on the GPU architecture that you are using. If you are using last generation GPUs, your video quality would be close to the CPU’s medium
presetif not better.
- Medium preset CPU encoding most probably would have better video quality but it depends on the GPU architecture that you are using. If you are using last generation GPUs, your video quality would be close to the CPU’s medium
4. Start Streaming
After configuring the server and tuning the encoder according to your needs, you can start the streaming by clicking the stream button at the bottom of the vMix dashboard.
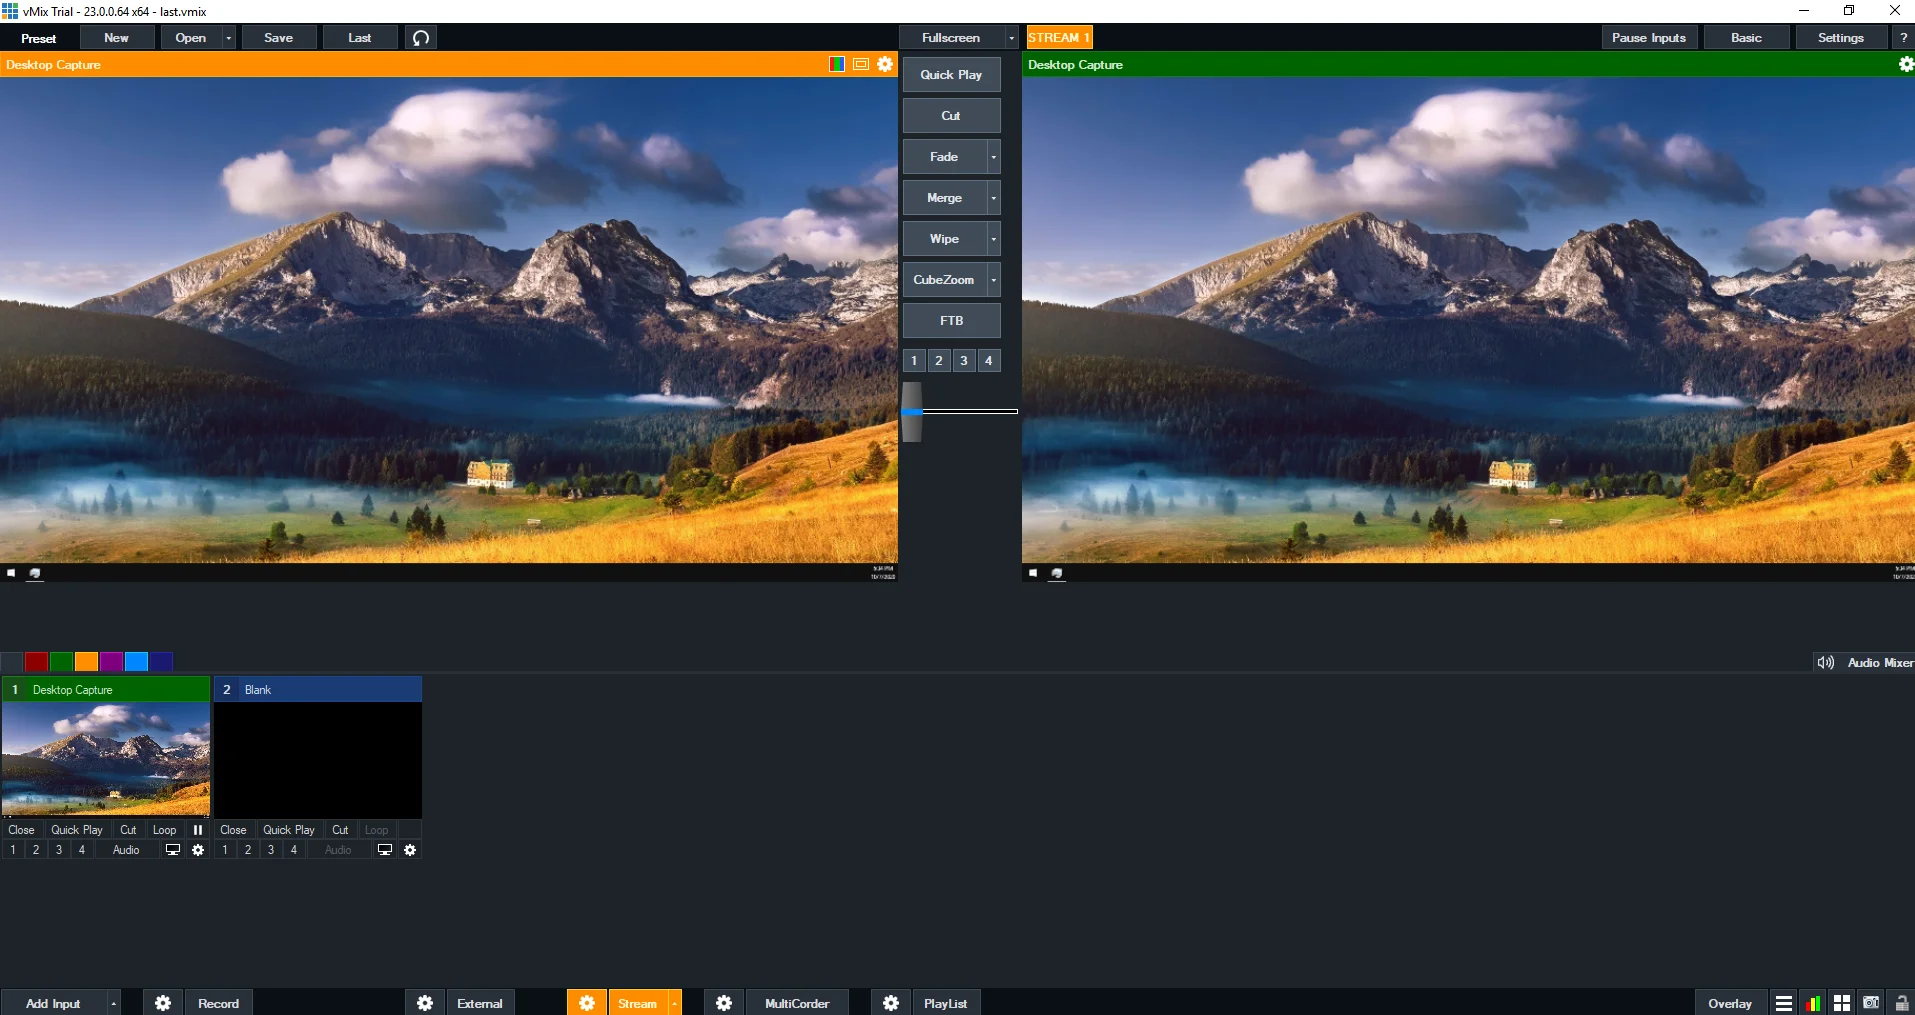
As you can see from the following screenshot, it started to streaming.
And you are publishing with vMix!
You can check https://www.vmix.com/support/training-videos.aspx to get better in vMix.
We tried to explain how to use vMix and we hope this tutorial helped you to get online with vMix.
You have more options for publishing in RTMP. Please check our other guides for publishing in RTMP:
If you have any questions, don’t hesitate to contact us.


