
Learn how to create a WebRTC Flutter streaming web application in 4 simple steps. This tutorial shows you how to add data, audio, or video streaming to your existing product using Flutter and Ant Media’s WebRTC SDK.
WebRTC is a widely-used real-time streaming protocol that’s straightforward to implement in browsers. While numerous tutorials exist for web platforms, implementing WebRTC on mobile requires additional considerations.
Platform-specific guides:
- Android developers: Build an Android WebRTC app in 4 steps
- iOS developers: Build an iOS WebRTC app in 4 steps
Prerequisites
Install the following software before beginning:
- Android Studio: Download and install
- Flutter SDK: Installation guide
Step 1: Create a Flutter Project
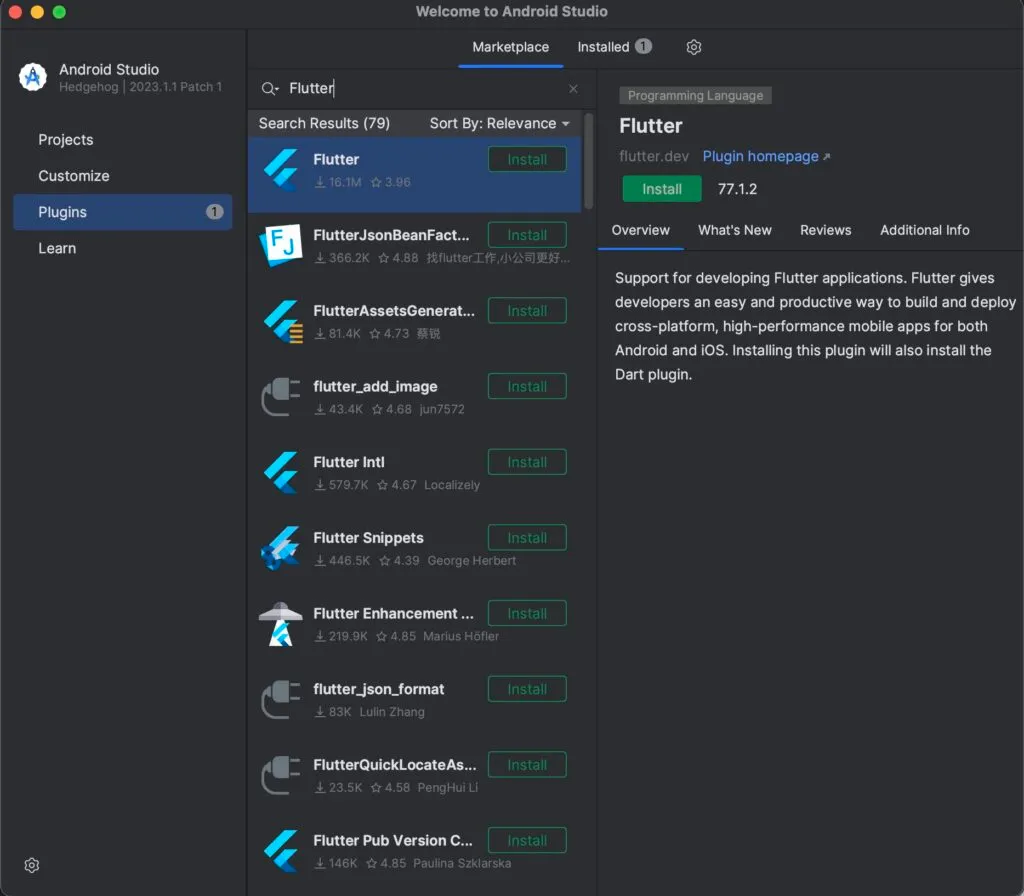
Configure the Flutter Plugin
- Open Android Studio and navigate to Plugins in the left sidebar
- Search for “Flutter” in the Marketplace tab
- Install the Flutter plugin and restart Android Studio
Initialize Your Project
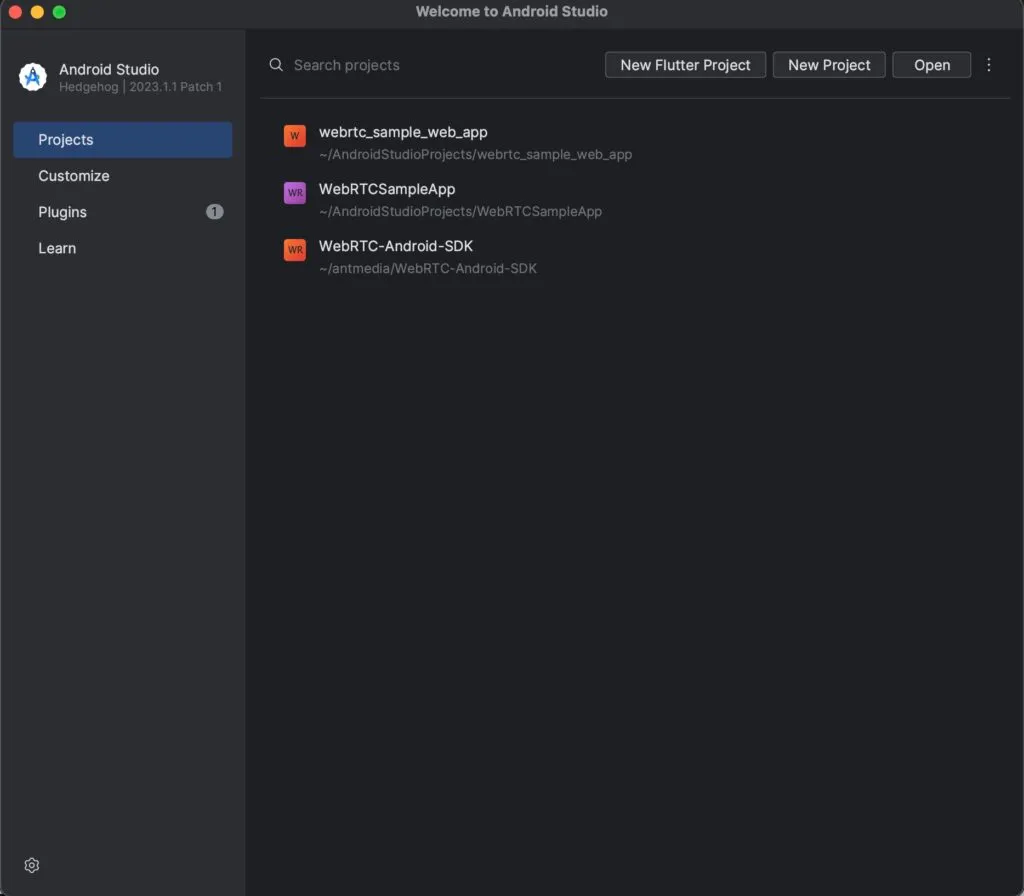
- Click Project in the left sidebar, then click New Flutter Project
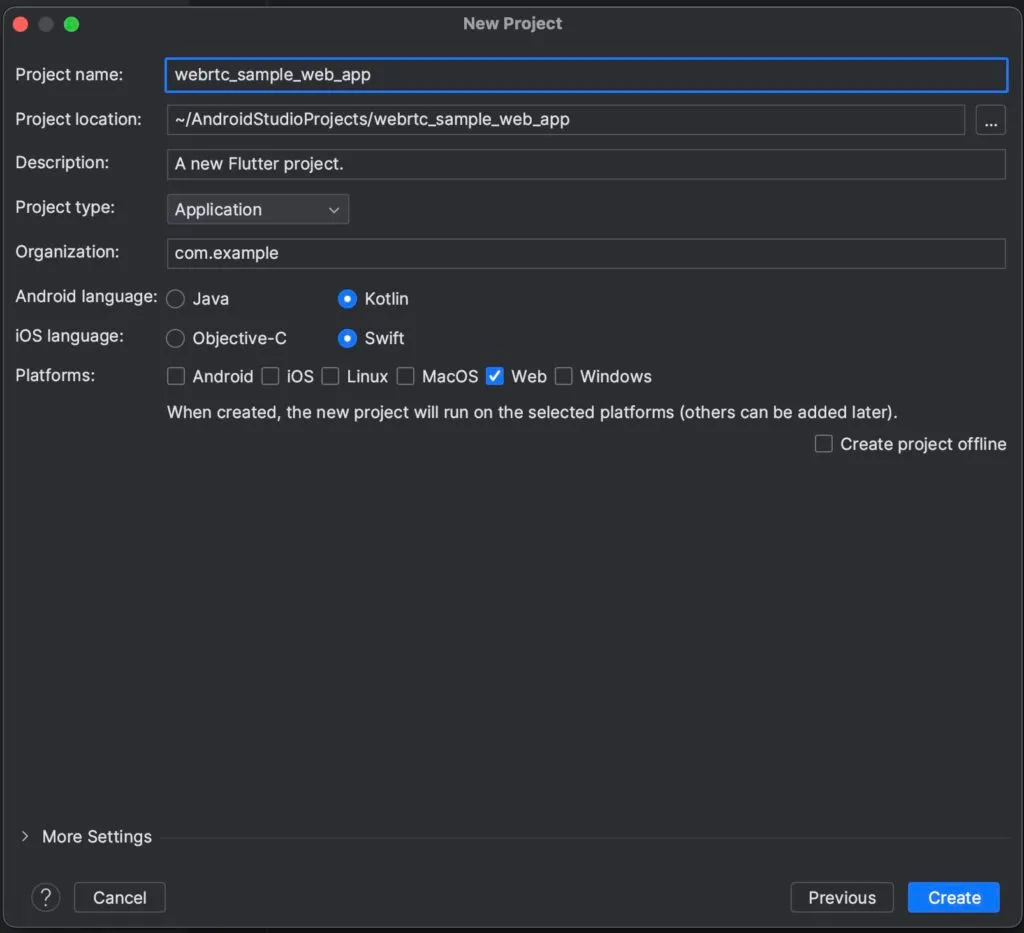
- Select Flutter from the project types and click Next
- Specify the Flutter SDK path you configured earlier
- Configure your project:
- Project name:
webrtc_sample_web_app - Important: Select the Web platform checkbox
- Project name:
Step 2: Add Ant Media Flutter WebRTC Dependency
Add the Ant Media Flutter package to your project’s pubspec.yaml file:
dependencies:
  ant_media_flutter: ^1.4.1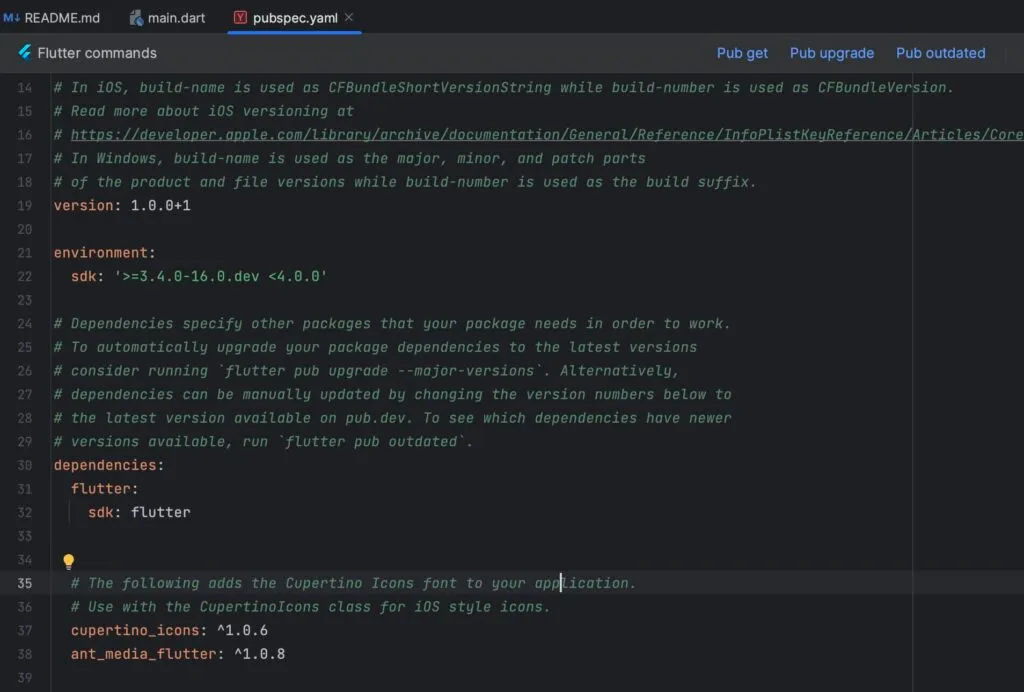
Click Pub get to install the dependency.
Step 3: Publish a WebRTC Live Stream
Implementation Code
Replace the contents of lib/main.dart with the following code:
Note: Replace the WebSocket URL with your Ant Media Server address.
import 'dart:core';
import 'package:ant_media_flutter/ant_media_flutter.dart';
import 'package:flutter/material.dart';
import 'package:flutter_webrtc/flutter_webrtc.dart';
void main() {
runApp(const WebRTCTestApp());
}
class WebRTCTestApp extends StatelessWidget {
const WebRTCTestApp({super.key});
@override
Widget build(BuildContext context) {
return const MaterialApp(
home: WebRTCTestHomeApp(),
);
}
}
class WebRTCTestHomeApp extends StatefulWidget {
const WebRTCTestHomeApp({super.key});
@override
State<WebRTCTestHomeApp> createState() => _WebRTCTestHomeAppState();
}
class _WebRTCTestHomeAppState extends State<WebRTCTestHomeApp> {
final RTCVideoRenderer _remoteRenderer = RTCVideoRenderer();
@override
void initState() {
super.initState();
AntMediaFlutter.requestPermissions();
initRenderers();
_connect();
}
Future<void> initRenderers() async {
await _remoteRenderer.initialize();
}
void _connect() async {
AntMediaFlutter.connect(
"wss://test.antmedia.io:5443/WebRTCAppEE/websocket",
"stream1",
'',
'',
AntMediaType.Publish,
false,
(HelperState state) {
if (state == HelperState.CallStateBye) {
_remoteRenderer.srcObject = null;
}
},
(stream) {
setState(() {
_remoteRenderer.srcObject = stream;
});
},
(stream) {
setState(() {
_remoteRenderer.srcObject = stream;
});
},
(datachannel) {},
(channel, message, isReceived) {},
(streams) {},
(stream) {
setState(() {
_remoteRenderer.srcObject = null;
});
},
[
{'url': 'stun:stun.l.google.com:19302'}
],
(command, mapData) {},
);
}
@override
Widget build(BuildContext context) {
return Scaffold(
body: RTCVideoView(_remoteRenderer),
);
}
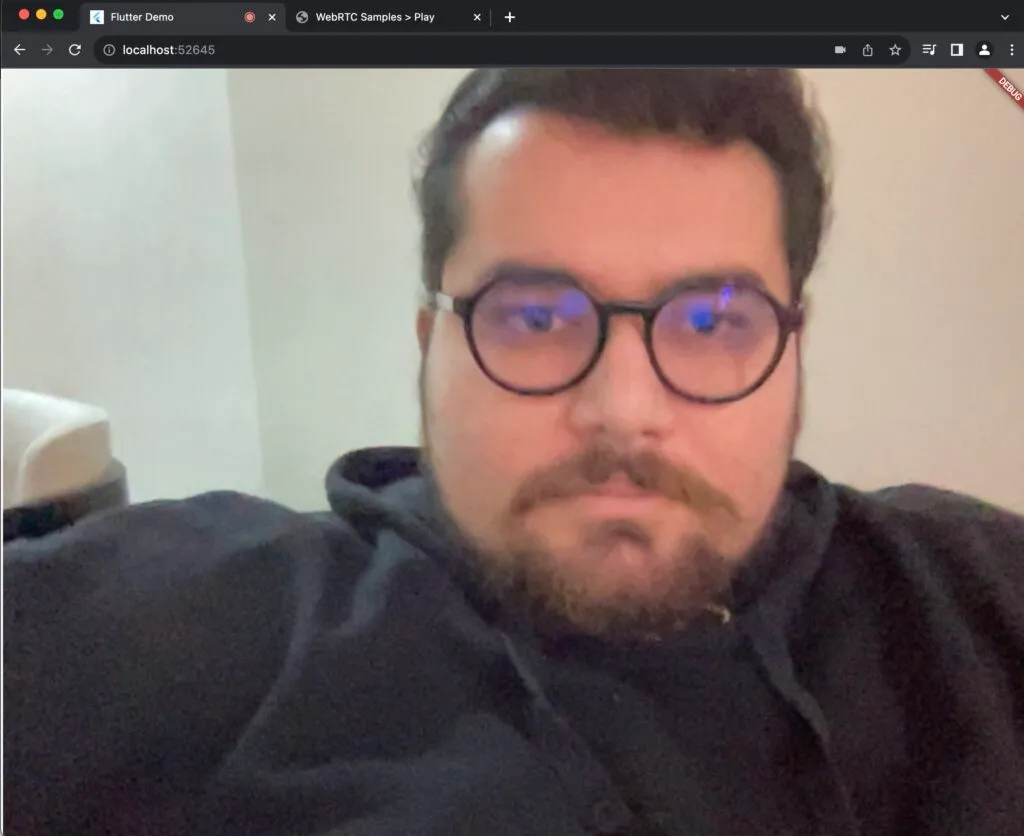
}Run the Publisher Application
- Click the Device Selection button in Android Studio
- Select Chrome (web) from the dropdown
- Click the Run button and wait for Chrome to launch

Grant camera and microphone permissions when prompted. Your stream will begin publishing immediately.
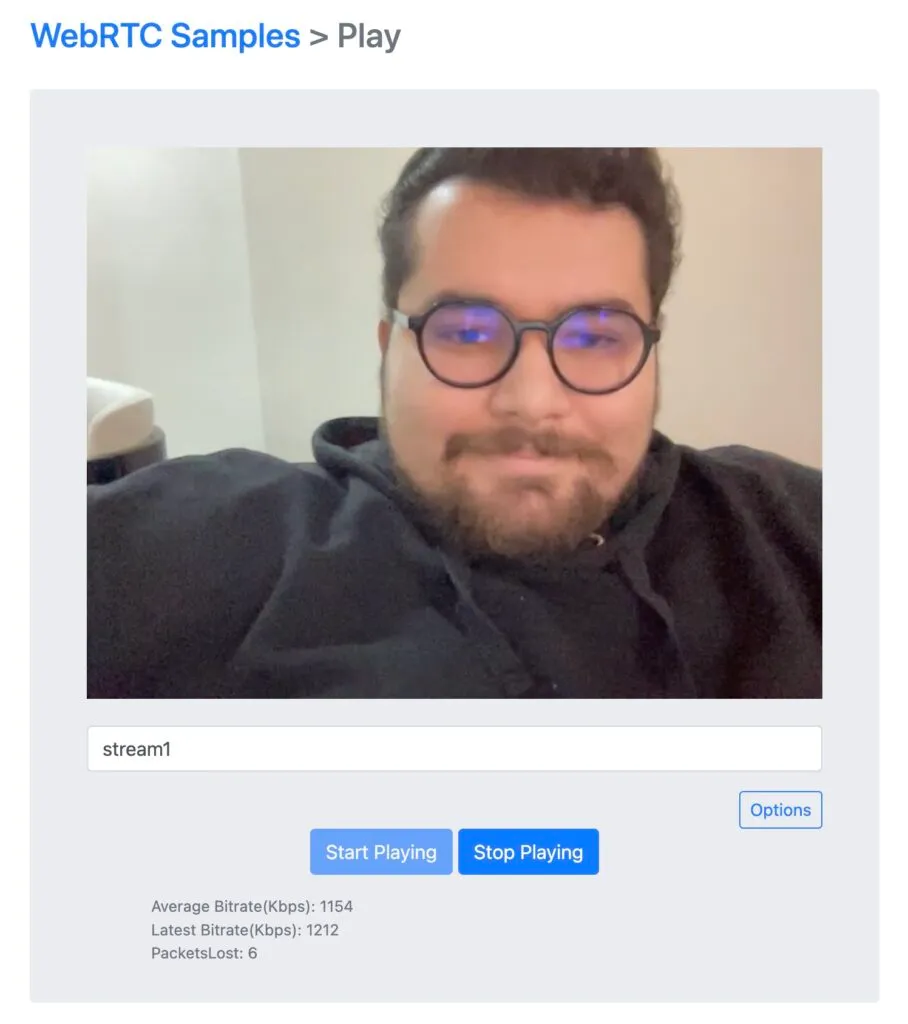
Verify Your Stream
Test your published stream using Ant Media’s WebRTC Test Player:
- Enter
stream1as the Stream ID - Click Start Playing
Note: To use your own server, access the WebRTC player at https://your-server-url/WebRTCAppEE/player.html
Step 4: Play WebRTC Live Stream
Converting your publisher to a player requires changing a single parameter in main.dart:
void _connect() async {
  AntMediaFlutter.connect(
    "wss://test.antmedia.io:5443/WebRTCAppEE/websocket",
    "stream1",
    '',
    '',
    AntMediaType.Play,  // Changed from AntMediaType.Publish
    false,
    // ... rest of the configuration remains the same
  );
}
Test the Player
- Create a test stream using Ant Media’s WebRTC Publisher
- Enter
stream1as the Stream ID - Click Start Publishing
- Run your Flutter player application

For troubleshooting or questions, visit GitHub Discussions. The complete source code is available in the WebRTC-Flutter-SDK repository.
Conclusion
You’ve successfully built a WebRTC streaming application using Flutter and Ant Media Server. In four straightforward steps, you learned to:
- Set up a Flutter Web project with WebRTC capabilities
- Integrate Ant Media’s Flutter SDK
- Publish live video streams
- Play back streams with minimal code changes
This foundation enables you to build sophisticated real-time applications including live events, video conferencing, online classrooms, and interactive platforms with cross-platform support and professional-grade performance.
Next Steps
- Explore Ant Media Server SDKs for other platforms
- Review the complete documentation
- Learn about transcoding and its importance for streaming
- Understand streaming protocols in depth


