
OBS (Open Broadcaster Software) is free, open-source software for video recording and live streaming. When integrated with Ant Media Server, OBS enables ultra-low latency broadcasting with sub-second delay using WebRTC technology.
This tutorial is part of our comprehensive OBS Studio Streaming Guide, which covers everything from basic setup to advanced streaming techniques.
OBS captures video from webcams, external cameras, screen sources, and audio devices. It publishes streams via RTMP protocol to Ant Media Server, which converts the stream to multiple formats including WebRTC, HLS, and DASH for playback across different devices.
Key capabilities:
- Zero licensing costs for both OBS and Ant Media Server Community Edition
- Cross-platform support (Windows, macOS, Linux)
- Professional-grade encoding with GPU acceleration
- Multi-source composition with scenes and transitions
This guide covers OBS-to-Ant Media Server integration in 5 steps, from initial setup through live broadcast verification. For alternative streaming software, see our guides on vMix and XSplit.
Step 1: Download and Install OBS
Download OBS from its official website. OBS supports Windows, macOS, and Linux distributions.
Follow the installation wizard for your operating system. No additional plugins are required for basic RTMP streaming with Ant Media Server.
When launching OBS for the first time, you can skip the auto-configuration wizard. Manual configuration provides better control over encoding settings and stream quality.
System Requirements:
Stable internet connection with upload speed exceeding your target bitrate by 1.5x
Windows 10/11, macOS 10.15+, or Ubuntu 20.04+
4GB RAM minimum (8GB recommended)
GPU with hardware encoding support (NVENC, QuickSync, or AMD VCE)
Step 2: Configure Video and Audio Sources
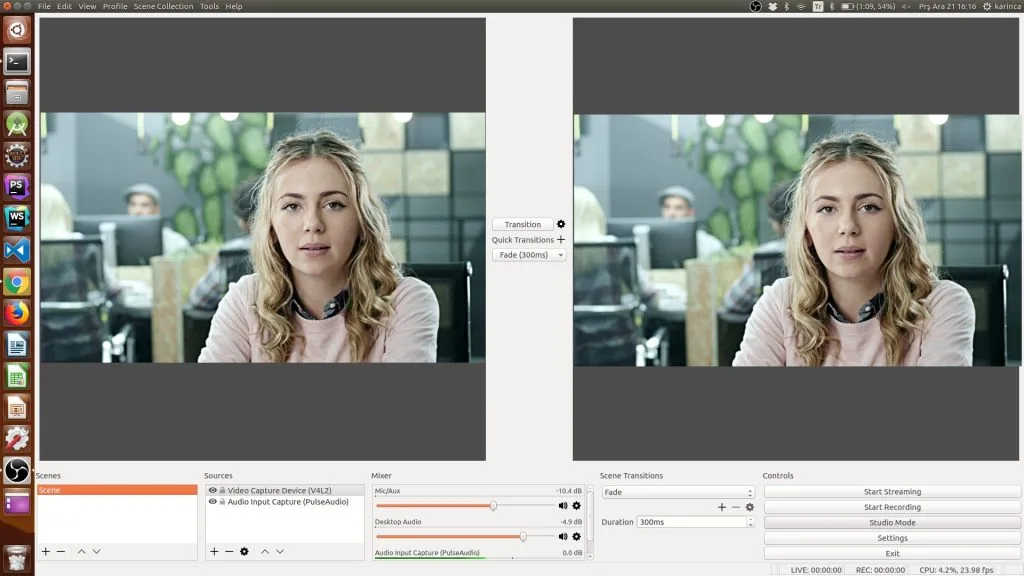
OBS uses sources to define what appears in your live stream. Sources can include webcams, external cameras, screen captures, media files, or browser windows.
Adding Video Sources
- Click the + icon in the Sources panel
- Select your source type:
- Video Capture Device for webcams and cameras
- Display Capture for full screen recording
- Window Capture for specific applications
- Image for static overlays
- Configure source properties (resolution, frame rate, audio)
- Position and resize sources in the preview window
Adding Audio Sources
- Add Audio Input Capture for microphones
- Add Audio Output Capture for system audio
- Configure audio levels in the Audio Mixer panel
- Apply filters (noise suppression, gain, compression) for clean audio
You can combine multiple sources in a single scene. For example, overlay your webcam feed over screen capture for presentation-style broadcasts.
For professional audio setups, configure multi-track audio recording to separate voice, music, and system sounds. This enables better post-production editing if you’re also recording locally.
Step 3: Configure Ant Media Server
Before streaming from OBS, Ant Media Server must be running and a live stream must be created.
Start Ant Media Server
- Download Ant Media Server from the official website or GitHub repository.
- Extract the package on your server.
- Start the server by running the following commands in the terminal:
cd /path/to/ant-media-server
./start.sh
Once started, Ant Media Server will begin running its services.
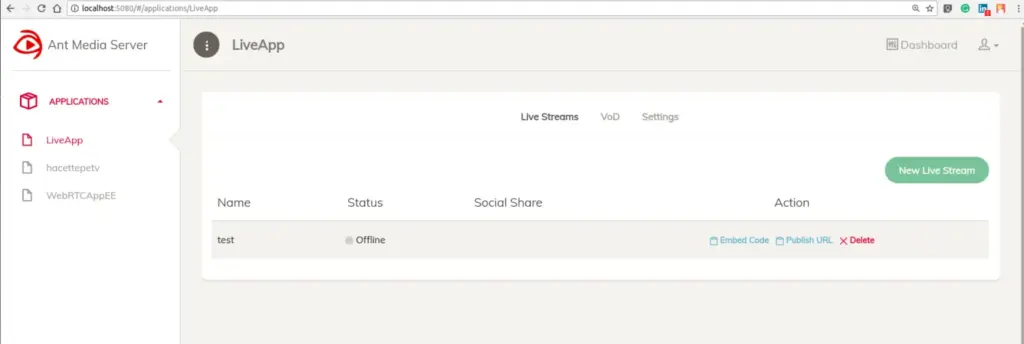
Create a Live Stream
- Open the Ant Media Server Management Console in your browser:
http://<server-ip>:5080- From the Applications section, select LiveApp.
- Click New Live Stream to create a stream.
- Ant Media Server will generate a unique stream ID and a publish URL in the following format:
rtmp://<server-ip>/LiveApp/<stream-id>- Copy the Publish URL, as it will be used in OBS.
Step 4: Configure OBS for Streaming
To start streaming from OBS to Ant Media Server, you need to configure the stream settings using the publish URL generated by Ant Media Server.
- Open OBS and click Settings.
- Select the Stream tab.
- Set the following values:
- Service: Custom
- Server:
rtmp://<server-ip>/LiveApp - Stream Key:
<stream-id>
- Click OK to save the settings.
⚠️ Important: The stream ID must be entered in the Stream Key field, not appended to the Server URL. Incorrect placement will prevent the stream from publishing.

Step 5: Start Streaming and Watch the Broadcast
After completing the configuration, you are ready to start streaming.
- Close the OBS Settings window.
- Click the Start Streaming button in the main OBS window.
Once streaming starts, Ant Media Server will receive the stream and publish it immediately.
You can verify and watch the live stream using one of the following methods:
- From the Ant Media Server Management Console
- Using a media player such as VLC by opening the same RTMP or playback URL
- By embedding the stream in a player if playback is enabled
If the stream is configured correctly, you should see the live broadcast without delay.
For production deployments, configure stream security to prevent unauthorized access. Enable publish tokens for RTMP input and play tokens for viewer access.
Frequently Asked Questions
Is OBS free to use with Ant Media Server?
Which streaming protocol does OBS use with Ant Media Server?
Where do I find the stream URL and stream key for OBS?
Why does my OBS stream not appear on Ant Media Server?
Conclusion
OBS provides a reliable and professional way to publish live video streams to Ant Media Server using RTMP protocol. This integration enables scalable streaming workflows supporting multiple playback formats including ultra-low latency WebRTC, adaptive HLS, and DASH.
This guide covered the complete setup process—from installing OBS and configuring sources to publishing and verifying live streams. Additional features like adaptive bitrate streaming, recording, CDN integration, and stream security provide a foundation for building professional broadcasting solutions.
For advanced implementations, explore Ant Media Server documentation covering clustering, load balancing, and enterprise deployment patterns. The combination of OBS’s flexible capture capabilities and Ant Media Server’s scalable delivery ensures stable streaming performance for applications ranging from small webcasts to large-scale broadcasts serving thousands of concurrent viewers.
For personalized assistance with your streaming setup, contact our team or explore our support packages for priority help with complex deployments.


