A developer-focused plugin for Ant Media Server that lets you run your own Python models on live video—with real-time overlays and a REST API for detection data.
The Python AI Plugin is built for developers who want to integrate custom AI models into their live streaming pipeline. Instead of routing video through external services or building your own ingestion pipeline, you implement a small Python class, register it, and your model runs on every live stream that hits Ant Media Server. You get a processed HLS output (with overlays), timestamped detection data via REST API, and a built-in viewer to debug and compare streams.
The plugin has example implementations for pose detection and object detection with YOLO , face detection with OpenCV, and Olama for VLM based AI Processing. You can use this examples as reference when building your own python modules. We will check out Olama integration in our new upcoming blog post.
Plugin Installation
- Get the plugin zip file from here.
- Unzip the file.
-
unzip ./pythonAIPlugin.zip
-
cd dist
-
sudo bash install_python_plugin.sh
Install samples
Optionally if you want to test the sample plugins you can install each sample plugin by going to samples directory.
cd ./dist/PythonPluginFiles/samples/
cd face
sudo bash ./install.sh

Note: There are multiple samples available under samples directory like YOLO & Olama you can go to thee directory and follow the same installation steps as mentioned above.
Example Python Modules:
The plugin includes three example implementations in src/main/java/io/antmedia/app/. Use them as starting points for your own models.
To test the example python models you can publish a stream to Ant Media Server with sample publish page.
http://server_ip:5080/LiveApp/?id=test
To play the processed stream stream, you can play it using
http://server_ip:5080/LiveApp/play.html?id=test_YoloPoseDetectionPlugin&playOrder=hls
1. Face Detection (OpenCV Haar)
sample_plugin.py
A lightweight example using OpenCV’s CascadeClassifier. Good as a first template because it keeps the flow simple: load the model once, process every frame, draw, output to HLS.
http://server_ip:5080/LiveApp/play.html?id=test_FaceDetectionPlugin&playOrder=hls
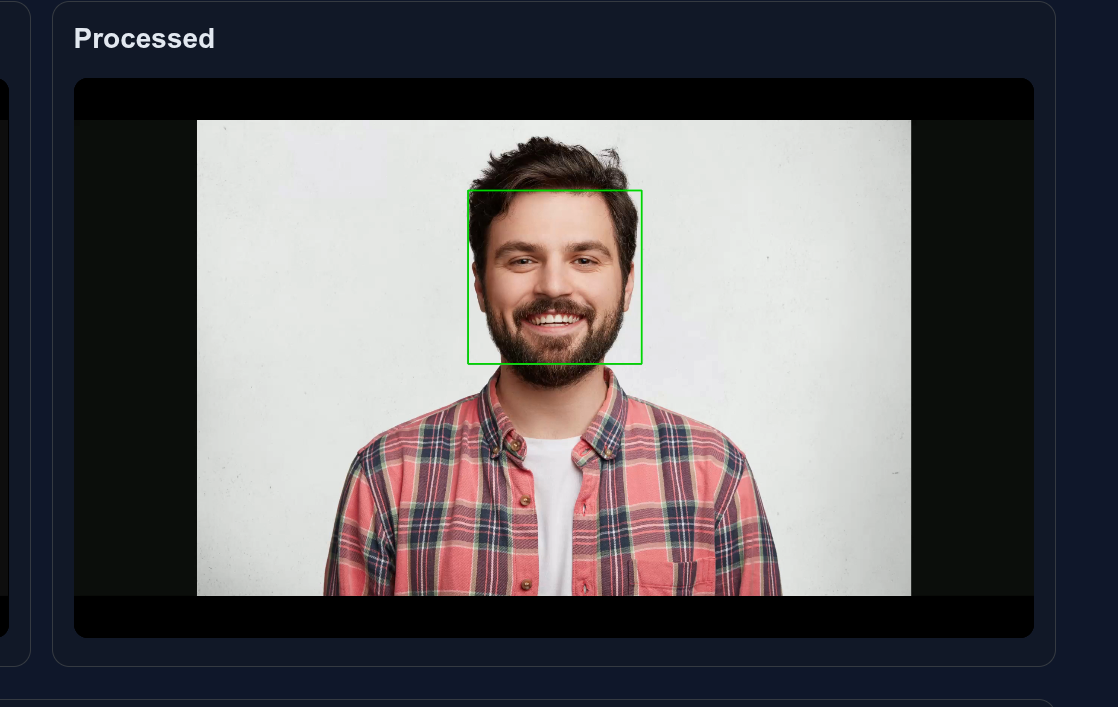
Output of AI plugin with face detection
2. General Object Detection (YOLOv8)
yolo_detection_plugin.py
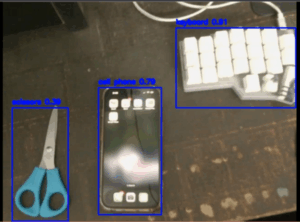
An example of YOLO Object detection use case which detects and draw the object border by highlighting the object. Uses Ultralytics YOLOv8 for 80+ object classes:
http://server_ip:5080/LiveApp/play.html?id=test_YoloGeneralDetectionPlugin&playOrder=hls
3. Pose Detection (YOLOv8-Pose)
yolo_pose_plugin.py
Example of YOLO pose detection which tracks people and body key points
Play the live stream using
http://server_ip:5080/LiveApp/play.html?id=test_YoloPoseDetectionPlugin&playOrder=hls

Output of AI plugin with pose detection
Architecture at a Glance
When a stream is published (WebRTC, RTMP, or RTSP):
- The plugin receives video frames from the live HLS / WebRTC feed.
- Each registered Python plugin processes frames in its own worker thread.
- Plugins run inference, optionally draw on the frame, and pass it to
stream_feeder.write(frame)to publish a processed HLS stream. - Plugins can call
java_callback.onResult(stream_id, json_str)to persist detection data for the REST API. - Multiple plugins run in parallel; each publishes its own processed stream (e.g.
streamId_FaceDetectionPlugin,streamId_YoloGeneralDetectionPlugin).

Adding Your Own Python Module
Now we will see how you can implementation your own python module for your AI processing use case. For any dependency we will use for the project we will have a python virtual Env with which you can install the dependency that is required by your project. We create this Env in Step 3.
Steps Summary
- Follow the plugin installation steps mentioned before.
-
git clone https://github.com/ant-media/plugins.git
- Add new folder under samples folder.
- Add new python file in that.
- Implement your plugin based on
sample_plugin.py,yolo_detection_plugin.py, oryolo_pose_plugin.pyregister it ininit.pymake install script and install the plugin. Refer below for more detailed explanation. - Restart the server.
1. Implement a Python Class Extending PluginBase
Create a new folder under samples folder eg. MyModule create a new file in that folder (e.g. my__module.py) in the samples directory, checkout sample module implementation for better clarity. Your class must implement PluginBase:
on_stream_started(stream_id, width, height)– Load models, init per-stream caches.on_stream_finished(stream_id)– Clean up per-stream state.on_video_frame(stream_id, frame, timestamp_ms, stream_feeder)– Run inference, draw onframe(OpenCV BGR numpy array), callstream_feeder.write(frame), and optionallyself.java_callback.onResult(stream_id, json.dumps(...)).
Tip: Copy one of the example plugins and adapt it.
For heavy models use detect_every_n_frames and cache results like yolo_detection_plugin.py or yolo_pose_plugin.py.
2. Initialize the Python Module in init.py
Create a new file in the same folder called init.py
from my_model_plugin import MyModelPlugin

def init_plugin(register_plugin, callbacks):
   face_plugin = MyPlugin()
   face_callback = callbacks.get("my_plugin") or callbacks.get("default")
   face_plugin.set_java_callback(face_callback)
   register_plugin(face_plugin)
3. Deploy the Python Module
Create a new install.sh file, which copy the newly created folder to the Ant Media Server installation directory reference sample module install.sh. You can also create a requirement.txt file and install with this script. Start the server with start.sh or restart it as a service.
Sample for install.sh, in this file we setup a virtual ENV for for python, install dependency, copy the files to Ant Media install directory.
AMS_DIR=/usr/local/antmedia
cd $AMS_DIR
python3 -m venv pythonAIPlugin
source ./pythonAIPlugin/bin/activate

source $AMS_DIR/pythonAIPlugin/bin/activate
pip install -r ./requirement.txt
cp -r ../face/ $AMS_DIR/PythonPluginFiles/samples
#Start the Server


cd /usr/local/antmedia
sudo ./start.sh
or
sudo systemctl restart antmedia
4. Optional: REST API & Detection Viewer
You can store your python module’s output data into the data base and retrieve it with REST API calls.
You can use this to return the plugin detected output to store in in the Database and later use this API to retrieve the data.
self.java_callback.onResult(app_name, stream_id, json.dumps(result_json))
For REST API and Detection Viewer support:
- Add a
ResultCallbackandset_java_callbackentry inJepPythonBridge.javafor your table name. - More rest APIs can be added by modifying the pythonPluginRestService.java
REST API for Detection Data
GET /rest/python-plugin/detections/{model}/{streamId}/seconds/{seconds}
GET /rest/python-plugin/detections/{model}/{streamId}/count/{lastn}
Built-in models: face_detections, yolo_general_detections, pose_detections. Custom plugins use the table name you register in JepPythonBridge.
Conclusion
The Python AI Plugin provides a powerful and streamlined way to run custom AI models directly on live video streams without the need to build complex streaming or processing pipelines. By simply implementing a Python class that extends PluginBase and registering it, you can immediately start processing frames while the plugin manages frame delivery, HLS output. These examples can serve as practical templates that you can easily modify to integrate your own AI models and workflows.
Whether you’re building real-time analytics, computer vision applications, or AI-driven streaming solutions, the Python AI Plugin enables you to focus on your model logic while the plugin handles the streaming infrastructure. For detailed setup instructions and implementation examples, refer to the documentation.